-
大师偷学:vue-cli构建SPA项目和SPA项目结构
目录
一,vue-cli构建SPA项目
前提:
想要实现vue-lic构建SPA项目,前提是搭建好nodeJS环境
我们使用两个命令来测试一下:
node -v
npm -v如果出现版本号则表示nodeJS环境搭建好了
1.1什么是Vue-cli?
vue-cli是vue.js的脚手架,用于自动生成vue.js+webpack的项目模板,创建命令如下:
vue init webpack xxx
注1:xxx 为自己创建项目的名称
注2:必须先安装vue,vue-cli,webpack,node等一些必要的环境
1.2安装vue-cli
命令:
npm install -g vue-cli
npm install webpack -g

安装完成之后打开命令窗口并输入 vue -V(注意这里是大写的“V”),如果出现相应的版本号,则说明安装成功。然后可以看到我们的目录下出现了一些文件:


1.3创建SPA项目
命令:
vue init webpack spa0911
此命令用于创建SPA项目,它会在当前目录生成一个以“spa0911”命名的文件夹

创建成功

1.4 使用开发软件HBuilder x 右键导入项目


二,SPA项目结构
1)在项目的目录层次中打开cmd窗口来启动项目
命令:
npm run dev2)得到一个访问地址

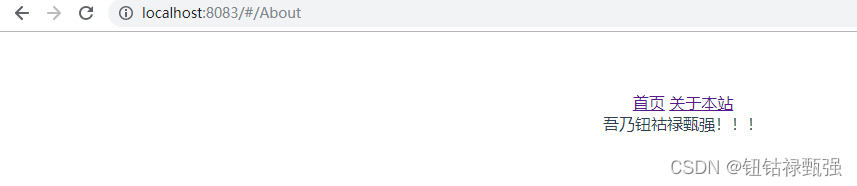
3)访问地址:证明SPA项目创建成功!

注2:vue-cli构建的项目,在控制台npm run dev启动后,默认的调试地址是8080端口的但是大部分时候,我们都要并行几个项目开发,很有可能已经占用了8080端口,所以就涉及到如何去更改调试地址的端口号了
config --> index.js
dev: {
// Paths
assetsSubDirectory: 'static',
assetsPublicPath: '/',
proxyTable: {},
host: 'localhost',
port: 8083, // 在这里修改端口号
autoOpenBrowser: false,
errorOverlay: true,
notifyOnErrors: true,
},
项目结构解析:


三、SPA完成路由的开发
spa的访问过程:
1.访问index.html
2.index.html通过main.js中的vue实例管理#app边界,
同时指定App.vue模板
3.App.vue中包含了logo图片以及锚点,而锚点与组件的对应关系存在router/index.js中,所有就指向了一个组件
4.最终App.vue中就显示了logo图片以及hellowrld.vue的内容当前后端分离时会启动两个一样的端口号 此时我们需要修改端口

组件使用流程:

APP.vue:
- <template>
- <div id="app">
- <router-link to="/Home">首页router-link>
- <router-link to="/About">关于本站router-link>
- <router-view/>
- div>
- template>
- <script>
- export default {
- name: 'App'
- }
- script>
- <style>
- #app {
- font-family: 'Avenir', Helvetica, Arial, sans-serif;
- -webkit-font-smoothing: antialiased;
- -moz-osx-font-smoothing: grayscale;
- text-align: center;
- color: #2c3e50;
- margin-top: 60px;
- }
- style>
Home.vue
- <template>
- <div>
- 这是首页内容,最新内容
- div>
- template>
- <script>
- export default{
- name:"Home",
- data(){
- return {
- msg:'Welcome to Your Vue.js App'
- };
- }
- }
- script>
- <style>
- style>
About.vue:
- <template>
- <div>
- 吾乃钮祜禄甄强!!!
- div>
- template>
- <script>
- export default{
- name:"About",
- data(){
- return {
- msg:'Welcome to Your Vue.js App'
- };
- }
- }
- script>
- <style>
- style>
index.js:
- import Vue from 'vue'
- import Router from 'vue-router'
- import HelloWorld from '@/components/HelloWorld'
- import Home from '@/components/Home'
- import About from '@/components/About'
- Vue.use(Router)
- export default new Router({
- routes: [
- {
- path: '/Home',
- name: 'Home',
- component: Home
- },
- {
- path: '/About',
- name: 'About',
- component: About
- }
- ]
- })

四、嵌套路由的使用
其实嵌套路由就是在index.js中加入一个children的属性以及配置相关的关系
About.vue:- <template>
- <div>
- <router-link to="/AboutMe">关于站长router-link>
- <router-link to="/AboutWebSeit">关于本站router-link>
- <router-view>router-view>
- div>
- template>
- <script>
- export default{
- name:"About",
- data(){
- return {
- msg:'Welcome to Your Vue.js App'
- };
- }
- }
- script>
- <style>
- style>
AboutMe.vue:
- <template>
- <div>
- 吾乃钮祜禄甄强!!!
- div>
- template>
- <script>
- export default{
- name:"AboutMe",
- data(){
- return {
- msg:'Welcome to Your Vue.js App'
- };
- }
- }
- script>
- <style>
- style>
AboutWebSeit.vue:
- <template>
- <div>
- 再见了!!!朕的江山!!!
- div>
- template>
- <script>
- export default{
- name:"AboutWebSeit",
- data(){
- return {
- msg:'Welcome to Your Vue.js App'
- };
- }
- }
- script>
- <style>
- style>
index.js:
- import Vue from 'vue'
- import Router from 'vue-router'
- import HelloWorld from '@/components/HelloWorld'
- import Home from '@/components/Home'
- import About from '@/components/About'
- import AboutMe from '@/components/AboutMe'
- import AboutSeit from '@/components/AboutWebSeit'
- Vue.use(Router)
- export default new Router({
- routes: [
- {
- path: '/Home',
- name: 'Home',
- component: Home
- },
- {
- path: '/About',
- name: 'About',
- component: About,
- children:[
- {
- path: '/AboutMe',
- name: 'AboutMe',
- component: AboutMe
- },
- {
- path: '/AboutWebSeit',
- name: 'AboutWebSeit',
- component: AboutWebSeit
- }
- ]
- }
- ]
- })
-
相关阅读:
2.4 自定义msg Python
Linux系统下安装go
基金合作保密协议
go test 命令详解
如何通过对话式机器人流程自动化 (CRPA),改善客户服务?
人大女王金融硕士项目——比努力更重要的,是要学会做对的选择
PAT 1141 PAT Ranking of Institutions
JSON.stringify()和JSON.parse()的使用
Spring boot 实践(16)Nacos server 2.2.3 下载安装
String.format()的详细用法
- 原文地址:https://blog.csdn.net/weixin_66110079/article/details/126802651
