-
Spring——IOC
前言
上一篇文章分享了Maven的安装与配置。本片文章将要分享的内容是Spring——IOC
一、Spring是什么?
Spring框架是一个开放源代码的J2EE应用程序框架,由Rod
Johnson发起,是针对bean的生命周期进行管理的轻量级容器(lightweight container)。
Spring解决了开发者在J2EE开发中遇到的许多常见的问题,提供了功能强大IOC、AOP及Web
MVC等功能。Spring可以单独应用于构筑应用程序,也可以和Struts、Webwork、Tapestry等众多Web框架组合使用,并且可以与
Swing等桌面应用程序AP组合。因此,
Spring不仅仅能应用于J2EE应用程序之中,也可以应用于桌面应用程序以及小应用程序之中。Spring框架主要由七部分组成,分别是
Spring Core、 Spring AOP、 Spring ORM、 Spring DAO、Spring Context、 Spring
Web和 Spring Web MVC简单来说:
Spring的核心是控制反转(IoC)和面向切面(AOP)。
Spring是一个分层的JavaSE/EEfull-stack(一站式)轻量级开源框架。我们为什么要学习Spring呢?
在度娘上我们可以看到
Spring的特点

Spring的优点:
 这都是我们学习Spring的原因。
二、Spring IOC
(PS:本文的代码基于Maven Project)
1.控制反转
没使用Spring之前: 编写UserBiz:- 1
- 2
package com.zhw.biz; /** * * @author zhw * */ public interface UserBiz { void list(); }- 1
- 2
- 3
- 4
- 5
- 6
- 7
- 8
- 9
- 10
编写UserBizImpl1:
package com.zhw.biz.impl; import com.zhw.biz.UserBiz; public class UserBizImpl1 implements UserBiz{ @Override public void list() { System.out.println("用户查询,按年龄排序..."); } }- 1
- 2
- 3
- 4
- 5
- 6
- 7
- 8
- 9
- 10
- 11
- 12
- 13
编写UserBizImpl2:
package com.zhw.biz.impl; import com.zhw.biz.UserBiz; public class UserBizImpl2 implements UserBiz{ @Override public void list() { System.out.println("用户查询,按注册时间排序..."); } }- 1
- 2
- 3
- 4
- 5
- 6
- 7
- 8
- 9
- 10
- 11
- 12
- 13
编写UserAction:
package com.zhw.web; import com.zhw.biz.UserBiz; import com.zhw.biz.impl.UserBizImpl1; public class UserAction { private UserBiz userBiz = new UserBizImpl1(); public void list() { userBiz.list(); } }- 1
- 2
- 3
- 4
- 5
- 6
- 7
- 8
- 9
- 10
- 11
编写OrderAction:
package com.zhw.web; import com.zhw.biz.UserBiz; import com.zhw.biz.impl.UserBizImpl1; public class OrderAction { private UserBiz userBiz = new UserBizImpl1(); public void list() { userBiz.list(); } }- 1
- 2
- 3
- 4
- 5
- 6
- 7
- 8
- 9
- 10
- 11
- 12
- 13
编写spring-context.xml
<beans xmlns="http://www.springframework.org/schema/beans" xmlns:xsi="http://www.w3.org/2001/XMLSchema-instance" xmlns:aop="http://www.springframework.org/schema/aop" xmlns:context="http://www.springframework.org/schema/context" xsi:schemaLocation="http://www.springframework.org/schema/beans http://www.springframework.org/schema/beans/spring-beans.xsd http://www.springframework.org/schema/aop http://www.springframework.org/schema/aop/spring-aop-4.3.xsd http://www.springframework.org/schema/context http://www.springframework.org/schema/context/spring-context-4.3.xsd"> bean> --> <bean class="com.zhw.biz.impl.UserBizImpl2" id="userBiz">bean> <bean class="com.zhw.web.UserAction" id="userAction"> <property name="userBiz" ref="userBiz">property> bean> <bean class="com.zhw.web.OrderAction" id="orderAction"> <property name="userBiz" ref="userBiz">property> bean> beans>- 1
- 2
- 3
- 4
- 5
- 6
- 7
- 8
- 9
- 10
- 11
- 12
- 13
- 14
- 15
- 16
- 17
- 18
- 19
编写测试方法Demo1
package com.zhw.demo; import org.springframework.context.support.ClassPathXmlApplicationContext; import com.zhw.web.OrderAction; import com.zhw.web.UserAction; public class Demo1 { @SuppressWarnings("resource") public static void main(String[] args) { ClassPathXmlApplicationContext context = new ClassPathXmlApplicationContext("/spring-context.xml"); UserAction userAction = (UserAction) context.getBean("userAction"); userAction.list(); } }- 1
- 2
- 3
- 4
- 5
- 6
- 7
- 8
- 9
- 10
- 11
- 12
- 13
- 14
- 15
- 16
- 17

我们最开始的时候建立了用户业务类。
1、
需求是:同时在用户模块、订单模块拿到所有用户数据
客户提出变更需求:同时在用户模块、订单模块拿到所有用户的数据,并且要求用户数据是通过年龄排序的
这个好办:修改userBiz中的list方法,添加排序功能2、
用户再次变更需求:同时在用户模块、订单模块拿到所有用户的数据,并且要求用户数据是注册时间排序的
这个也好办:修改userBiz中的list方法,添加排序功能,按照时间排序
3、
客户觉得还是第一个好,再改回去。
看着挺简单,但是随着项目内容在增加,调用biz越多,改需求的时候,我们要更改的地方就越多。
4、
结论:
我们用最原始的办法写,就需要频繁修改biz层的代码。
而我们用多实现的话,凡是涉及到用户业务层调用的模块,都需要修改再来看我们的spring-context.xml

我们在property中的ref中调用的bean不同,对应的方法不同。
我们将用户的需求1,用UserBizImpl1来完成
需求2,用UserBizImpl2来完成。
如果修改需求,我们只需要将spring-context.xml中对应的property的ref进行更改就OK了。
可以得出。控制反转: 指的是将创建对象的权利反转给Spring容器来完成。
2.依赖引入
*依赖注入的3种方式
1、set 注入
2、构造注入
3、自动装配
byName
byType1.set注入
UserAction
package com.zhw.web; import java.util.List; import com.zhw.biz.UserBiz; import com.zhw.biz.impl.UserBizImpl1; /** * 依赖注入的3种方式 * 1、set 注入 * 2、构造注入 * 3、自动装配 * byName * byType * @author zhw * */ public class UserAction { // private UserBiz userBiz = new UserBizImpl1(); private UserBiz userBiz; public UserBiz getUserBiz() { return userBiz; } public void setUserBiz(UserBiz userBiz) { this.userBiz = userBiz; } private String name; private int age; private List<String> hobby; public String getName() { return name; } public void setName(String name) { this.name = name; } public int getAge() { return age; } public void setAge(int age) { this.age = age; } public List<String> getHobby() { return hobby; } public void setHobby(List<String> hobby) { this.hobby = hobby; } public void list() { userBiz.list(); } }- 1
- 2
- 3
- 4
- 5
- 6
- 7
- 8
- 9
- 10
- 11
- 12
- 13
- 14
- 15
- 16
- 17
- 18
- 19
- 20
- 21
- 22
- 23
- 24
- 25
- 26
- 27
- 28
- 29
- 30
- 31
- 32
- 33
- 34
- 35
- 36
- 37
- 38
- 39
- 40
- 41
- 42
- 43
- 44
- 45
- 46
- 47
- 48
- 49
- 50
- 51
- 52
- 53
- 54
- 55
- 56
- 57
- 58
- 59
- 60
- 61
- 62
- 63
- 64
spring-context.xml
<beans xmlns="http://www.springframework.org/schema/beans" xmlns:xsi="http://www.w3.org/2001/XMLSchema-instance" xmlns:aop="http://www.springframework.org/schema/aop" xmlns:context="http://www.springframework.org/schema/context" xsi:schemaLocation="http://www.springframework.org/schema/beans http://www.springframework.org/schema/beans/spring-beans.xsd http://www.springframework.org/schema/aop http://www.springframework.org/schema/aop/spring-aop-4.3.xsd http://www.springframework.org/schema/context http://www.springframework.org/schema/context/spring-context-4.3.xsd"> <bean class="com.zhw.biz.impl.UserBizImpl2" id="userBiz">bean> <bean class="com.zhw.web.UserAction" id="userAction"> <property name="userBiz" ref="userBiz">property> <property name="name" value="zhangsna">property> <property name="age" value="22">property> <property name="hobby" > <list> <value>唱value> <value>跳value> <value>rapvalue> <value>篮球value> list> property> bean> <bean class="com.zhw.web.OrderAction" id="orderAction"> <property name="userBiz" ref="userBiz">property> bean> beans>- 1
- 2
- 3
- 4
- 5
- 6
- 7
- 8
- 9
- 10
- 11
- 12
- 13
- 14
- 15
- 16
- 17
- 18
- 19
- 20
- 21
- 22
- 23
- 24
- 25
- 26
- 27
- 28
- 29
- 30
看一下运行结果:
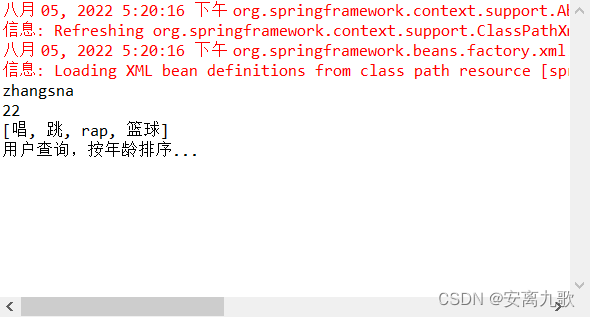
2.构造注入
OrderAction
package com.zhw.web; import java.util.List; import com.zhw.biz.UserBiz; import com.zhw.biz.impl.UserBizImpl1; public class OrderAction { // private UserBiz userBiz = new UserBizImpl1(); private UserBiz userBiz; public UserBiz getUserBiz() { return userBiz; } public void setUserBiz(UserBiz userBiz) { this.userBiz = userBiz; } private String name; private int age; private List<String> hobby; public OrderAction() { } public OrderAction(String name, int age, List<String> hobby) { super(); this.name = name; this.age = age; this.hobby = hobby; } public void list() { System.out.println(name); System.out.println(age); System.out.println(hobby); userBiz.list(); } }- 1
- 2
- 3
- 4
- 5
- 6
- 7
- 8
- 9
- 10
- 11
- 12
- 13
- 14
- 15
- 16
- 17
- 18
- 19
- 20
- 21
- 22
- 23
- 24
- 25
- 26
- 27
- 28
- 29
- 30
- 31
- 32
- 33
- 34
- 35
- 36
- 37
- 38
- 39
- 40
- 41
- 42
- 43
- 44
spring-context.xml
<beans xmlns="http://www.springframework.org/schema/beans" xmlns:xsi="http://www.w3.org/2001/XMLSchema-instance" xmlns:aop="http://www.springframework.org/schema/aop" xmlns:context="http://www.springframework.org/schema/context" xsi:schemaLocation="http://www.springframework.org/schema/beans http://www.springframework.org/schema/beans/spring-beans.xsd http://www.springframework.org/schema/aop http://www.springframework.org/schema/aop/spring-aop-4.3.xsd http://www.springframework.org/schema/context http://www.springframework.org/schema/context/spring-context-4.3.xsd"> <bean class="com.zhw.biz.impl.UserBizImpl1" id="userBiz">bean> <bean class="com.zhw.web.UserAction" id="userAction"> <property name="userBiz" ref="userBiz">property> <property name="name" value="zhangsna">property> <property name="age" value="22">property> <property name="hobby" > <list> <value>唱value> <value>跳value> <value>rapvalue> <value>篮球value> list> property> bean> <bean class="com.zhw.web.OrderAction" id="orderAction"> <property name="userBiz" ref="userBiz">property> <constructor-arg name="name" value="zhangsna">constructor-arg> <constructor-arg name="age" value="22">constructor-arg> <constructor-arg > <list> <value>唱value> <value>跳value> <value>rapvalue> <value>篮球value> list>constructor-arg> bean> beans>- 1
- 2
- 3
- 4
- 5
- 6
- 7
- 8
- 9
- 10
- 11
- 12
- 13
- 14
- 15
- 16
- 17
- 18
- 19
- 20
- 21
- 22
- 23
- 24
- 25
- 26
- 27
- 28
- 29
- 30
- 31
- 32
- 33
- 34
- 35
- 36
- 37
- 38
- 39
运行效果如下:

3.自动装配
xml
<beans default-autowire="byName" xmlns="http://www.springframework.org/schema/beans" xmlns:xsi="http://www.w3.org/2001/XMLSchema-instance" xmlns:aop="http://www.springframework.org/schema/aop" xmlns:context="http://www.springframework.org/schema/context" xsi:schemaLocation="http://www.springframework.org/schema/beans http://www.springframework.org/schema/beans/spring-beans.xsd http://www.springframework.org/schema/aop http://www.springframework.org/schema/aop/spring-aop-4.3.xsd http://www.springframework.org/schema/context http://www.springframework.org/schema/context/spring-context-4.3.xsd"> <bean class="com.zhw.biz.impl.UserBizImpl1" id="userBiz">bean> <bean class="com.zhw.web.UserAction" id="userAction"> <property name="userBiz" ref="userBiz">property> <property name="name" value="zhangsna">property> <property name="age" value="22">property> <property name="hobby" > <list> <value>唱value> <value>跳value> <value>rapvalue> <value>篮球value> list> property> bean> <bean class="com.zhw.web.OrderAction" id="orderAction"> <property name="userBiz" ref="userBiz">property> <constructor-arg name="name" value="zhangsna">constructor-arg> <constructor-arg name="age" value="22">constructor-arg> <constructor-arg > <list> <value>唱value> <value>跳value> <value>rapvalue> <value>篮球value> list>constructor-arg> bean> beans>- 1
- 2
- 3
- 4
- 5
- 6
- 7
- 8
- 9
- 10
- 11
- 12
- 13
- 14
- 15
- 16
- 17
- 18
- 19
- 20
- 21
- 22
- 23
- 24
- 25
- 26
- 27
- 28
- 29
- 30
- 31
- 32
- 33
- 34
- 35
- 36
- 37
- 38
- 39
自动装配总结:byName:是通过spring管理的bean对象的ID进行查找,如果找不到则注入失败;反之成功
byType:是通过spring管理的bean对象接口实现类进行查找;如果没有或两个以上,则注入失败,反之成功二、Spring与web容器整合
为什么要进行整合?
建模的过程是十分耗时的,我们本次的案例,不需要建模很多,如果需要建模太多实际是很耗时间的。
需要解决的问题
1.建模必不可少
2.建模要保障只执行一次
3.建模后,期望在每一个servlet都能够拿到Spring的上下文对象ClassPathXmlApplicationContext
怎么解决?
1.监听器的初始化方法
2.Spring的上下文 要 存放在tomcat的上下文中SpringLoadListener
package com.zhw.listener; import javax.servlet.ServletContext; import javax.servlet.ServletContextEvent; import javax.servlet.ServletContextListener; import org.springframework.context.support.ClassPathXmlApplicationContext; import com.zhw.web.UserAction; public class SpringLoadListener implements ServletContextListener{ @Override public void contextInitialized(ServletContextEvent sce) { // 拿到Spring的上下文 ClassPathXmlApplicationContext context = new ClassPathXmlApplicationContext("/spring-context.xml"); // 将Spring的上下文 保存到tomcat的上下文中 ServletContext servletContext = sce.getServletContext(); servletContext.setAttribute("springContext", context); } }- 1
- 2
- 3
- 4
- 5
- 6
- 7
- 8
- 9
- 10
- 11
- 12
- 13
- 14
- 15
- 16
- 17
- 18
- 19
- 20
- 21
- 22
- 23
总结
以上就是今天要讲的内容,本文仅仅简单介绍了Spring IOC。
-
相关阅读:
【docker】CentOS 7上安装Docker的详细过程
网络安全新挑战:通用人工智能(AGI)等级保护指南
apisix之插件开发,包含java和lua两种方式
Kotlin的对象表达式(Object expressions)
《Java基础知识》Java ArrayList源码分析4
一文彻底熟练掌握并使用Java的NIO操作
MyBatis的各种查询功能
爱家居网页制作 网页设计与制作html+css+javascript)项目4
Java-CMS
thunderbird 首次打开配置文件信息:
- 原文地址:https://blog.csdn.net/qq_62331938/article/details/126180396
