-
SpringBoot学习(八)——Swagger
Swagger
创建springboot项目
导入依赖
<dependency> <groupId>org.springframework.bootgroupId> <artifactId>spring-boot-starter-webartifactId> dependency> <dependency> <groupId>io.springfoxgroupId> <artifactId>springfox-boot-starterartifactId> <version>3.0.0version> dependency>- 1
- 2
- 3
- 4
- 5
- 6
- 7
- 8
- 9
创建HelloController
@RestController public class HelloController { @RequestMapping("/hello") public String hello(){ return "hello"; } }- 1
- 2
- 3
- 4
- 5
- 6
- 7
Swagger配置
@Configuration @EnableSwagger2 public class SwaggerConfig { }- 1
- 2
- 3
- 4
Failed to start bean ‘documentationPluginsBootstrapper错误
在启动项目时报错,Failed to start bean ‘documentationPluginsBootstrapper

在application.properties中添加
spring.mvc.pathmatch.matching-strategy=ant_path_matcher- 1
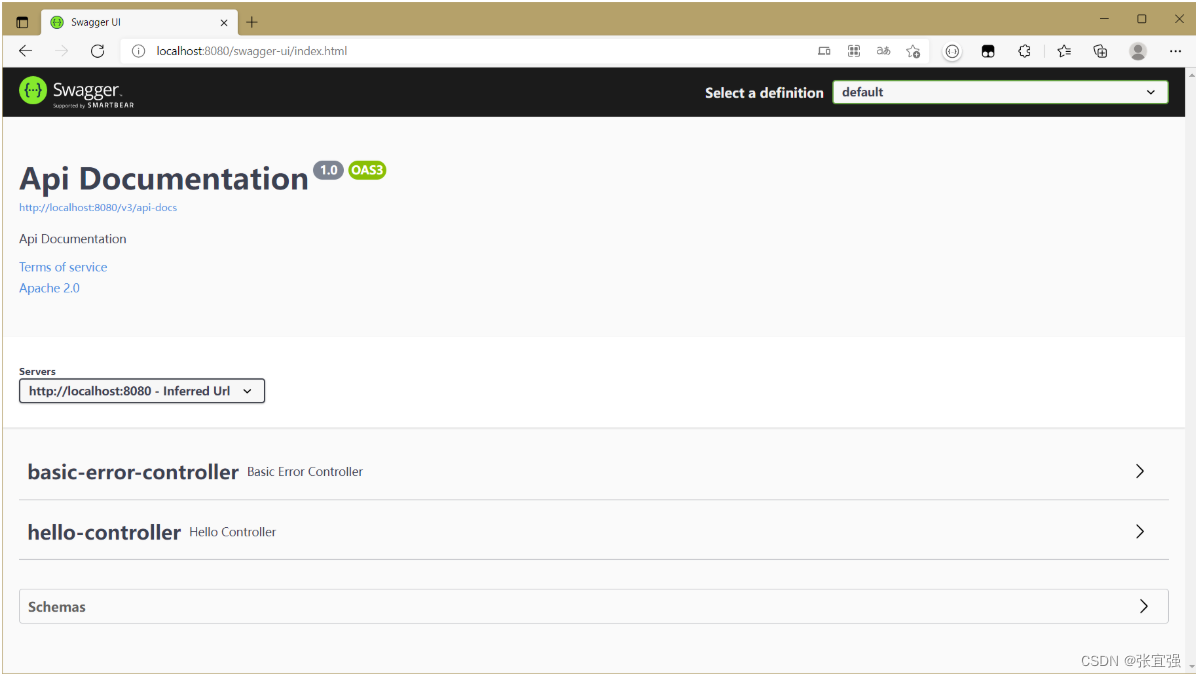
启动项目
启动项目,访问http://localhost:8080/swagger-ui/index.html
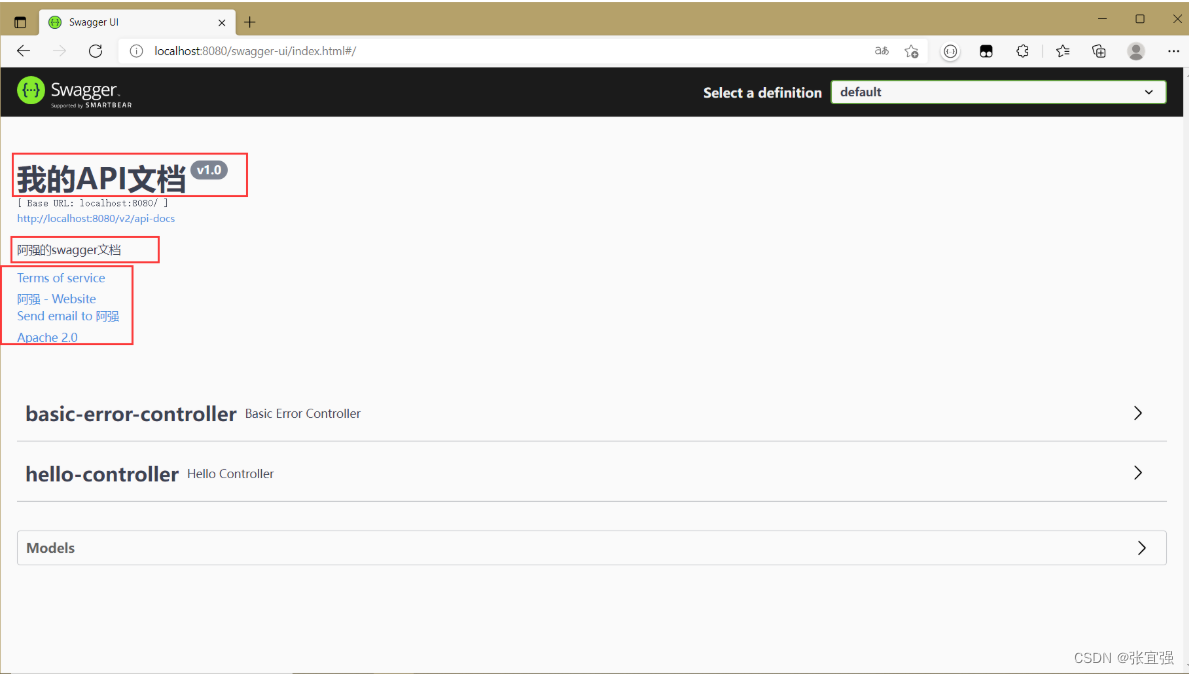
Swagger文档信息配置
@Configuration @EnableSwagger2 public class SwaggerConfig { @Bean public Docket docket(){ return new Docket(DocumentationType.SWAGGER_2).apiInfo(apiInfo()); } private ApiInfo apiInfo(){ Contact contact = new Contact("阿强", "https://blog.csdn.net/qq_41505957", "1758043090@qq.com"); return new ApiInfo("我的API文档", "阿强的swagger文档", "v1.0", "https://blog.csdn.net/qq_41505957",// 自己的团队组织网站 contact, "Apache 2.0", "http://www.apache.org/licenses/LICENSE-2.0", new ArrayList<>() ); } }- 1
- 2
- 3
- 4
- 5
- 6
- 7
- 8
- 9
- 10
- 11
- 12
- 13
- 14
- 15
- 16
- 17
- 18
- 19
- 20
- 21
- 22
- 23
扫描指定包下类
public Docket docket(){ return new Docket(DocumentationType.SWAGGER_2).apiInfo(apiInfo()). select(). apis(RequestHandlerSelectors.basePackage("com.example.demo.controller")). build(); }- 1
- 2
- 3
- 4
- 5
- 6
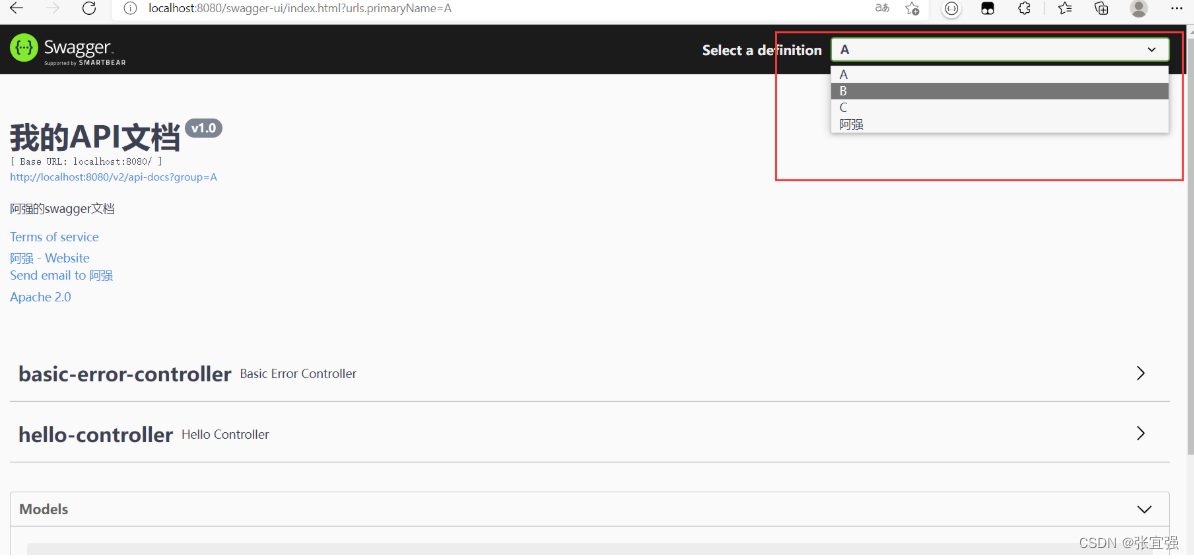
配置API文档的分组
使用groupName()为api文档分组。
当想创建多个分组时,需要创建多个Docket Bean
@Bean public Docket docket(){ return new Docket(DocumentationType.SWAGGER_2).apiInfo(apiInfo()). groupName("阿强"). select(). apis(RequestHandlerSelectors.basePackage("com.example.demo.controller")). build(); } @Bean public Docket docket1(){ return new Docket(DocumentationType.SWAGGER_2).apiInfo(apiInfo()). groupName("A"); } @Bean public Docket docket2(){ return new Docket(DocumentationType.SWAGGER_2).apiInfo(apiInfo()). groupName("B"); } @Bean public Docket docket3(){ return new Docket(DocumentationType.SWAGGER_2).apiInfo(apiInfo()). groupName("C"); }- 1
- 2
- 3
- 4
- 5
- 6
- 7
- 8
- 9
- 10
- 11
- 12
- 13
- 14
- 15
- 16
- 17
- 18
- 19
- 20
- 21
- 22
- 23
- 24
- 25
- 26
- 27
- 28
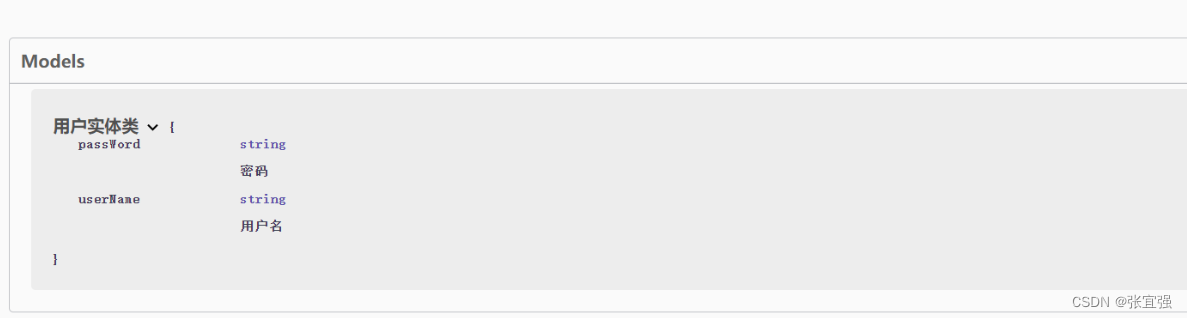
Models实体类配置
创建一个实体类,@ApiModel用于实体类上
@ApiModelProperty用于实体类属性上
@ApiModel("用户实体类") public class User { @ApiModelProperty("用户名") private String userName; @ApiModelProperty("密码") private String passWord; public User(String userName, String passWord) { this.userName = userName; this.passWord = passWord; } }- 1
- 2
- 3
- 4
- 5
- 6
- 7
- 8
- 9
- 10
- 11
当实体类作为方法的返回值时,文档中会有实体类的说明
@GetMapping("/getUser") public User getUser(User user){ return user; }- 1
- 2
- 3
- 4
-
相关阅读:
初识jetson tx2
向表中针对全部列插入数据
Cholesterol-PEG-Thiol CLS-PEG-SH 胆固醇-聚乙二醇-巯基
python解析mdf或mf4文件利器---asammdf
健康中国·营养先行|2022主动健康与临床营养高峰论坛圆满落幕
跟着森老师学React Hooks(1)——使用Vite构建React项目
Liunx-05磁盘管理
java(连接mysql)
使用 webpack 打包 express 应用
无线智慧城市业务方案建设
- 原文地址:https://blog.csdn.net/qq_41505957/article/details/126003813
