-
Vue3+node.js网易云音乐实战项目(五)
实现效果

1、推荐歌单详细页面
1.1、导航条和背景
推荐歌单页面做好后,我们开始做它的详细页面

首先,我们设置一下路由,在views中新建一个ListView.vue的文件

然后我们在router文件夹下index.js设置
{ path: '/listview', name: 'listview', // route level code-splitting // this generates a separate chunk (about.[hash].js) for this route // which is lazy-loaded when the route is visited. component: () => import(/* webpackChunkName: "about" */ '../views/ListView.vue') }- 1
- 2
- 3
- 4
- 5
- 6
- 7
- 8

然后,我们来到components下的recommendMusic.vue下设置路由跳转

看看下效果

然后,我们统一的调整一下a标签的颜色,在App.vue中设置一下
// 设置跳转的颜色和下划线 a{ color: #333; text-decoration: underline; }- 1
- 2
- 3
- 4
- 5
设置好后,我们需要知道跳转到对应的歌单上,所以我们可以看到参数里面有个对应的id

我们把这个id传过去就能对应到我们不同的页面,我们把这个id也传过去


那么我们通过这个id,先把每日推荐的歌曲给拿到

那我们就先把api封装一下,在api文件夹下index.js中
注意这里的baseURL,指 http://localhost:3000 ,我把它拿出来了
function postPlaylistDetail(id){ return axios.post(`${baseUrl}/playlist/detail?id=${id}`) }- 1
- 2
- 3
然后我们在Views文件夹下的ListView.vue中测试一下
<script> import {postPlaylistDetail} from '@/api/index'; import { onMounted ,reactive} from 'vue'; import {useRoute} from 'vue-router' export default { setup(){ const route = useRoute() let state = reactive ({ list:[] }) onMounted(async()=>{ // 获取传入的id let id = route.query.id let result = await postPlaylistDetail(id) console.log(result); }) } } </script>- 1
- 2
- 3
- 4
- 5
- 6
- 7
- 8
- 9
- 10
- 11
- 12
- 13
- 14
- 15
- 16
- 17
- 18
- 19
- 20
- 21

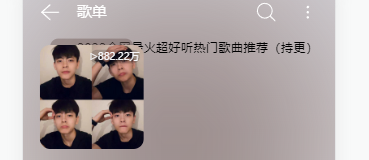
结果请求出来后我们开始来写页面部分,首先就是顶部部分

为了便于区分,我在components下创建了一个listView.vue的文件夹防止推荐歌单详细页面的vue

然后我们在ListView.vue中注册一下主键

然后我们在listviewTop.vue中写结构,引入图标(图标根据自己在iconfont下载的名字为主)
<template> <div class="listViewTop"> <div class="listViewTopNav"> <div class="left"> <!-- 返回按钮 --> <div class="back"> <svg class="icon" aria-hidden="true"> <use xlink:href="#icon-xitongfanhui"></use> </svg> </div> <!-- 歌单 --> <div class="title"> 歌单 </div> </div> <!-- 搜索按钮 和 更多按钮--> <div class="right"> <div class="search"> <svg class="icon" aria-hidden="true"> <use xlink:href="#icon-sousuo"></use> </svg> </div> <div class="more"> <svg class="icon" aria-hidden="true"> <use xlink:href="#icon-gengduo-shuxiang"></use> </svg> </div> </div> </div> </div> </template>- 1
- 2
- 3
- 4
- 5
- 6
- 7
- 8
- 9
- 10
- 11
- 12
- 13
- 14
- 15
- 16
- 17
- 18
- 19
- 20
- 21
- 22
- 23
- 24
- 25
- 26
- 27
- 28
- 29
- 30
- 31

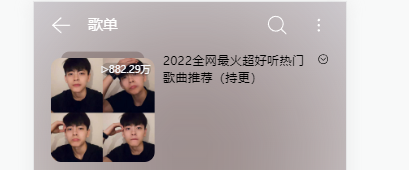
然后我们来调整格式,设置整体的宽高和边距
<style lang="less" scoped> .listViewTop{ width: 7.5rem; padding: 0 0.4rem; height: 6rem; } </style>- 1
- 2
- 3
- 4
- 5
- 6
- 7

在利用flex从像两边靠
.listViewTopNav{ display: flex; justify-content: space-between; align-items: center; height: 1.2rem; font-size: 0.35rem; }- 1
- 2
- 3
- 4
- 5
- 6
- 7

在调整给左右两边的盒子调整为flex
.left,.right{ display: flex; }- 1
- 2
- 3

调整一下图标大小,给它调整为白色
.icon{ width: 0.5rem; height: 0.5rem; fill: #fff; }- 1
- 2
- 3
- 4
- 5

然后我们调整一下元素之间的边距和字体颜色
.title{ margin-left: 0.4rem; } .search{ margin-right: 0.5rem; } .left,.right{ display: flex; color: #fff; }- 1
- 2
- 3
- 4
- 5
- 6
- 7
- 8
- 9
- 10

然后我们来调整页面的背景,很显然背景是一个图片模糊的

那么我们把这个的值传给子组件listviewtop.vue
<listviewtop :playlist = "state.playlist"></listviewtop>- 1
在子组件这边接收一下
export default { props:['playlist'] }- 1
- 2
- 3
然后渲染一下
<img class="bg" :src="playlist.coverImgUrl" alt="">- 1

然后我们调整一下样式
.bg{ position:fixed; left:0; top: 0; width: 7.5rem; height: auto; z-index: -1; // 设置滤镜模糊 filter: blur(150px); }- 1
- 2
- 3
- 4
- 5
- 6
- 7
- 8
- 9
- 10

1.2、头像和简介
接下来,我们来做头像和简介

我们可以分析,主要就分为两个区域 左边头像区域和右边文字区域和图标区域,然后我们首先创建一个div盒子
<!-- 头像 简介部分 --> <div class="content"> <div class="content_left"> </div> <div class="contnet_right"> </div> </div>- 1
- 2
- 3
- 4
- 5
- 6
- 7

然后我们可以看到头像是分为上面一层和下面一层两层的,上面的就是我们获取的背景图像,下面的是和它相同色调的背景图像

<!-- 头像 简介部分 --> <div class="content"> <div class="content_left"> <!-- 头像 --> <div class="hp"> <img class="headPortrait" :src="playlist.coverImgUrl" alt=""> </div> <!-- 头像下面的小方块 --> <div class="headPortraitBlock"> <img class="headPortraitBlockBG" :src="playlist.coverImgUrl" alt=""> </div> </div> <div class="contnet_right"> </div> </div>- 1
- 2
- 3
- 4
- 5
- 6
- 7
- 8
- 9
- 10
- 11
- 12
- 13
- 14
- 15
然后我们给上层的一个div一个宽高区区分上下层
.headPortrait{ width: 2.5rem; height: 2.5rem; border-radius: 10%; }- 1
- 2
- 3
- 4
- 5

然后,这里我们让它们俩个重叠,利用position和z-index来重叠,给最上层的父元素给定一个position: relative,子元素设置为position: absolute
.content_left{ position: relative; // 头像 .hp{ position: absolute; z-index: 2; top: 8px; } .headPortrait{ width: 2.5rem; height: 2.5rem; border-radius: 10%; } }- 1
- 2
- 3
- 4
- 5
- 6
- 7
- 8
- 9
- 10
- 11
- 12
- 13
- 14

然后我们调整下面的头像,首先它是一个圆角,并且稍微往左边移动一点点
.headPortraitBlock{ position: absolute; z-index: 1; left: 13px; // 隐藏超出的部分 overflow: hidden; border-radius: 10px; }- 1
- 2
- 3
- 4
- 5
- 6
- 7
- 8

然后我们设置一下图片的大小,并且和背景一样扩散,然后尽量取中间的颜色
.headPortraitBlockBG{ width: 2rem; height: 2rem; background-size: cover; filter: blur(50px); // 局部放大取颜色 transform: scale(3); }- 1
- 2
- 3
- 4
- 5
- 6
- 7
- 8

然后我们在设置左上角的播放量,这个播放量,我们在推荐页面的歌单写过,我们直接copy那里的代码,然后修改一下变量就可以了
<div class="count"> <span>▷</span> <!--播放量 --> <span>{{formatNum(playlist.playCount)}}</span> </div>- 1
- 2
- 3
- 4
- 5

.count{ position: absolute; right: 0.1rem; top: 0.1rem; font-size: 0.24rem; color:rgb(246,247,250); border-radius:10px; background-color: rgba(19, 19, 19, 0.2); }- 1
- 2
- 3
- 4
- 5
- 6
- 7
- 8
- 9

然后我们来实现右边的标题和简介部分

上面的名字,我们通过传过来的参数可以知道就是name

那我们先把布局调整好
<div class="contnet_right"> <div class="rightTop"> <!-- 歌单用户姓名 --> <div class="UserTitle"> <p>{{playlist.name}}</p> </div> <!-- 更多图标 --> <div class="contnet_right_more"> <svg class="icon" aria-hidden="true"> <use xlink:href="#icon-gengduo"></use> </svg> </div> </div> <!-- 用户头像和姓名 --> <div class="UserInfo"></div> <!-- 用户简介 --> <div class="UserAbout"></div> </div>- 1
- 2
- 3
- 4
- 5
- 6
- 7
- 8
- 9
- 10
- 11
- 12
- 13
- 14
- 15
- 16
- 17
- 18
大概就是这样,后面有问题,我们在调整,我们先看看效果。
接下来我们调整一下样式,首先还是利用flex,向两边靠。
.contnet_right{ width: 4rem; .rightTop{ display: flex; justify-content: space-around; } }- 1
- 2
- 3
- 4
- 5
- 6
- 7
- 8
然后调整一下字体颜色大小和图标颜色
.UserTitle{ color: #fff; font-size: 15px; } .icon{ fill: #fff; width: 0.5rem; height: 0.5rem; }- 1
- 2
- 3
- 4
- 5
- 6
- 7
- 8
- 9
- 10

然后,我们来做下面这部分内容

首先,先看传过来的参数,找到我们需要的值

这几个就是我们需要的,然后我们来搭框架。
<!-- 用户头像和姓名 --> <div class="UserInfo"> <!-- 头像 --> <div class="UserImg"> <img class="UserPortrait" :src="playlist.creator.avatarUrl"> </div> <!-- 名称 --> <div class="UserName"> <p>{{playlist.creator.nickname}}</p> </div> <!-- 关注图标 --> <div class="UserAttention"></div> </div> <!-- 用户简介 --> <div class="UserAbout"> <p>{{playlist.description}}</p> </div>- 1
- 2
- 3
- 4
- 5
- 6
- 7
- 8
- 9
- 10
- 11
- 12
- 13
- 14
- 15
- 16
- 17

然后我们来调整格式,首先用户头像那一栏是一个横排列,然后用户图片是个圆形
.UserInfo{ display: flex; .UserPortrait{ width: 0.5rem; height: 0.5rem; border-radius: 100%; } }- 1
- 2
- 3
- 4
- 5
- 6
- 7
- 8

然后我们来调整名字的大小和颜色,给一个居中效果和颜色
.UserInfo{ display: flex; color: rgba(255, 255, 255, 0.5); .UserName{ height: 26px; padding-left: 4px; font-size: 10px; line-height: 26px; } }- 1
- 2
- 3
- 4
- 5
- 6
- 7
- 8
- 9
- 10

然后,这里我就出了一个错误,我们来看一下,当我们刷新页面的时候

它说没有这个值,因为这是creator的数据,刚开始是一个空的,所以第一次渲染拿不到值,然后就报了这个错误,我们需要去ListView.vue下设置creator对象,解决问题。

然后,我们来添加关注的样式,首先先把关注插入进来
<!-- 关注图标 --> <div class="UserAttention"> <svg class="icon" aria-hidden="true"> <use xlink:href="#icon-plus"></use> </svg> </div>- 1
- 2
- 3
- 4
- 5
- 6

给它一个背景和宽高,高的话就和用户图片一样就行了,
.UserAttention{ width: 0.7rem; height: 0.5rem; background-color: rgba(207, 207, 207, 0.5); margin-left: 10px; border-radius: 12px; }- 1
- 2
- 3
- 4
- 5
- 6
- 7

然后调整一下图标的位置和颜色就可以了
.UserAttention{ width: 0.7rem; height: 0.5rem; background-color: rgba(207, 207, 207, 0.5); margin-left: 10px; border-radius: 12px; display: flex; .icon{ align-self: center; margin:0 auto; fill: rgba(255, 255, 255, 0.6); } }- 1
- 2
- 3
- 4
- 5
- 6
- 7
- 8
- 9
- 10
- 11
- 12
- 13

然后我们来调整下面简介部分,首先就是一个文字和图标的的布局。
<!-- 用户简介 --> <div class="UserAbout"> <div class="description"> <p>{{playlist.description}}</p> </div> <div class="UserAboutMore"> <svg class="icon" aria-hidden="true"> <use xlink:href="#icon-gengduo1"></use> </svg> </div> </div>- 1
- 2
- 3
- 4
- 5
- 6
- 7
- 8
- 9
- 10
- 11

还是利用flex布局,让它变为一排,然后多余的字体隐藏,在调整一下颜色
.UserAbout{ display: flex; justify-content: space-around; margin-top: 0.3rem; width: 3.5rem; color: rgba(255, 255, 255, 0.5); .description{ width: 3rem; font-size: 14px; display: -webkit-box; -webkit-line-clamp: 1; -webkit-box-orient: vertical; overflow: hidden; } .icon{ align-self: center; margin:0 auto; fill: rgba(255, 255, 255, 0.6); } }- 1
- 2
- 3
- 4
- 5
- 6
- 7
- 8
- 9
- 10
- 11
- 12
- 13
- 14
- 15
- 16
- 17
- 18
- 19
- 20

1.3、头部完整代码
<template> <div class="listViewTop"> <img class="bg" :src="playlist.coverImgUrl" alt=""> <div class="listViewTopNav"> <div class="left"> <!-- 返回按钮 --> <div class="back"> <svg class="icon" aria-hidden="true"> <use xlink:href="#icon-xitongfanhui"></use> </svg> </div> <!-- 歌单 --> <div class="title"> 歌单 </div> </div> <!-- 搜索按钮 和 更多按钮--> <div class="right"> <div class="search"> <svg class="icon" aria-hidden="true"> <use xlink:href="#icon-sousuo"></use> </svg> </div> <div class="more"> <svg class="icon" aria-hidden="true"> <use xlink:href="#icon-gengduo-shuxiang"></use> </svg> </div> </div> </div> <!-- 头像 简介部分 --> <div class="content"> <div class="content_left"> <!-- 头像 --> <div class="hp"> <img class="headPortrait" :src="playlist.coverImgUrl" alt=""> <div class="count"> <span>▷</span> <!--播放量 --> <span>{{formatNum(playlist.playCount)}}</span> </div> </div> <!-- 头像下面的小方块 --> <div class="headPortraitBlock"> <img class="headPortraitBlockBG" :src="playlist.coverImgUrl" alt=""> </div> </div> <div class="contnet_right"> <div class="rightTop"> <!-- 歌单用户姓名 --> <div class="UserTitle"> <p>{{playlist.name}}</p> </div> <!-- 更多图标 --> <div class="contnet_right_more"> <svg class="icon" aria-hidden="true"> <use xlink:href="#icon-gengduo"></use> </svg> </div> </div> <!-- 用户头像和姓名 --> <div class="UserInfo"> <!-- 头像 --> <div class="UserImg"> <img class="UserPortrait" :src="playlist.creator.avatarUrl"> </div> <!-- 名称 --> <div class="UserName"> <p>{{playlist.creator.nickname}}</p> </div> <!-- 关注图标 --> <div class="UserAttention"> <svg class="icon" aria-hidden="true"> <use xlink:href="#icon-plus"></use> </svg> </div> </div> <!-- 用户简介 --> <div class="UserAbout"> <div class="description"> <p>{{playlist.description}}</p> </div> <div class="UserAboutMore"> <svg class="icon" aria-hidden="true"> <use xlink:href="#icon-gengduo1"></use> </svg> </div> </div> </div> </div> </div> </template> <script> import { computed } from 'vue' export default { props:['playlist'], setup(){ // 格式化输出听歌人数 const formatNum = computed(()=>{ return function(num){ if(num>10000) return (num/10000).toFixed(2) + '万' } }) return { formatNum } } } </script> <style lang="less" scoped> .listViewTop{ width: 7.5rem; padding: 0 0.4rem; .bg{ position:fixed; left:0; top: 0; width: 7.5rem; height: auto; z-index: -1; // 设置滤镜模糊 filter: blur(150px); // transform: scale(4); } .listViewTopNav{ display: flex; justify-content: space-between; align-items: center; height: 1.2rem; font-size: 0.35rem; .icon{ width: 0.5rem; height: 0.5rem; fill: #fff; } .title{ margin-left: 0.4rem; } .search{ margin-right: 0.5rem; } } .left,.right{ display: flex; color: #fff; } // 标题 头像部分 .content{ display: flex; justify-content: space-between; margin-top: 10px; } // 左边头像部分 .content_left{ position: relative; // 头像 .hp{ position: absolute; z-index: 2; top: 8px; } .headPortrait{ width: 2.5rem; height: 2.5rem; border-radius: 10%; } .headPortraitBlock{ position: absolute; z-index: 1; left: 13px; // 隐藏超出的部分 overflow: hidden; border-radius: 10px; .headPortraitBlockBG{ width: 2rem; height: 2rem; background-size: cover; filter: blur(50px); // 局部放大取颜色 transform: scale(3); } } .count{ position: absolute; right: 0.1rem; top: 0.1rem; font-size: 0.24rem; color:rgb(246,247,250); border-radius:10px; background-color: rgba(19, 19, 19, 0.2); } } // 右边歌单名和用户简介部分 .contnet_right{ width: 4rem; height: 2.5rem; .rightTop{ display: flex; justify-content: space-around; height: 1.25rem; .UserTitle{ color: #fff; font-size: 15px; } .icon{ fill: #fff; width: 0.5rem; height: 0.5rem; } } // 用户信息 .UserInfo{ display: flex; color: rgba(255, 255, 255, 0.5); .UserPortrait{ width: 0.5rem; height: 0.5rem; border-radius: 100%; } .UserName{ height: 26px; padding-left: 4px; font-size: 10px; line-height: 26px; } .UserAttention{ width: 0.7rem; height: 0.5rem; background-color: rgba(207, 207, 207, 0.5); margin-left: 10px; border-radius: 12px; display: flex; .icon{ align-self: center; margin:0 auto; fill: rgba(255, 255, 255, 0.6); } } } // 用户简介 .UserAbout{ display: flex; justify-content: space-around; margin-top: 0.3rem; width: 3.5rem; color: rgba(255, 255, 255, 0.5); .description{ width: 3rem; font-size: 14px; display: -webkit-box; -webkit-line-clamp: 1; -webkit-box-orient: vertical; overflow: hidden; } .icon{ align-self: center; margin:0 auto; fill: rgba(255, 255, 255, 0.6); } } } } </style>- 1
- 2
- 3
- 4
- 5
- 6
- 7
- 8
- 9
- 10
- 11
- 12
- 13
- 14
- 15
- 16
- 17
- 18
- 19
- 20
- 21
- 22
- 23
- 24
- 25
- 26
- 27
- 28
- 29
- 30
- 31
- 32
- 33
- 34
- 35
- 36
- 37
- 38
- 39
- 40
- 41
- 42
- 43
- 44
- 45
- 46
- 47
- 48
- 49
- 50
- 51
- 52
- 53
- 54
- 55
- 56
- 57
- 58
- 59
- 60
- 61
- 62
- 63
- 64
- 65
- 66
- 67
- 68
- 69
- 70
- 71
- 72
- 73
- 74
- 75
- 76
- 77
- 78
- 79
- 80
- 81
- 82
- 83
- 84
- 85
- 86
- 87
- 88
- 89
- 90
- 91
- 92
- 93
- 94
- 95
- 96
- 97
- 98
- 99
- 100
- 101
- 102
- 103
- 104
- 105
- 106
- 107
- 108
- 109
- 110
- 111
- 112
- 113
- 114
- 115
- 116
- 117
- 118
- 119
- 120
- 121
- 122
- 123
- 124
- 125
- 126
- 127
- 128
- 129
- 130
- 131
- 132
- 133
- 134
- 135
- 136
- 137
- 138
- 139
- 140
- 141
- 142
- 143
- 144
- 145
- 146
- 147
- 148
- 149
- 150
- 151
- 152
- 153
- 154
- 155
- 156
- 157
- 158
- 159
- 160
- 161
- 162
- 163
- 164
- 165
- 166
- 167
- 168
- 169
- 170
- 171
- 172
- 173
- 174
- 175
- 176
- 177
- 178
- 179
- 180
- 181
- 182
- 183
- 184
- 185
- 186
- 187
- 188
- 189
- 190
- 191
- 192
- 193
- 194
- 195
- 196
- 197
- 198
- 199
- 200
- 201
- 202
- 203
- 204
- 205
- 206
- 207
- 208
- 209
- 210
- 211
- 212
- 213
- 214
- 215
- 216
- 217
- 218
- 219
- 220
- 221
- 222
- 223
- 224
- 225
- 226
- 227
- 228
- 229
- 230
- 231
- 232
- 233
- 234
- 235
- 236
- 237
- 238
- 239
- 240
- 241
- 242
- 243
- 244
- 245
- 246
- 247
- 248
- 249
- 250
- 251
- 252
- 253
- 254
- 255
- 256
- 257
- 258
- 259
- 260
- 261
- 262
- 263
- 264
- 265
- 266
- 267
- 268
- 269
1.4、链接
Vue3+node.js网易云音乐实战项目(一): https://blog.csdn.net/NITIQ/article/details/125358363?spm=1001.2014.3001.5501
Vue3+node.js实战项目网易云音乐APP(二): https://blog.csdn.net/NITIQ/article/details/125358401?spm=1001.2014.3001.5502
Vue3+node.js网易云音乐实战项目(三): https://blog.csdn.net/NITIQ/article/details/125358446?spm=1001.2014.3001.5502
Vue3+node.js网易云音乐实战项目(四): https://blog.csdn.net/NITIQ/article/details/125358476?spm=1001.2014.3001.5502未完…
-
相关阅读:
飞天使-pt-online-schema-change 添加索引方法,不锁表
idea创建纯净的maven项目简单的maven工程
[1166]CDH集群删除主机节点
【IC设计】NoC(Network on Chip)调研
Java.lang.Class类 getEnclosingMethod()方法有什么功能呢?
手把手教你如何采用服务商模式实现微信支付
欧拉函数
TOGAF 架构内容框架
vue 中的性能优化
Kafka消费者重平衡
- 原文地址:https://blog.csdn.net/NITIQ/article/details/125467589