背景#
来了个需求,需要从某个线上es库查询一些数据出来并进行大屏展示。问需求方有没有开发环境的es库,答:没有,说要不直连他们的线上库。
后面想想也行吧,业务方都这么说了,结果开网络的流程被打回了,理由是网络隔离。
于是,只能采用从线上es库导出文件,然后在开发环境原样搭建这么一个es库并导入的办法。
了解到线上es库,版本是5.4.3,准备在开发环境恢复的那个索引的数据量大概是有20来个g。
我们是使用elasticdump来进行数据导入导出的,数据量小的时候用这个还是可以,但20 来个g这种,导入的过程还是有一些坑的,当时一开始没加一些参数,搞了一晚上都没弄完,后面研究了下,速度才快了,所以简单记录下。
开发环境es搭建#
简单搭建#
先找到了官方的5.4.3版本的文档。
https://www.elastic.co/guide/en/elasticsearch/reference/5.4/getting-started.html
首先是搭建,参考官方:https://www.elastic.co/guide/en/elasticsearch/reference/5.4/zip-targz.html
我是用tar包这种方式:
wget https://artifacts.elastic.co/downloads/elasticsearch/elasticsearch-5.4.3.tar.gz
sha1sum elasticsearch-5.4.3.tar.gz
tar -xzf elasticsearch-5.4.3.tar.gz
cd elasticsearch-5.4.3/
./bin/elasticsearch
结果启动报错:
[root@VM-0-6-centos elasticsearch-5.4.3]# ./bin/elasticsearch
OpenJDK 64-Bit Server VM warning: If the number of processors is expected to increase from one, then you should configure the number of parallel GC threads appropriately using -XX:ParallelGCThreads=N
网上查了下,把内存改了下,我的云主机内存小,大家看着改吧:
[root@VM-0-6-centos elasticsearch-5.4.3]# vim config/jvm.options
-Xms256m
-Xmx256m
再启动,再报错:
Caused by: java.lang.RuntimeException: can not run elasticsearch as root
创建个用户、用户组吧:
// --先看看有没有es的相关用户存在
cat /etc/passwd
groupadd elasticsearch
useradd elasticsearch -g elasticsearch
chown -R elasticsearch:elasticsearch /opt/upload/elasticsearch-5.4.3
然后可以单开个shell
su elasticsearch
cd /opt/upload/elasticsearch-5.4.3
bin/elasticsearch
这样就前台启动起来了。默认的日志就在es安装目录下:
/opt/upload/elasticsearch-5.4.3/logs/elasticsearch.log
curl -X GET "localhost:9200/?pretty"
后台运行:
后台运行并记录pid到pid file:
./bin/elasticsearch -d -p pid
停止:
kill `cat pid`
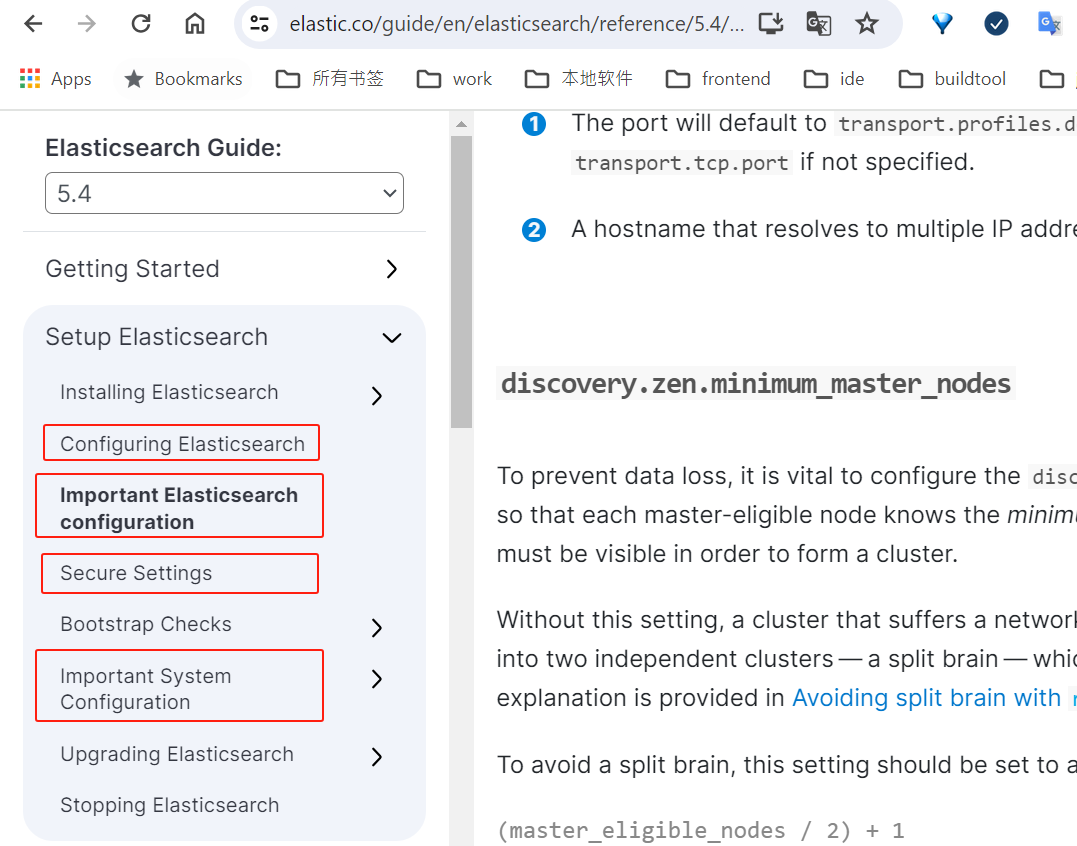
关于配置#
网上很多安装教程会涉及把这两个配置相关的目录,改成es用户,如这种:
chown elasticsearch:elasticsearch -R /var/log/elasticsearch
但这个路径还是要根据实际来,这个path.logs/path.data在config/elasticsearch.yml 中配置,我们这里没配置,所以就在安装目录下,所以不需要单独去chown修改权限。
除了这个之外,还有很多配置项,开发环境可以无所谓,线上还是得每个参数好好斟酌。
这些参数配置的文档:
https://www.elastic.co/guide/en/elasticsearch/reference/5.4/important-settings.html#path-settings
还有很多重要的配置:
https://www.elastic.co/guide/en/elasticsearch/reference/5.4/setting-system-settings.html
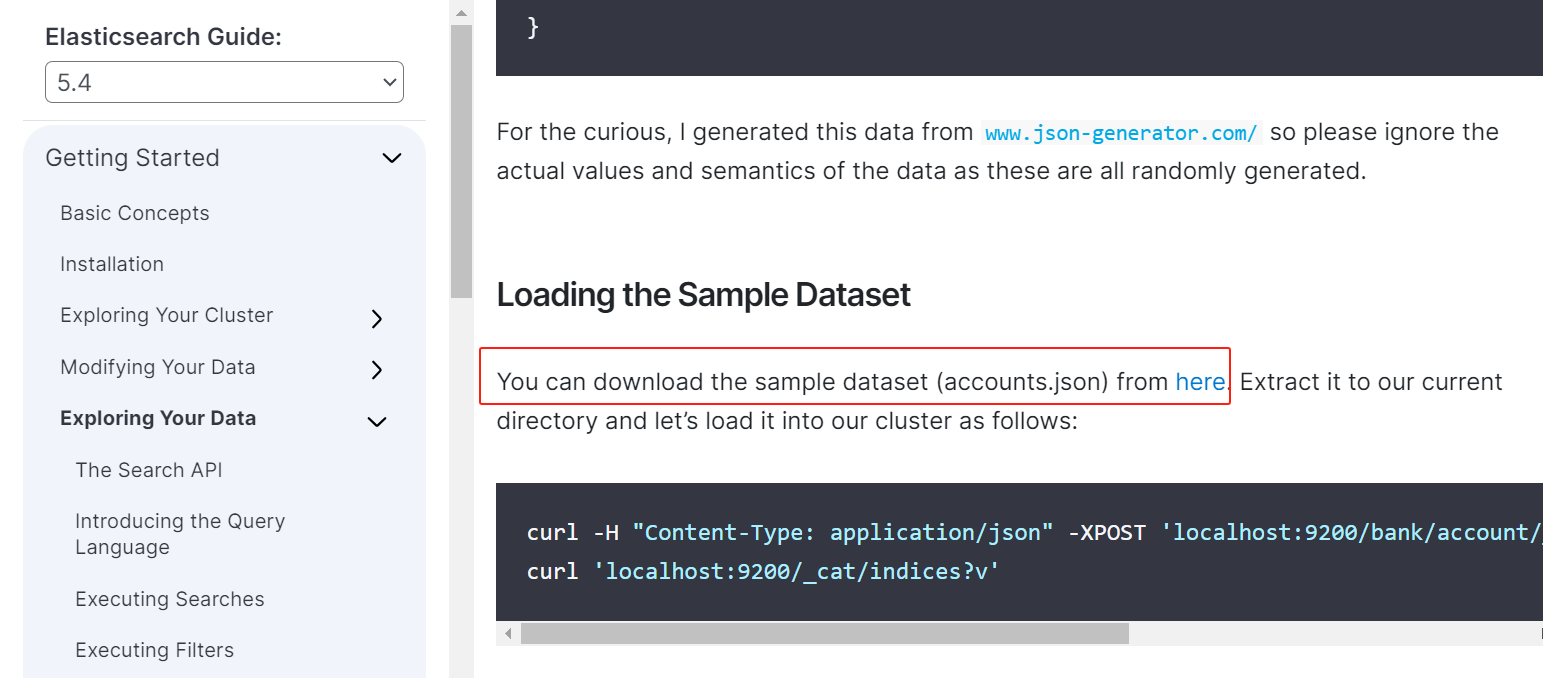
样例数据导入#
在看官网时,发现还有样例数据辅助学习,试了下,还是不错的。
原地址已经404了,在网上找了下:
https://blog.csdn.net/qq_20667511/article/details/109614359
https://github.com/elastic/elasticsearch/blob/7.5/docs/src/test/resources/accounts.json
https://github.com/elastic/elasticsearch/issues/88146
数据导入:
https://www.elastic.co/guide/en/elasticsearch/reference/5.4/gs-exploring-data.html
curl -H "Content-Type: application/json" -XPOST 'localhost:9200/bank/account/_bulk?pretty&refresh' --data-binary "@accounts.json"
curl 'localhost:9200/_cat/indices?v'
esdump导入数据#
elasticsearch-dump安装#
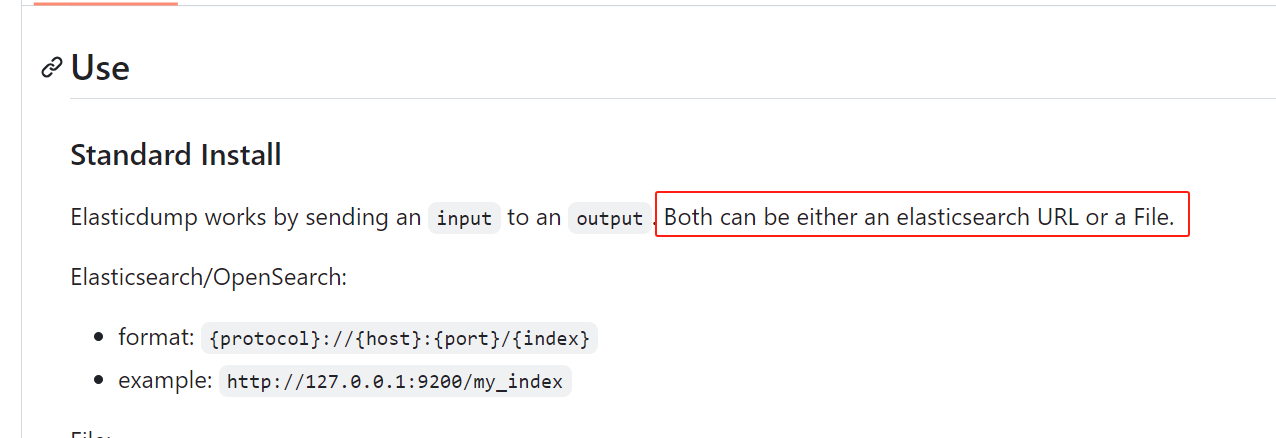
https://github.com/elasticsearch-dump/elasticsearch-dump
这个是用js写的,我这边是先在本地虚拟机用npm安装这个module(有网络),然后把这个模块拷贝到内网es服务器上去跑导入本地文件的;当然它也支持从一个es/文件导出,直接导入到另一个es/文件。
反正就是目标和源都可以是文件和es服务。
npm install elasticdump -g
or 安装指定版本的module
npm i elasticdump@6.104.1
https://www.npmjs.com/package/elasticdump/v/6.104.1?activeTab=readme
找到elasticdump这个node,打tar包,拷贝到无网络的服务器上
ll /root/upload/node-v12.3.0-linux-x64/lib/node_modules
tar -cvf elasticdump.tar elasticdump
目标服务器上解压:
/root/upload/node-v16.20.2-linux-x64/lib/node_modules
此时,执行elasticdump不生效,找不到,所以要在path下建立软连接:
cd /root/upload/node-v16.20.2-linux-x64/bin
ln -s ../lib/node_modules/elasticdump/bin/elasticdump elasticdump
ln -s ../lib/node_modules/elasticdump/bin/multielasticdump multielasticdump
导入(慢)#
我是从文件导入新搭建的es服务。根据导出语句写导入语句即可:
注意,数据量大的时候,下面语句比较慢,看完全文再操作。
elasticdump --input=/root/upload/root/esbackup/20231204/base20231204/common_mapping.json --output=http://localhost:9200/base20231204 --type=mapping
elasticdump --input=/root/upload/root/esbackup/20231204/base20231204/common_data.json --output=http://localhost:9200/base20231204 --type=data
elasticdump --input=/root/upload/root/esbackup/20231204/base20231204/data_mapping.json --output=http://localhost:9200/data --type=mapping
后台导入:
nohup elasticdump --input=/root/upload/root/esbackup/20231204/base20231204/data_data.json --output=http://localhost:9200/data --type=data 2>&1 &
导入(快)#
后面的语句:
nohup elasticdump --input=/root/upload/root/esbackup/20231204/history20231204/common_data.json --output=http://localhost:9200/data20231204 --type=data --noRefresh --limit 10000 --support-big-int --fileSize 1gb 2>&1 &
主要是增加了--noRefresh,这个才是主要的。
参数的解释:
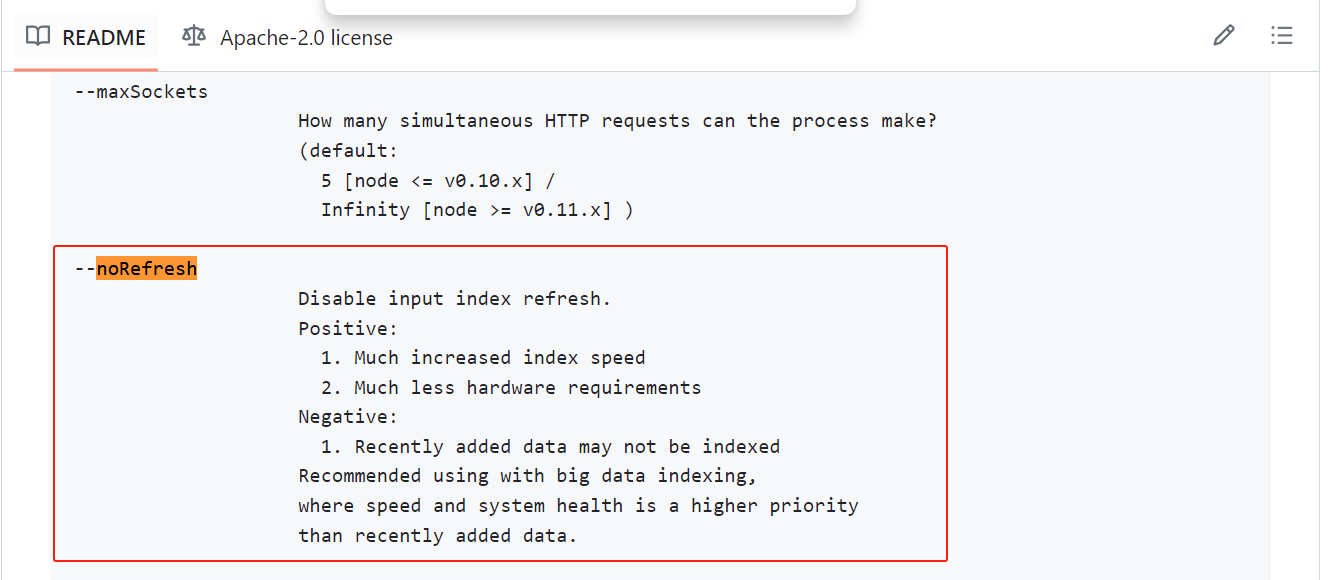
开了这个选项后,导入快多了,之前是一晚上都搞不完。
kibana#
顺便记录下kibana的安装。
https://www.elastic.co/guide/en/kibana/5.4/targz.html
wget https://artifacts.elastic.co/downloads/kibana/kibana-5.4.3-linux-x86_64.tar.gz
sha1sum kibana-5.4.3-linux-x86_64.tar.gz
tar -xzf kibana-5.4.3-linux-x86_64.tar.gz
cd kibana/
启动前改下配置:
cd config/
vim kibana.yml
elasticsearch.url: "http://localhost:9200"
server.host: 0.0.0.0
其他#
本来一开始规划是后端对接es,给前端提供接口;后来计划是前端直接对接es(前端为了避免跨域,还是通过后端nginx转发es请求到es服务器)。
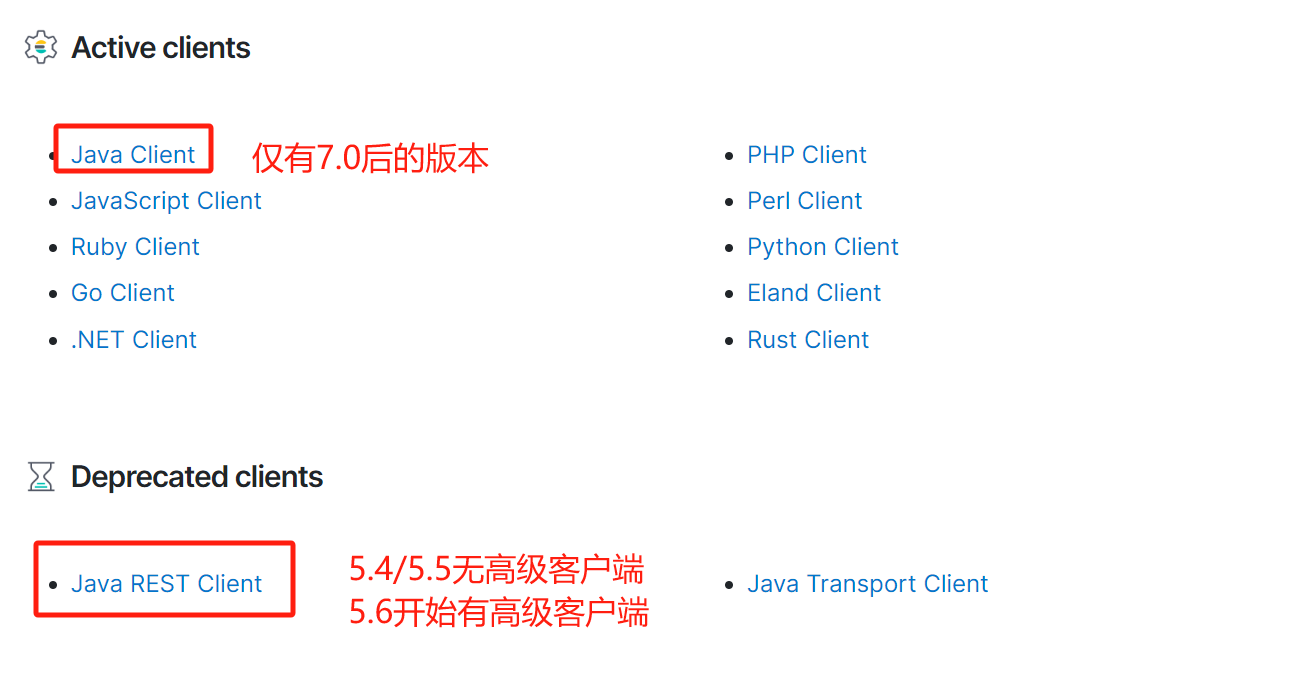
当时本来还研究了下java client的版本兼容,后面就没弄了。
https://www.elastic.co/guide/en/elasticsearch/client/index.html
客户端这块,Java Client只支持7.0后版本的服务端;
Java Rest Client这块,5.6版本的高级客户端,不支持es服务端5.4.3版本,所以,如果要用的话,都只能使用5.4或5.5或5.6的低级客户端。
https://www.elastic.co/guide/en/elasticsearch/client/java-rest/5.6/java-rest-high-compatibility.html
参考链接#
https://www.elastic.co/guide/en/elastic-stack/5.4/index.html
https://www.elastic.co/guide/en/elastic-stack/5.4/elastic-stack.html
https://www.elastic.co/guide/en/elasticsearch/reference/5.4/getting-started.html
https://www.elastic.co/guide/en/kibana/5.4/introduction.html