-
pytest框架前后置设置,以及pytest默认规则
一、pytest框架的默认规则
1、模块名默认必须以test开头或者以test结尾
2、测试类必须以Test开头,并且不能有__init__方法
3、测试方法默认必须以test开头
当然以后的一些默认规则除测试类不能使用__init__方法外其余的都是可配置的,当然一般情况下我们也不会去修改这些默认配置。二、使用setup 与teardown等方式实现用例的前后置
1.1、setup与teardown
此为函数级别实现前后置的方法,在每个测试用例运行前后都会调用前后置的方法。
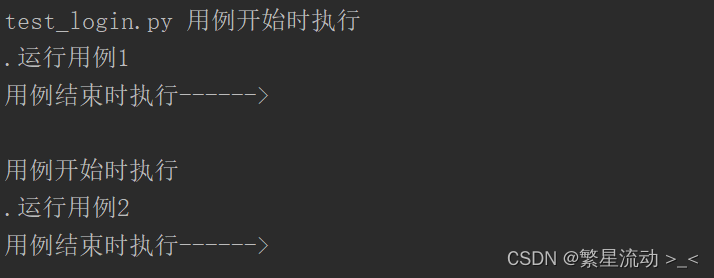
class TestLogin: def setup(self): print('用例开始时执行') def teardown(self): print('用例结束时执行------>\n') def test_01_hujian(self): print('运行用例1') def test_02_hujian(self): print('运行用例2') if __name__ == '__main__': pytest.main(['-vs', 'test_login.py'])- 1
- 2
- 3
- 4
- 5
- 6
- 7
- 8
- 9
- 10
- 11
- 12
- 13
- 14
- 15
- 16
运行结果:可以看到在运行每条用例的前后都会调用前后方法
1.2、setup_class与 teardown_class
此为类级别的前后置方法,意思就是每个类运行前后才会运行一次该方法。
class TestLogin: def setup_class(self): print('用例开始时执行') def teardown_class(self): print('用例结束时执行------>\n') def test_01_hujian(self): print('运行用例1') def test_02_hujian(self): print('运行用例2')- 1
- 2
- 3
- 4
- 5
- 6
- 7
- 8
- 9
- 10
- 11
- 12
- 13
- 14
运行结果:可以看到结果,在该类运行前后才会执行前后置方法。

2.3、setup_module、teardown_module
模块级别前后置方法,意思就是在一个python文件中可以存在多个类,各个类中存在各个测试用例,使用该前后置方法只会在类前后调用一次。值得注意的是该方法只能单独存在,不能写个某个类中哦。
def setup_module(): print('用例开始时执行') def teardown_module(): print('用例结束时执行------>\n') class TestLogin_01: def test_01_hujian(self): print('运行用例1') def test_02_hujian(self): print('运行用例2') class TestLogin_02: def test_03_hujian(self): print('运行用例3') def test_04_hujian(self): print('运行用例4')- 1
- 2
- 3
- 4
- 5
- 6
- 7
- 8
- 9
- 10
- 11
- 12
- 13
- 14
- 15
- 16
- 17
- 18
- 19
- 20
- 21
- 22
- 23
- 24
运行结果:

掌握上面三种基本方法基本就够了,不过今天的重点不是讲setup 与teardown,在pytest中一般使用fixture来实现前后置,这也是pytest框架的核心所在。三、使用fixture来实现前后置功能
3.1、使用fixture的默认规则以及使用方法
1、fixture要放在conftest.py文件中,文件名是不可更改的。
2、在不同的用例py文件中可以使用同一个fixture文件,但是最后跟对应py文件在同一层级目录中。
3、在使用fixture时不需要任何import操作。3.2、基本参数说明
我们在学会fixture参数使用后可以说基本就会使用fuxture啦。
@pytest.fixture(scope='', params='', autouse='', ids='', name='') def myfuxture(): print('用例前后置的方式')- 1
- 2
- 3
**1、scope:**表示是被pytest.fuxture标记的方式的作用域,function(函数)(默认)、class、module、package、session
params:参数化**2、autouse:**autouse=True:自动执行,默认为FALSE
**3、ids:**当使用params参数化时,给每个值设置一个变量名,意义不大
**4、name:**给表示的是@pytest.fixture标记的方法取一个别名
3.3、参数的运用
在讲参数如何运行前我们先看一下如何调用fuxture吧。
# 我们在测试用例目录创建conftest.py文件,内容如下。 import pytest @pytest.fixture() def myfuxture(): print('用例前后置的方式')- 1
- 2
- 3
- 4
- 5
- 6
- 7
在用例文件调用它
# 我们直接在测试用例方法里调用myfuxture即可,因为我们没有加任何参数,所以上面提到过scope默认等于function,它是函数级别的,我们看下打印结果,只会在test_01_hujian用例前运行前置。 class TestLogin_01: def test_01_hujian(self,myfuxture): print('运行用例1') def test_02_hujian(self): print('运行用例2')- 1
- 2
- 3
- 4
- 5
- 6
- 7
- 8

3.3.1、autouse:自动执行
刚看到这个参数注释的时候肯定很多小伙伴都一脸懵逼,什么是自动执行。上面我们看到在调用fuxture时需要在函数里引用,当我们加上参数autouse='Ture’时则不需要引用fuxture方法名,直接所有用例都会调用fuxture是不是很好用。
import pytest @pytest.fixture(autouse=True) def myfuxture(): print('用例前后置的方式')- 1
- 2
- 3
- 4
- 5
- 6
class TestLogin_01: def test_01_hujian(self): print('运行用例1') def test_02_hujian(self): print('运行用例2')- 1
- 2
- 3
- 4
- 5
- 6
- 7
查看结果:因为没有加scope参数所以它是函数级别的,在两个用例执行前都会调用fuxture方法。
3.3.2、scope标记作用域
当不加这个参数时默认scope=function,上面以及演示。
当scop=class@pytest.fixture(autouse=True, scope='class') def myfuxture(): print('用例前后置的方式')- 1
- 2
- 3
打印结果:只会在所有方法开始前后执行class方法。

scop=module,当一个py文件中存在多个类时,会在第一个类执行前置,最后一个类执行后置。import pytest @pytest.fixture(autouse=True, scope='module') def myfuxture(): print('用例前后置的方式')- 1
- 2
- 3
- 4
- 5
- 6
import pytest import time class TestLogin_01: def test_01_hujian(self): print('运行用例1') def test_02_hujian(self): print('运行用例2') class TestLogin_02: def test_03_hujian(self): print('运行用例3') def test_04_hujian(self): print('运行用例4') class TestLogin_03: def test_01_hujian(self): print('运行用例5') def test_02_hujian(self): print('运行用例6') class TestLogin_04: def test_03_hujian(self): print('运行用例7') def test_04_hujian(self): print('运行用例8') if __name__ == '__main__': pytest.main(['-vs'])- 1
- 2
- 3
- 4
- 5
- 6
- 7
- 8
- 9
- 10
- 11
- 12
- 13
- 14
- 15
- 16
- 17
- 18
- 19
- 20
- 21
- 22
- 23
- 24
- 25
- 26
- 27
- 28
- 29
- 30
- 31
- 32
- 33
- 34
- 35
- 36
- 37
- 38
- 39
执行结果:

我们主要就使用这个三个参数即可,后面不多做介绍。
fuxture的参数化个人感觉不是很好用,这里就不多做介绍了,另外跟参数化涉及到的参数还有重命名参数这里不做介绍啦。3.4、fuxture实现后置功能
前面演示的例子一直都只展示了前置功能,那后置如何实现呢。
我们用yield来实现。至于yield这里就不多做介绍了,博主有单独的文档专门介绍。@pytest.fixture(autouse=True) def myfuxture(): print('用例前置的方式') yield print('后置方法')- 1
- 2
- 3
- 4
- 5

-
相关阅读:
S7-200SMART PLC实现冒泡排序的具体方法和程序示例
软考高项-质量大师的观点
接口测试之文件上传
MYSQL高级(二)---索引
MySQL -- 环境安装(CentOS7)
技术干货 | 如何用MindSpore优化器加速收敛高度逼近最优值?
vscode运行Live Server报错:Windows找不到文件Microsoft Edge
嵌入式开发--赛普拉斯cypress的铁电存储器FM25CL64B
八大排序(二)--------冒泡排序
vb圣经加注释
- 原文地址:https://blog.csdn.net/HUJIANLAILE/article/details/132939550
