-
Python入门教程 |Python 错误和异常
Python3 错误和异常
作为 Python 初学者,在刚学习 Python 编程时,经常会看到一些报错信息,在前面我们没有提及,这章节我们会专门介绍。
Python 有两种错误很容易辨认:语法错误和异常。
Python assert(断言)用于判断一个表达式,在表达式条件为 false 的时候触发异常。

语法错误
Python 的语法错误或者称之为解析错,是初学者经常碰到的,如下实例
>>> while True print('Hello world') File "" , line 1, in ? while True print('Hello world') ^ SyntaxError: invalid syntax- 1
- 2
- 3
- 4
- 5
这个例子中,函数 print() 被检查到有错误,是它前面缺少了一个冒号 : 。
语法分析器指出了出错的一行,并且在最先找到的错误的位置标记了一个小小的箭头。
异常
即便 Python 程序的语法是正确的,在运行它的时候,也有可能发生错误。运行期检测到的错误被称为异常。
大多数的异常都不会被程序处理,都以错误信息的形式展现在这里:
>>> 10 * (1/0) # 0 不能作为除数,触发异常 Traceback (most recent call last): File "" , line 1, in ? ZeroDivisionError: division by zero >>> 4 + spam*3 # spam 未定义,触发异常 Traceback (most recent call last): File "" , line 1, in ? NameError: name 'spam' is not defined >>> '2' + 2 # int 不能与 str 相加,触发异常 Traceback (most recent call last): File "" , line 1, inTypeError: can only concatenate str (not "int") to str - 1
- 2
- 3
- 4
- 5
- 6
- 7
- 8
- 9
- 10
- 11
- 12
异常以不同的类型出现,这些类型都作为信息的一部分打印出来: 例子中的类型有 ZeroDivisionError,NameError 和 TypeError。
错误信息的前面部分显示了异常发生的上下文,并以调用栈的形式显示具体信息。
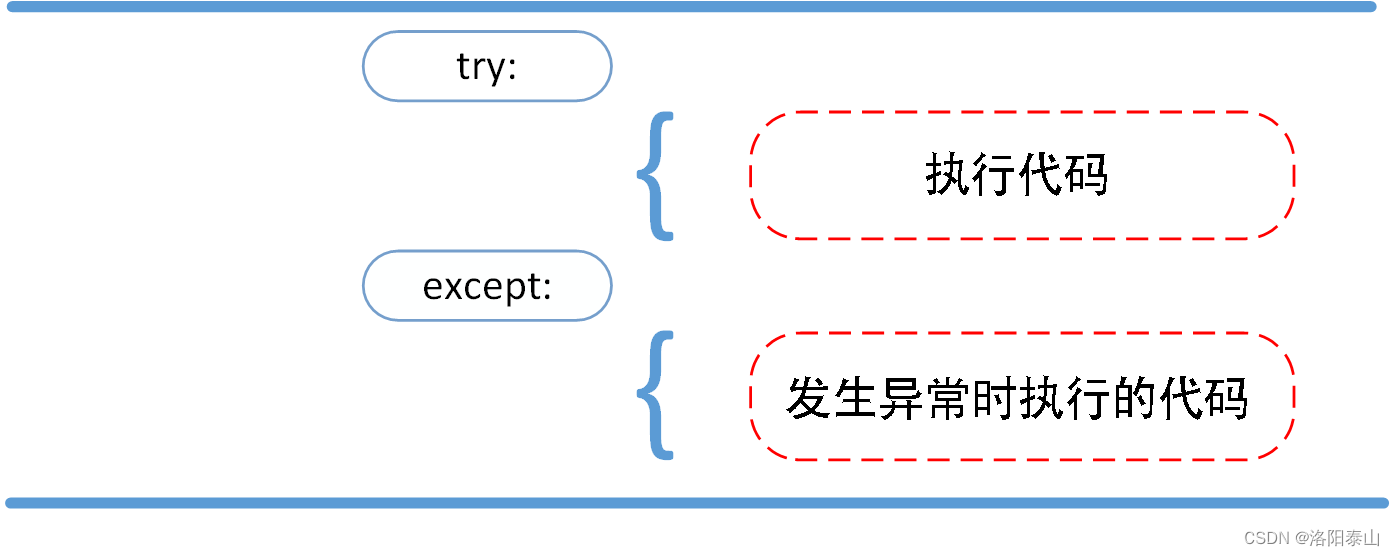
异常处理
try/except
异常捕捉可以使用 try/except 语句。
以下例子中,让用户输入一个合法的整数,但是允许用户中断这个程序(使用 Control-C 或者操作系统提供的方法)。用户中断的信息会引发一个 KeyboardInterrupt 异常。while True: try: x = int(input("请输入一个数字: ")) break except ValueError: print("您输入的不是数字,请再次尝试输入!")- 1
- 2
- 3
- 4
- 5
- 6
try 语句按照如下方式工作:
- 首先,执行 try 子句(在关键字 try 和关键字 except 之间的语句)。
- 如果没有异常发生,忽略 except 子句,try 子句执行后结束。
- 如果在执行 try 子句的过程中发生了异常,那么 try 子句余下的部分将被忽略。如果异常的类型和 except 之后的名称相符,那么对应的 except 子句将被执行。
- 如果一个异常没有与任何的 except 匹配,那么这个异常将会传递给上层的 try 中。
一个 try 语句可能包含多个except子句,分别来处理不同的特定的异常。最多只有一个分支会被执行。
处理程序将只针对对应的 try 子句中的异常进行处理,而不是其他的 try 的处理程序中的异常。
一个except子句可以同时处理多个异常,这些异常将被放在一个括号里成为一个元组,例如:
except (RuntimeError, TypeError, NameError): pass- 1
- 2
最后一个except子句可以忽略异常的名称,它将被当作通配符使用。你可以使用这种方法打印一个错误信息,然后再次把异常抛出。
import sys try: f = open('myfile.txt') s = f.readline() i = int(s.strip()) except OSError as err: print("OS error: {0}".format(err)) except ValueError: print("Could not convert data to an integer.") except: print("Unexpected error:", sys.exc_info()[0]) raise- 1
- 2
- 3
- 4
- 5
- 6
- 7
- 8
- 9
- 10
- 11
- 12
- 13
try/except…else
try/except 语句还有一个可选的 else 子句,如果使用这个子句,那么必须放在所有的 except 子句之后。
else 子句将在 try 子句没有发生任何异常的时候执行。

以下实例在 try 语句中判断文件是否可以打开,如果打开文件时正常的没有发生异常则执行 else 部分的语句,读取文件内容:for arg in sys.argv[1:]: try: f = open(arg, 'r') except IOError: print('cannot open', arg) else: print(arg, 'has', len(f.readlines()), 'lines') f.close()- 1
- 2
- 3
- 4
- 5
- 6
- 7
- 8
使用 else 子句比把所有的语句都放在 try 子句里面要好,这样可以避免一些意想不到,而 except 又无法捕获的异常。
异常处理并不仅仅处理那些直接发生在 try 子句中的异常,而且还能处理子句中调用的函数(甚至间接调用的函数)里抛出的异常。例如:
>>> def this_fails(): x = 1/0 >>> try: this_fails() except ZeroDivisionError as err: print('Handling run-time error:', err) Handling run-time error: int division or modulo by zero- 1
- 2
- 3
- 4
- 5
- 6
- 7
- 8
- 9
try-finally 语句
try-finally 语句无论是否发生异常都将执行最后的代码。

以下实例中 finally 语句无论异常是否发生都会执行:try: runoob() except AssertionError as error: print(error) else: try: with open('file.log') as file: read_data = file.read() except FileNotFoundError as fnf_error: print(fnf_error) finally: print('这句话,无论异常是否发生都会执行。')- 1
- 2
- 3
- 4
- 5
- 6
- 7
- 8
- 9
- 10
- 11
- 12
抛出异常
Python 使用 raise 语句抛出一个指定的异常。
raise语法格式如下:
raise [Exception [, args [, traceback]]]- 1

以下实例如果 x 大于 5 就触发异常:x = 10 if x > 5: raise Exception('x 不能大于 5。x 的值为: {}'.format(x))- 1
- 2
- 3
执行以上代码会触发异常:
Traceback (most recent call last): File "C:\Users\Lenovo\Desktop\test.py", line 3, in <module> raise Exception('x 不能大于 5。x 的值为: {}'.format(x)) Exception: x 不能大于 5。x 的值为: 10- 1
- 2
- 3
- 4
raise 唯一的一个参数指定了要被抛出的异常。它必须是一个异常的实例或者是异常的类(也就是 Exception 的子类)。
如果你只想知道这是否抛出了一个异常,并不想去处理它,那么一个简单的 raise 语句就可以再次把它抛出。
>>> try: raise NameError('HiThere') # 模拟一个异常。 except NameError: print('An exception flew by!') raise An exception flew by! Traceback (most recent call last): File "" , line 2, in ? NameError: HiThere- 1
- 2
- 3
- 4
- 5
- 6
- 7
- 8
- 9
- 10
用户自定义异常
你可以通过创建一个新的异常类来拥有自己的异常。异常类继承自 Exception 类,可以直接继承,或者间接继承,例如:
>>> class MyError(Exception): def __init__(self, value): self.value = value def __str__(self): return repr(self.value) >>> try: raise MyError(2*2) except MyError as e: print('My exception occurred, value:', e.value) My exception occurred, value: 4 >>> raise MyError('oops!') Traceback (most recent call last): File "" , line 1, in ? __main__.MyError: 'oops!'- 1
- 2
- 3
- 4
- 5
- 6
- 7
- 8
- 9
- 10
- 11
- 12
- 13
- 14
- 15
- 16
在这个例子中,类 Exception 默认的 _init_() 被覆盖。
当创建一个模块有可能抛出多种不同的异常时,一种通常的做法是为这个包建立一个基础异常类,然后基于这个基础类为不同的错误情况创建不同的子类:
class Error(Exception): """Base class for exceptions in this module.""" pass class InputError(Error): """Exception raised for errors in the input. Attributes: expression -- input expression in which the error occurred message -- explanation of the error """ def __init__(self, expression, message): self.expression = expression self.message = message class TransitionError(Error): """Raised when an operation attempts a state transition that's not allowed. Attributes: previous -- state at beginning of transition next -- attempted new state message -- explanation of why the specific transition is not allowed """ def __init__(self, previous, next, message): self.previous = previous self.next = next self.message = message- 1
- 2
- 3
- 4
- 5
- 6
- 7
- 8
- 9
- 10
- 11
- 12
- 13
- 14
- 15
- 16
- 17
- 18
- 19
- 20
- 21
- 22
- 23
- 24
- 25
- 26
- 27
- 28
- 29
- 30
大多数的异常的名字都以"Error"结尾,就跟标准的异常命名一样。
定义清理行为
try 语句还有另外一个可选的子句,它定义了无论在任何情况下都会执行的清理行为。 例如:
>>> try: ... raise KeyboardInterrupt ... finally: ... print('Goodbye, world!') ... Goodbye, world! Traceback (most recent call last): File "" , line 2, inKeyboardInterrupt - 1
- 2
- 3
- 4
- 5
- 6
- 7
- 8
- 9
以上例子不管 try 子句里面有没有发生异常,finally 子句都会执行。
如果一个异常在 try 子句里(或者在 except 和 else 子句里)被抛出,而又没有任何的 except 把它截住,那么这个异常会在 finally 子句执行后被抛出。
下面是一个更加复杂的例子(在同一个 try 语句里包含 except 和 finally 子句):
>>> def divide(x, y): try: result = x / y except ZeroDivisionError: print("division by zero!") else: print("result is", result) finally: print("executing finally clause") >>> divide(2, 1) result is 2.0 executing finally clause >>> divide(2, 0) division by zero! executing finally clause >>> divide("2", "1") executing finally clause Traceback (most recent call last): File "" , line 1, in ? File "" , line 3, in divide TypeError: unsupported operand type(s) for /: 'str' and 'str'- 1
- 2
- 3
- 4
- 5
- 6
- 7
- 8
- 9
- 10
- 11
- 12
- 13
- 14
- 15
- 16
- 17
- 18
- 19
- 20
- 21
- 22
预定义的清理行为
一些对象定义了标准的清理行为,无论系统是否成功的使用了它,一旦不需要它了,那么这个标准的清理行为就会执行。
下面这个例子展示了尝试打开一个文件,然后把内容打印到屏幕上:
for line in open("myfile.txt"): print(line, end="")- 1
- 2
以上这段代码的问题是,当执行完毕后,文件会保持打开状态,并没有被关闭。
关键词 with 语句就可以保证诸如文件之类的对象在使用完之后一定会正确的执行他的清理方法:
with open("myfile.txt") as f: for line in f: print(line, end="")- 1
- 2
- 3
以上这段代码执行完毕后,就算在处理过程中出问题了,文件 f 总是会关闭。
with 关键字
Python 中的 with 语句用于异常处理,封装了 try…except…finally 编码范式,提高了易用性。
with 语句使代码更清晰、更具可读性, 它简化了文件流等公共资源的管理。
在处理文件对象时使用 with 关键字是一种很好的做法。
我们可以看下以下几种代码实例:
不使用 with,也不使用 try…except…finallyfile = open('./test.txt', 'w') file.write('hello world !') file.close()- 1
- 2
- 3
以上代码如果在调用 write 的过程中,出现了异常,则 close 方法将无法被执行,因此资源就会一直被该程序占用而无法被释放。 接下来我们呢可以使用 try…except…finally 来改进代码:
file = open('./test.txt', 'w') try: file.write('hello world') finally: file.close()- 1
- 2
- 3
- 4
- 5
以上代码我们对可能发生异常的代码处进行 try 捕获,发生异常时执行 except 代码块,finally 代码块是无论什么情况都会执行,所以文件会被关闭,不会因为执行异常而占用资源。
使用 with 关键字:
with open('./test.txt', 'w') as file: file.write('hello world !')- 1
- 2
使用 with 关键字系统会自动调用 f.close() 方法, with 的作用等效于 try/finally 语句是一样的。
我们可以在执行 with 关键字后检验文件是否关闭:
>>> with open('./test.txt') as f: ... read_data = f.read() >>> # 查看文件是否关闭 >>> f.closed True- 1
- 2
- 3
- 4
- 5
- 6
with 语句实现原理建立在上下文管理器之上。
上下文管理器是一个实现 _enter_ 和 _exit_ 方法的类。
使用 with 语句确保在嵌套块的末尾调用 _exit_ 方法。
这个概念类似于 try…finally 块的使用。
with open('./test.txt', 'w') as my_file: my_file.write('hello world!')- 1
- 2
以上实例将 hello world! 写到 ./test.txt 文件上。
在文件对象中定义了 _enter_ 和 _exit_ 方法,即文件对象也实现了上下文管理器,首先调用 _enter_ 方法,然后执行 with 语句中的代码,最后调用 _exit_ 方法。 即使出现错误,也会调用 _exit_ 方法,也就是会关闭文件流。
assert(断言)
Python assert(断言)用于判断一个表达式,在表达式条件为 false 的时候触发异常。
断言可以在条件不满足程序运行的情况下直接返回错误,而不必等待程序运行后出现崩溃的情况,例如我们的代码只能在 Linux 系统下运行,可以先判断当前系统是否符合条件。

语法格式如下:assert expression- 1
等价于:
if not expression: raise AssertionError- 1
- 2
assert 后面也可以紧跟参数:
assert expression, [arguments]- 1
等价于:
if not expression: raise AssertionError(arguments)- 1
- 2
以下为 assert 使用实例:
>>> assert True # 条件为 true 正常执行 >>> assert False # 条件为 false 触发异常 Traceback (most recent call last): File "" , line 1, in <module> AssertionError >>> assert 1==1 # 条件为 true 正常执行 >>> assert 1==2 # 条件为 false 触发异常 Traceback (most recent call last): File "" , line 1, in <module> AssertionError >>> assert 1==2, '1 不等于 2' Traceback (most recent call last): File "" , line 1, in <module> AssertionError: 1 不等于 2 >>>- 1
- 2
- 3
- 4
- 5
- 6
- 7
- 8
- 9
- 10
- 11
- 12
- 13
- 14
- 15
- 16
以下实例判断当前系统是否为 Linux,如果不满足条件则直接触发异常,不必执行接下来的代码:
import sys assert ('linux' in sys.platform), "该代码只能在 Linux 下执行"- 1
- 2
-
相关阅读:
ES6基本语法(一)
实战指南:使用 xUnit.DependencyInjection 在单元测试中实现依赖注入【完整教程】
【Linux网络编程】多路IO转接之select、poll、epoll
webpack学习
微信小程序开发基础(二)基本组件
腾讯面试 Java 高频 210 题解析:Spirng+ 设计模式 +Redis+MySQL
室温离子液体1-丁基-3-甲基咪唑六氟磷酸盐([EMIM] PF6)科研试剂
使用四则运算实现异或
关于UIScreen.main.bounds.height的值发生了变化的原因和解决方案
如何加密保护配置文件中的敏感内容(Spring Cloud微服务)
- 原文地址:https://blog.csdn.net/weixin_40986713/article/details/132894775
