-
02. Kubeadm部署Kubernetes集群
目录
3.7、node1和node2节点加入Kubernetes集群
1、前言
Kubernetes本身不提供容器引擎,因此在部署之前需要先安装好Docker环境。
2、Kubernetes部署方式
Kubernetes的部署方式有:
- kubeadmin方式
- yum方式
- 二进制包方式
- minikubei工具方式
今天我们先介绍最常用的kubeadm方式。
3、kubeadmin部署
为了方便我们测试,先对三个节点分别配置host:
- 192.168.74.129 master
- 192.168.74.130 node1
- 192.168.74.131 node2

3.1、关闭防火墙
- systemctl stop firewalld
- systemctl disable firewalld
- # 同时关闭Swap
- swapoff -a
- # 永久禁用
- sed -i 's/enforcing/disabled/' /etc/selinux/config
- setenforce 0

3.2、配置阿里云Kubernetes源
在master节点上,配置阿里云Kubernetes源,方便下载。
- [root@192 ~]# cat > /etc/yum.repos.d/kubernetes.repo << EOF
- > [kubernetes]
- > name=Kubernetes
- > baseurl=https://mirrors.aliyun.com/kubernetes/yum/repos/kubernetes-el7-x86_64
- > enabled=1
- > gpgkeycheck=0
- > repo_gpgcheck=0
- > gpgkey=https://mirrors.aliyun.com/kubernetes/yum/doc/yum-key.gpg
- https://mirrors.aliyun.com/kubernetes/yum/doc/rpm-package-key.gpg
- > EOF

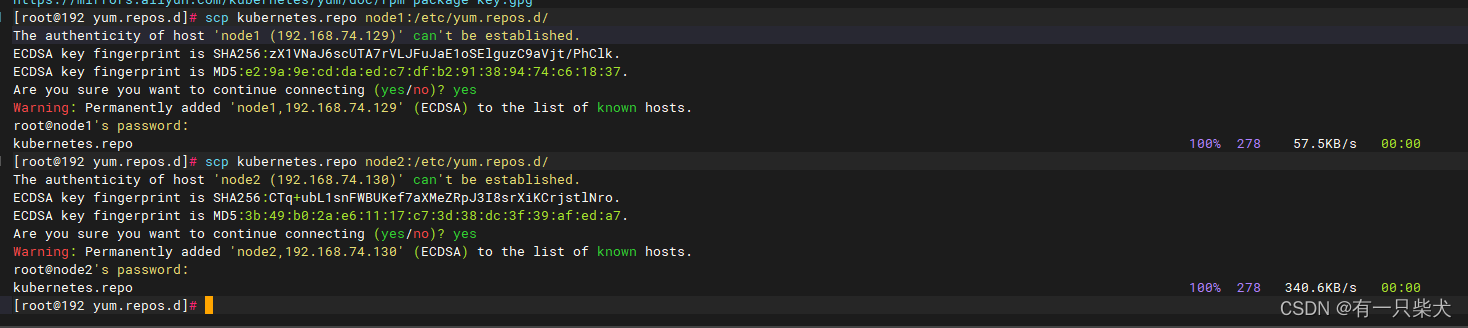
接着利用scp命令复制到node1和node2节点:
- scp /etc/yum.repos.d/kubernetes.repo node1:/etc/yum.repos.d/
- scp /etc/yum.repos.d/kubernetes.repo node2:/etc/yum.repos.d/
3.3、安装kubeadm,kubelet,kubectl
在master,node1,node2节点上分别安装kubeadm,kubelet,kubectl。
- # 不指定版本号,则安装最新版本
- yum install -y kubelet-1.15.0 kubeadm-1.15.0 kubectl-1.15.0
安装完成后,启动kubelet:
- systemctl start kubectl
- systemctl enable kubectl
3.4、初始化master节点
kubeadm init --apiserver-advertise-address=192.168.74.129 --image-repository registry.cn-hangzhou.aliyuncs.com/google_containers --kubernetes-version v1.15.0 --service-cidr=10.168.0.0/12 --pod-network-cidr=10.244.0.0/16 --ignore-preflight-errors=all这里很容易出错,要有耐心。当初始化失败时,可以使用kubeadm reset重置。
当控制台有如下输出时,就说明初始化成功。

其中内容:
- kubeadm join 192.168.74.129:6443 --token zhb1rz.qyi4ld37t0py180b \
- --discovery-token-ca-cert-hash sha256:54f2619a2931211bf21e8f4e0cf1dda00d1bad9331f654e21155ce6b0c331005
就是node节点加入集群的命令。
3.5、master节点配置kubectl命令行工具
- mkdir -p $HOME/.kube
- cp -i /etc/kubernetes/admin.conf $HOME/.kube/config
- chown $(id -u):$(id -g) $HOME/.kube/config

3.6、master节点下载flannel网络配置文件
Flannel是一个开源的网络管理工具,用于在容器集群中提供网络通信。它可以帮助在不同主机上运行的容器互相通信,并确保容器间的网络隔离。Flannel的工作原理是通过创建 overlay 网络来连接容器。它使用虚拟网络 TUN/TAP 设备将容器网络流量封装到二层网络中,并通过基础网络设备进行路由。
kubectl apply -f http://raw.githubusercontent.com/coreos/flannel/master/Documentation/kube-flannel.yml这个节点访问很慢,我这边基本无法访问。如果节点上无法直接访问,可以创建一个kube-flannel.yml。然后直接将以下内容复制进去:
- ---
- kind: Namespace
- apiVersion: v1
- metadata:
- name: kube-flannel
- labels:
- k8s-app: flannel
- pod-security.kubernetes.io/enforce: privileged
- ---
- kind: ClusterRole
- apiVersion: rbac.authorization.k8s.io/v1
- metadata:
- labels:
- k8s-app: flannel
- name: flannel
- rules:
- - apiGroups:
- - ""
- resources:
- - pods
- verbs:
- - get
- - apiGroups:
- - ""
- resources:
- - nodes
- verbs:
- - get
- - list
- - watch
- - apiGroups:
- - ""
- resources:
- - nodes/status
- verbs:
- - patch
- - apiGroups:
- - networking.k8s.io
- resources:
- - clustercidrs
- verbs:
- - list
- - watch
- ---
- kind: ClusterRoleBinding
- apiVersion: rbac.authorization.k8s.io/v1
- metadata:
- labels:
- k8s-app: flannel
- name: flannel
- roleRef:
- apiGroup: rbac.authorization.k8s.io
- kind: ClusterRole
- name: flannel
- subjects:
- - kind: ServiceAccount
- name: flannel
- namespace: kube-flannel
- ---
- apiVersion: v1
- kind: ServiceAccount
- metadata:
- labels:
- k8s-app: flannel
- name: flannel
- namespace: kube-flannel
- ---
- kind: ConfigMap
- apiVersion: v1
- metadata:
- name: kube-flannel-cfg
- namespace: kube-flannel
- labels:
- tier: node
- k8s-app: flannel
- app: flannel
- data:
- cni-conf.json: |
- {
- "name": "cbr0",
- "cniVersion": "0.3.1",
- "plugins": [
- {
- "type": "flannel",
- "delegate": {
- "hairpinMode": true,
- "isDefaultGateway": true
- }
- },
- {
- "type": "portmap",
- "capabilities": {
- "portMappings": true
- }
- }
- ]
- }
- net-conf.json: |
- {
- "Network": "10.244.0.0/16",
- "Backend": {
- "Type": "vxlan"
- }
- }
- ---
- apiVersion: apps/v1
- kind: DaemonSet
- metadata:
- name: kube-flannel-ds
- namespace: kube-flannel
- labels:
- tier: node
- app: flannel
- k8s-app: flannel
- spec:
- selector:
- matchLabels:
- app: flannel
- template:
- metadata:
- labels:
- tier: node
- app: flannel
- spec:
- affinity:
- nodeAffinity:
- requiredDuringSchedulingIgnoredDuringExecution:
- nodeSelectorTerms:
- - matchExpressions:
- - key: kubernetes.io/os
- operator: In
- values:
- - linux
- hostNetwork: true
- priorityClassName: system-node-critical
- tolerations:
- - operator: Exists
- effect: NoSchedule
- serviceAccountName: flannel
- initContainers:
- - name: install-cni-plugin
- image: docker.io/flannel/flannel-cni-plugin:v1.2.0
- command:
- - cp
- args:
- - -f
- - /flannel
- - /opt/cni/bin/flannel
- volumeMounts:
- - name: cni-plugin
- mountPath: /opt/cni/bin
- - name: install-cni
- image: docker.io/flannel/flannel:v0.22.2
- command:
- - cp
- args:
- - -f
- - /etc/kube-flannel/cni-conf.json
- - /etc/cni/net.d/10-flannel.conflist
- volumeMounts:
- - name: cni
- mountPath: /etc/cni/net.d
- - name: flannel-cfg
- mountPath: /etc/kube-flannel/
- containers:
- - name: kube-flannel
- image: docker.io/flannel/flannel:v0.22.2
- command:
- - /opt/bin/flanneld
- args:
- - --ip-masq
- - --kube-subnet-mgr
- resources:
- requests:
- cpu: "100m"
- memory: "50Mi"
- securityContext:
- privileged: false
- capabilities:
- add: ["NET_ADMIN", "NET_RAW"]
- env:
- - name: POD_NAME
- valueFrom:
- fieldRef:
- fieldPath: metadata.name
- - name: POD_NAMESPACE
- valueFrom:
- fieldRef:
- fieldPath: metadata.namespace
- - name: EVENT_QUEUE_DEPTH
- value: "5000"
- volumeMounts:
- - name: run
- mountPath: /run/flannel
- - name: flannel-cfg
- mountPath: /etc/kube-flannel/
- - name: xtables-lock
- mountPath: /run/xtables.lock
- volumes:
- - name: run
- hostPath:
- path: /run/flannel
- - name: cni-plugin
- hostPath:
- path: /opt/cni/bin
- - name: cni
- hostPath:
- path: /etc/cni/net.d
- - name: flannel-cfg
- configMap:
- name: kube-flannel-cfg
- - name: xtables-lock
- hostPath:
- path: /run/xtables.lock
- type: FileOrCreate
接着运行:
kubectl apply -f kube-flannel.yml
3.7、node1和node2节点加入Kubernetes集群
先拉取flannel镜像:
docker pull query.io/coreos/flannel:v0.11.0-amd64接着在node节点上运行加入Kubernetes集群的命令:
kubeadm join 192.168.74.129:6443 --token zhb1rz.qyi4ld37t0py180b --discovery-token-ca-cert-hash sha256:54f2619a2931211bf21e8f4e0cf1dda00d1bad9331f654e21155ce6b0c331005显示这个信息,则加入成功。

3.8、查看节点信息
添加成功后,可以在master节点上查看集群的节点信息。
kubectl get nodes
但是,我们看状态信息均为NotReady。这说明节点虽然加入集群了,但是依然报错了。
先查看master节点的信息:
kubectl describe nodes master我们可以看到master节点下有具体的报错信息“runtime network not ready: NetworkReady=false reason:NetworkPluginNotReady message:docker: network plugin is not ready: cni config uninitialized”。

这里显示的是网络插件没有配置好,参考网络上的教程修复即可。
-
相关阅读:
什么是用来评估神经网络,神经网络的数据预处理
Java基础进阶线程的生命周期
vue3 生命周期函数,都改了啥?
数据结构--单链表操作
鲍威尔暗示将继续加息以解决通胀问题 有何影响?
第七章:基于敏捷模式S公司质量搭建的第一阶段
教你轻松使用Fastjson
【PTQ】Cross-Layer Equalization跨层均衡-证明和实践详细解读
【LeetCode-中等】128. 最长连续序列(详解)
Python-sqlparse解析SQL工具库一文详解(二)
- 原文地址:https://blog.csdn.net/p793049488/article/details/132790455
