-
【个人博客系统网站】我的博客列表页 · 增删改我的博文 · 退出登录 · 博客详情页 · 多线程应用
【JavaEE】进阶 · 个人博客系统(4)

【JavaEE】进阶 · 个人博客系统(4)
1. 增加博文
1.1 预期效果

用户在网页中编写标题和正文,点击提交,选择
- 输入摘要
- 取消,继续编写文章
提交成功后,选择
- 继续写文章
- 返回“我的博客列表页”
1.1 约定前后端交互接口
后端:
- /art/publish
- 将前端传递过来的数据保存到数据库
- 返回受影响行数
前端:
- /art/publish
- 标题,正文,摘要
- 当前登录用户sessionid
1.2 后端代码

- controller层
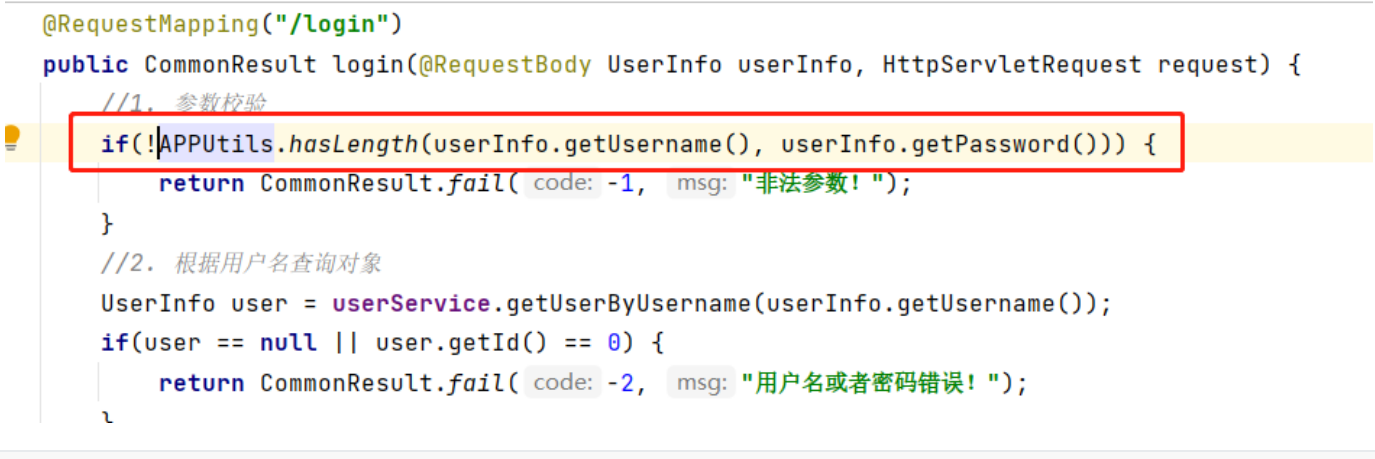
由于经常需要对字符串进行检查,我封装了一个方法:
- 为什么前端检验完了,后端还检验呢?
- 千万别相信“前端”,因为这个“前端”,可能不是浏览器正常的流程,也可能是通过postman等方式发送的请求,这个就可以绕开前端代码的校验~
- 不用担心,因为
public class APPUtils { /** * 字符串全部都有长度才返回true * @param strings * @return */ public static boolean hasLength(String... strings) { for(String x : strings) { if(!StringUtils.hasLength(x)) { return false; } } return true; } }- 1
- 2
- 3
- 4
- 5
- 6
- 7
- 8
- 9
- 10
- 11
- 12
- 13
- 14
- 15
修改:

@RequestMapping("/publish") public CommonResult publish(@RequestBody ArticleInfo articleInfo, HttpServletRequest request) { // 1. 获取当前用户详信息 UserInfo userInfo = SessionUtils.getUser(request); articleInfo.setUid(userInfo.getId()); articleInfo.setPhoto(userInfo.getPhoto()); // 2. 校验参数 if(!APPUtils.hasLength(articleInfo.getContent(), articleInfo.getSummary(), articleInfo.getTitle())) { return CommonResult.fail(-1, "非法参数!"); } // 3. 提交到数据库中 int rows = articleService.publish(articleInfo); // 4. 返回 return CommonResult.success(rows); }- 1
- 2
- 3
- 4
- 5
- 6
- 7
- 8
- 9
- 10
- 11
- 12
- 13
- 14
- 15
- service层
@Autowired private ArticleMapper articleMapper; public int publish(ArticleInfo articleInfo) { return articleMapper.insert(articleInfo); }- 1
- 2
- 3
- 4
- 5
- 6
- mapper层
@Insert("insert into articleinfo (title, content, summary, uid, photo) values (#{title}, #{content}, #{summary}, #{uid}, #{photo})") int insert(ArticleInfo articleInfo);- 1
- 2
- 拦截器配置
- 拦截,不排除此接口
1.3 前端代码

function publish() { var title = jQuery("#text"); var content = jQuery("#content"); // 1. 参数校验 if (title.val().trim() == "") { alert("标题不能为空!"); title.focus(); return false; } if (content.val().trim() == "") { alert("正文不能为空!"); content.focus(); return false; } // 2. 输入摘要 var summary = prompt("请输入摘要:"); if(summary == "") { return false; } // 3. 发送请求 jQuery.ajax({ url: "/art/publish", method: "POST", contentType: "application/json; charset=utf8", data: JSON.stringify({ title: title.val().trim(), content: content.val().trim(), summary: summary.val().trim(), }), // 3. 处理响应 success: function (body) { if (body.code == 200 && body.data == 1) { if(confirm("发布成功!请问是否继续创作?")) { location.href = location.href; }else { location.href = "myblog_lists.html"; } } else { alert("发布失败:" + body.msg); } }, }); }- 1
- 2
- 3
- 4
- 5
- 6
- 7
- 8
- 9
- 10
- 11
- 12
- 13
- 14
- 15
- 16
- 17
- 18
- 19
- 20
- 21
- 22
- 23
- 24
- 25
- 26
- 27
- 28
- 29
- 30
- 31
- 32
- 33
- 34
- 35
- 36
- 37
- 38
- 39
- 40
- 41
- 42
- 43
1.4 测试


为了避免写文章过程中session过去,我将session设置为永不过期:

2. 我的博客列表页
2.1 期待效果

- 左侧窗口显示用户信息
- 右侧窗口显示用户创作的博文简介
- 标题
- 时间以及阅读量
- 摘要
- 查看正文,修改文章,删除文章按钮
- 右上角
- 点击主页跳转到所有人的博客列表页
- 点击写博客跳转到博客创作页
- 点击退出登录,后端删除登录记录,跳转到登录页面
2.2 显示用户信息以及博客信息
2.2.1 约定前后端交互接口
后端:
- /article/get_mylist
- 通过当前登录用户查询博客
- 返回用户信息以及博客信息的组合
前端:
- /article/get_mylist
- get
- 接受响应,投喂给页面
2.2.2 后端代码
- controller层
@RequestMapping("/get_mylist") public CommonResult getMylist(HttpServletRequest request) { // 1. 获取当前登录用户 UserInfo userInfo = SessionUtils.getUser(request); // 2. 通过此用户发布的所有文章 List<ArticleInfo> list = articleService.getListByUid(userInfo.getId()); // 3. 标题 / 正文太长 处理 ArticleUtils.substringList(list); // 4. 返回给前端 Map<String, Object> map = new HashMap<>(); map.put("user", userInfo); map.put("list", list); return CommonResult.success(map); }- 1
- 2
- 3
- 4
- 5
- 6
- 7
- 8
- 9
- 10
- 11
- 12
- 13
- 14
// 文章工具类 public class ArticleUtils { //标题截取长度 private static final int _TITLE_LENGTH = 40; //摘要截取长度 private static final int _SUMMARY_LENGTH = 160; public static void substringList(List<ArticleInfo> list) { if(list != null && list.size() != 0) { // 并发处理 list 集合 list.stream().parallel().forEach((art) -> { //标题截取 if(art.getTitle().length() > _TITLE_LENGTH) { art.setTitle(art.getTitle().substring(0, _TITLE_LENGTH) + "..."); } //摘要截取 if(art.getSummary().length() > _SUMMARY_LENGTH) { art.setSummary(art.getSummary().substring(0, _SUMMARY_LENGTH) + "..."); } }); } } }- 1
- 2
- 3
- 4
- 5
- 6
- 7
- 8
- 9
- 10
- 11
- 12
- 13
- 14
- 15
- 16
- 17
- 18
- 19
- 20
- 21
- 22
- 23
- 24
- service层
public List<ArticleInfo> getListByUid(int uid) { return articleMapper.getListByUid(uid); }- 1
- 2
- 3
- mapper层
@Select("select * from articleinfo where uid = #{uid} order by id desc") List<ArticleInfo> getListByUid(@Param("uid") int uid); //越晚发布排在越前- 1
- 2
- 拦截器配置
- 不排除此接口
- 时间格式配置
可以接受数据库时间的类型一般是:
- Date
- LocalDataTime
- TimeStamp
网络资料
LocalDateTime和Date是Java中表示日期和时间的两种不同的类,它们有一些区别和特点。
-
类型:LocalDateTime是Java 8引入的新类型,属于Java 8日期时间API(java.time包)。而Date是旧版Java日期时间API(java.util包)中的类。
-
不可变性:LocalDateTime是不可变的类型,一旦创建后,其值是不可变的。而Date是可变的类型,可以通过方法修改其值。
-
线程安全性:LocalDateTime是线程安全的,多个线程可以同时访问和操作不同的LocalDateTime实例。而Date是非线程安全的,如果多个线程同时访问和修改同一个Date实例,可能会导致不可预期的结果。
-
时间精度:LocalDateTime提供了纳秒级别的时间精度,可以表示更加精确的时间。而Date只能表示毫秒级别的时间精度。
-
时区处理:LocalDateTime默认不包含时区信息,表示的是本地日期和时间。而Date则包含时区信息,它的实际值会受到系统默认时区的影响。
而TimeStamp就是long类型的时间戳的包装~
对于时间格式的控制:
-
json的构造本身是通过getter去获取的,所以可以重写getter来控制显示效果
-
全局配置:

但是这只适合jdk8之前的Date类型
-
局部配置:
- 对于时间类型的属性,是可以通过注解@JsonFormat来配置的:

2.2.3 前端代码
左:

右:

jQuery.ajax({ type: "get", url: "/art/get_mylist", success: function (body) { if (body.code == 200) { // 1. 改变左侧窗口 jQuery(".card img").attr("src", body.data.user.photo); jQuery(".card h3").text(body.data.user.name); if(body.data.user.git.trim() != "") { jQuery(".card a").attr("href", body.data.user.git); } jQuery("#count").text(body.data.list.length); // 2. 显示文章,构造博客html元素 for (var blog of body.data.list) { console.log(body.title); var art = '"; // 3. 追加到div.article jQuery(".article").append(jQuery(art)); } } }, });- 1
- 2
- 3
- 4
- 5
- 6
- 7
- 8
- 9
- 10
- 11
- 12
- 13
- 14
- 15
- 16
- 17
- 18
- 19
- 20
- 21
- 22
- 23
- 24
- 25
- 26
- 27
- 28
- 29
- 30
- 31
- 32
- 33
- 34
- 35
- 36
- 37
- 38
- 39
- 40
你也可以,以标签为单位去设置属性以及嵌套,这有逻辑的构建;而我这里是单纯的拼接字符串,用jQuery(str),构造html元素
2.2.4 测试

2.3 删除文章
2.3.1 约定前后端交互接口
后端:
- /art/delete
- 根据当前登录用户id,和删除文章对应的作者id,判断是否有权限删除,有才能删除
- 返回受影响行数
前端:
- /art/delete
- post
- JSON:id(文章id)
- 如果受影响行数为1,刷新页面
2.3.2 后端代码
- controller层
@RequestMapping("/delete") public CommonResult delete(@RequestBody ArticleInfo articleInfo, HttpServletRequest request) { // 1. 获取当前登录用户的id int uid = SessionUtils.getUser(request).getId(); // 2. 设置到文章对象里 articleInfo.setUid(uid); // 3. 删除 int rows = articleService.delete(articleInfo); // 4. 返回 return CommonResult.success(rows); }- 1
- 2
- 3
- 4
- 5
- 6
- 7
- 8
- 9
- 10
- 11
- service层
public int delete(ArticleInfo articleInfo) { return articleMapper.delete(articleInfo); }- 1
- 2
- 3
- mapper层
@Delete("delete from articleinfo where id = #{id} and uid = #{uid}") // 查找文章和检测权限在一步搞定 int delete(ArticleInfo articleInfo);- 1
- 2
- 3
- 拦截器配置
- 拦截,不排除
2.3.3 前端代码
function del(aid) { // 0. 参数校验 if (parseInt(aid) == NaN || aid <= 0) { return false; } jQuery.ajax({ method: "post", url: "/art/delete", contentType: "application/json; charset=utf8", data: JSON.stringify({ id: aid, }), success: function (body) { if (body.code == 200 && body.data == 1) { location.href = location.href; } else { alert("删除失败!\n"); } }, }); }- 1
- 2
- 3
- 4
- 5
- 6
- 7
- 8
- 9
- 10
- 11
- 12
- 13
- 14
- 15
- 16
- 17
- 18
- 19
- 20
- 21
2.3.4 测试

2.4 退出登录
2.4.1 约定前后端交互接口
后端:
- /user/logout
- 根据当前用户进行删session操作
- 无返回值
前端:
- /user/logout
- a标签的get
2.4.2 后端代码
- controller层
@RequestMapping("/logout") public void logout(HttpServletRequest request, HttpServletResponse response) throws IOException { // 设置为null也可以,但这是因为我们的判断原理的原因 //SessionUtils.setUser(request, null); // 调用工具类里的注销方法 SessionUtils.remove(request); response.sendRedirect("blog_login.html"); }- 1
- 2
- 3
- 4
- 5
- 6
- 7
- 8
/** * 注销 * @param request */ public static void remove(HttpServletRequest request) { HttpSession session = request.getSession(false); if(session != null && session.getAttribute(ApplicationVariable.SESSION_KEY) != null) { session.removeAttribute(ApplicationVariable.SESSION_KEY); } }- 1
- 2
- 3
- 4
- 5
- 6
- 7
- 8
- 9
- 10
- 拦截器配置
- 拦截,不排除
2.4.3 前端代码
<a href="/user/logout">退出登录a>- 1
2.4.4 测试

3. 修改文章


预期效果就是:原有数据显示出来,供用户修改
3.1 页面初始化
3.1.1 约定前后端接口
后端:
- /art/get_art
- 根据uid和aid查询文章
- 返回文章信息
前端:
- /art/get_art
- post,json,aid
- 将数据投喂到网页
3.1.2 后端代码
- controller层
@RequestMapping("/get_art") public CommonResult getArt(@RequestBody ArticleInfo articleInfo, HttpServletRequest request) { // 1. 获取当前登录用户的id int uid = SessionUtils.getUser(request).getId(); // 2. 设置到文章对象里 articleInfo.setUid(uid); // 3. 查询文章 ArticleInfo art = articleService.getArt(articleInfo); // 4. 返回(查询不到一个对象,是null;如果查询不到对象集合,返回的是空集合) return art == null ? CommonResult.fail(-1, "查询不到!") : CommonResult.success(art); }- 1
- 2
- 3
- 4
- 5
- 6
- 7
- 8
- 9
- 10
- 11
- service层
public ArticleInfo getArt(ArticleInfo articleInfo) { return articleMapper.getArticleCheck(articleInfo); }- 1
- 2
- 3
- mapper层
@Select("select * from articleinfo where id = #{id} and uid = #{uid}") ArticleInfo getArticleCheck(ArticleInfo articleInfo);//检查权限的查询文章 @Select("select * from articleinfo where id = #{id}") ArticleInfo getArticle(ArticleInfo articleInfo);- 1
- 2
- 3
- 4
- 5
- 拦截器配置
- 拦截,不排除
3.1.3 前端代码
<script> var aid = getParamValue("aid"); // 1. 校验参数 function init() { if (aid == null || aid <= 0) { alert("非法参数!"); location.href = "myblog_lists.html"; return false; } // 2. 查询文章 jQuery.ajax({ url: "/art/get_art", method: "post", contentType: "application/json; charset=utf8", data: JSON.stringify({ id: aid, }), success: function (body) { if (body.code == 302) { location.href = body.msg; return false; } if (body.code == 200) { jQuery("#text").val(body.data.title); jQuery("#content").val(body.data.content); jQuery("#summary").val(body.data.summary);//用隐藏输入框保存摘要信息 } else { alert("发布失败:" + body.msg); } }, }); } init(); script>- 1
- 2
- 3
- 4
- 5
- 6
- 7
- 8
- 9
- 10
- 11
- 12
- 13
- 14
- 15
- 16
- 17
- 18
- 19
- 20
- 21
- 22
- 23
- 24
- 25
- 26
- 27
- 28
- 29
- 30
- 31
- 32
- 33
- 34

注意:
- 如果直接写代码的话,而不是调用方法,默认页面跟代码一起加载,而调用方法是页面加载后调用此init方法
- 如果不采取这种方式的话,会导致请求返回的页面,被拦截器拦下
- 为什么还是用json而不是用querystring直接发送请求
- 习惯吧,因为json比较通用,如果还需要其他信息,querystring不方便
- 修改页跟添加页是一样的,为什么不重用?
- 重用会导致一些没有必要的判断,不符合单一设计原则,麻烦/乱/开发不舒适,耦合度高…
3.1.4 测试

3.2 修改文章
3.2.1 约定前后端交互接口
后端:
- /art/update
- 接受文章数据
- 返回受影响行数
前端:
- /art/update
- post,json,上传文章数据
- 成功则跳转到我的博客列表页
3.2.2 后端代码
- controller层
@RequestMapping("/update") public CommonResult update(@RequestBody ArticleInfo articleInfo, HttpServletRequest request) { // 0. 确认用户 int uid = SessionUtils.getUser(request).getId(); articleInfo.setUid(uid); // 1. 校验参数 if(!APPUtils.hasLength(articleInfo.getContent(), articleInfo.getSummary(), articleInfo.getTitle())) { return CommonResult.fail(-1, "非法参数!"); } // 2. 修改 int rows = articleService.update(articleInfo); // 3. 返回 return CommonResult.success(rows); }- 1
- 2
- 3
- 4
- 5
- 6
- 7
- 8
- 9
- 10
- 11
- 12
- 13
- 14
- service层
public int update(ArticleInfo articleInfo) { return articleMapper.updateArticle(articleInfo); }- 1
- 2
- 3
- mapper层
- 必须是有权限才能修改
- 更新时间修改为当下
@Update("update articleinfo set content = #{content}, title = #{title}, summary = #{summary}, updatetime = now() where id = #{id} and uid = #{uid}") int updateArticle(ArticleInfo articleInfo);- 1
- 2
- 拦截器配置
- 拦截,不排除
3.2.3 前端代码

function update() { if (aid == null || aid <= 0) { alert("非法参数!"); location.href = "myblog_lists.html"; return false; } var title = jQuery("#text"); var content = jQuery("#content"); // 1. 参数校验 if (title.val().trim() == "") { alert("标题不能为空!"); title.focus(); return false; } if (content.val().trim() == "") { alert("正文不能为空!"); content.focus(); return false; } // 2. 输入摘要 var summary = prompt("请输入摘要:", jQuery("#summary").val()); if (summary.trim() == "") { return false; } jQuery("#summary").val(summary); // 3. 发送请求 jQuery.ajax({ url: "/art/update", method: "POST", contentType: "application/json; charset=utf8", data: JSON.stringify({ id: aid, title: title.val().trim(), content: content.val().trim(), summary: summary.trim(), }), // 3. 处理响应 success: function (body) { if (body.code == 302) { location.href = body.msg; return false; } if (body.code == 200 && body.data == 1) { location.href = "myblog_lists.html"; } else { alert("修改失败:" + body.msg); } }, }); }- 1
- 2
- 3
- 4
- 5
- 6
- 7
- 8
- 9
- 10
- 11
- 12
- 13
- 14
- 15
- 16
- 17
- 18
- 19
- 20
- 21
- 22
- 23
- 24
- 25
- 26
- 27
- 28
- 29
- 30
- 31
- 32
- 33
- 34
- 35
- 36
- 37
- 38
- 39
- 40
- 41
- 42
- 43
- 44
- 45
- 46
- 47
- 48
- 49
- 50
3.2.4 测试
4. 博客详情页
4.1 期待效果

- 根据是否登录,改变导航栏
- 根据querystring中的aid,显示对应的博文,和作者信息
- 每次访问成功,阅读量加1(本次显示是加1之前)
- 作者的文章总数通过后端计算
- 正文以html的样式渲染出来
这样的复杂查询可以用到并发编程:
- 【JavaEE】Callable接口(NO.6线程创建方法)-JUC的常见类-与线程安全有关集合类_s:103的博客-CSDN博客
- 用有返回值的线程创建方式(获取的时候若未结束,等待…)
4.2 约定前后端交换接口
后端:
- /art/detail
- 通过aid,找到文章
- 通过文章,uid找到作者,查询总文章数,通过aid修改文章阅读量
- 返回:
- “login”,true/false,true代表登录中
- “count”,文章数
- “user”,用户
- “art”,文章
前端:
- /art/detail
- json,aid
- 接受响应,投喂给代码
4.3 后端代码
- controller层
- 查询文章信息
- 校验文章是否存在
- 根据uid查询用户总文章数的任务
- 根据uid查询用户信息的任务
- 根据aid更新阅读量的任务
- 线程池执行任务
- 构造响应数据,并返回
@Autowired private ArticleService articleService; @Autowired private UserService userService; @RequestMapping("/detail") public CommonResult detail(@RequestBody ArticleInfo articleInfo, HttpServletRequest request) throws ExecutionException, InterruptedException { // 1. 查询文章信息 ArticleInfo art = articleService.getArtByAid(articleInfo); // 2. 校验文章是否存在 if(art == null) { return CommonResult.fail(-1, "非法参数!"); } // 3. 根据uid查询用户总文章数的任务 FutureTask<Integer> task1 = new FutureTask<Integer>(() -> { return articleService.getArtNumberByUid(art.getUid()); }); // 4. 根据uid查询用户信息的任务 FutureTask<UserInfo> task2 = new FutureTask<UserInfo>(() -> { return userService.getUserByUid(art.getUid()); }); // 5. 根据aid更新阅读量的任务 FutureTask<Integer> task3 = new FutureTask<Integer>(() -> { return articleService.incrementRCount(art.getId()); }); // 6. 线程池执行任务 APPUtils.THREAD_POOL.submit(task1); APPUtils.THREAD_POOL.submit(task2); APPUtils.THREAD_POOL.submit(task3); // 7. 构造响应数据,并返回 Map<String, Object> map = new HashMap<>(); map.put("login", SessionUtils.getUser(request) != null); map.put("count", task1.get()); map.put("user", task2.get()); map.put("art", art); return CommonResult.success(map); }- 1
- 2
- 3
- 4
- 5
- 6
- 7
- 8
- 9
- 10
- 11
- 12
- 13
- 14
- 15
- 16
- 17
- 18
- 19
- 20
- 21
- 22
- 23
- 24
- 25
- 26
- 27
- 28
- 29
- 30
- 31
- 32
- 33
- 34
- 35
- 36

- service层
ArticleService:
public int getArtNumberByUid(int uid) { return articleMapper.getArtNumberByUid(uid); } public int incrementRCount(int aid) { return articleMapper.incrementRCount(aid); }- 1
- 2
- 3
- 4
- 5
- 6
- 7
UserService:
public UserInfo getUserByUid(int uid) { return userMapper.getUserByUid(uid); }- 1
- 2
- 3
- mapper层
ArticleMapper:
@Select("select count(*) from articleinfo where uid=#{uid}") int getArtNumberByUid(@Param("uid") int uid); @Update("update articleinfo set rcount = rcount + 1 where id = #{aid}") int incrementRCount(@Param("aid") int aid);- 1
- 2
- 3
- 4
- 5
UserMapper:
@Select("select * from userinfo where id = #{uid}") UserInfo getUserByUid(@Param("uid") int uid);- 1
- 2
- 拦截器配置
- 排除拦截
- editor.md是个目录,要排除整个目录才对,不然后面渲染不上去,之前可以渲染是因为我们处于登录状态~
- 因为详情页不需要登录~

4.4 前端代码
- 导航栏

- 网页图标

- 右侧用户卡片

- 右侧文章信息

var aid = getParamValue("aid"); function init() { if (aid == null || aid <= 0) { alert("非法参数!"); return false; } jQuery.ajax({ method: "post", url: "/art/detail", contentType: "application/json; charset=utf8", data: JSON.stringify({ id: aid, }), success: function (body) { if (body.code == 200) { // 1. 导航栏显示 if (body.data.login == false) { jQuery("#icon").attr("href", "img/logo2.png"); jQuery(".navigation img").attr("src", " img/logo2.png"); jQuery(".navigation .space").css("width", "75%"); jQuery(".title").text("未登录"); jQuery("#add").hide(); jQuery("#logout").text("登录"); jQuery("#logout").attr("href", "blog_login.html"); } // 2. 文章数显示 jQuery("#count").text(body.data.count); // 3. 用户信息显示 jQuery(".card img").attr("src", body.data.user.photo); jQuery(".card h3").text(body.data.user.name); if (body.data.user.git.trim() != "") { jQuery(".card a").attr("href", body.data.user.git); } // 4. 文章信息显示 jQuery(".article h3").text(body.data.art.title); jQuery(".article .date").text( body.data.art.createtime + " 阅读量:" + body.data.art.rcount ); editormd.markdownToHTML("pc", { markdown: body.data.art.content, }); } else { alert("查看失败:" + body.msg); } }, }); } init();- 1
- 2
- 3
- 4
- 5
- 6
- 7
- 8
- 9
- 10
- 11
- 12
- 13
- 14
- 15
- 16
- 17
- 18
- 19
- 20
- 21
- 22
- 23
- 24
- 25
- 26
- 27
- 28
- 29
- 30
- 31
- 32
- 33
- 34
- 35
- 36
- 37
- 38
- 39
- 40
- 41
- 42
- 43
- 44
- 45
- 46
- 47
- 48
4.5 测试

文章到此结束!谢谢观看
可以叫我 小马,我可能写的不好或者有错误,但是一起加油鸭🦆!代码:myblog_system/src · 游离态/马拉圈2023年9月 - 码云 - 开源中国 (gitee.com)
-
相关阅读:
python面试题——版本管理工具GIT(二)
教你如何在 Windows 下让崩溃的 Python 程序自重启
【Linux】线程控制
博弈论算法的实现2
python基础简介
【正点原子STM32连载】第十一章 STM32时钟系统 摘自【正点原子】MiniPro STM32H750 开发指南_V1.1
phpstudy脚本编写 和sql注入编写
力扣(LeetCode)336. 回文对(2022.12.03)
【数据结构】栈与队列
总结90条实用的Python编程技巧
- 原文地址:https://blog.csdn.net/Carefree_State/article/details/132694221
