-
CentOS 7 迁移升级 RHEL8 衍生版操作指南
之前写过一篇 Centos迁移到AnolisOS 的教程,今天我们来讲讲从 Centos7 迁移到 RHEL 8 衍生的几个发行版。

本指南包含有关如何将 CentOS 7 升级到 RHEL8 的衍生发行版(例如 AlmaLinux、EuroLinux、CentOS Stream、Oracle Linux 和 Rocky Linux)的步骤。
在开始迁移前请做好系统快照备份,如果是生产环境尽量先在虚拟环境中进行迁移和验证。
版本查询
首先需要确定您的系统版本为 CentOS 7.x 才可以使用本指南。
[root@localhost ~]# cat /etc/redhat-release CentOS Linux release 7.9.2009 (Core)- 1
- 2
更新系统
完成升级需要更新到最新版的Centos7系统,因此首先需要对 CentOS7系统进行更新,然后重启。
yum update -y reboot- 1
- 2
安装Leapp
elevate-release项目使用 repo 和 GPG 密钥安装包。yum install -y http://repo.almalinux.org/elevate/elevate-release-latest-el7.noarch.rpm- 1
选择迁移系统版本
为您的系统选择相应的REHL8发行版进行迁移升级,当前支持以下选项:
# Alma Linux leapp-data-almalinux # Centos Stream leapp-data-centos # Euro Linux leapp-data-eurolinux # Oracle Linux leapp-data-oraclelinux # Rocky Linux leapp-data-rocky- 1
- 2
- 3
- 4
- 5
- 6
- 7
- 8
- 9
- 10
- 11
- 12
- 13
- 14
迁移检查
本实例选择
Rocky Linux作为迁移版本sudo yum install -y leapp-upgrade leapp-data-Rocky- 1
开始升级前检查,并且安装所需要的依赖.
验证报告
sudo leapp preupgrade- 1
报告文件会存放在
/var/log/leapp/目录中cd /var/log/leapp ls answerfile answerfile.userchoices archive leapp-preupgrade.log leapp-report.json leapp-report.txt- 1
- 2
- 3
问题修复
========================================================= UPGRADE INHIBITED ========================================================= Upgrade has been inhibited due to the following problems: 1. Inhibitor: Missing required answers in the answer file Consult the pre-upgrade report for details and possible remediation. ========================================================= UPGRADE INHIBITED ========================================================= Debug output written to /var/log/leapp/leapp-upgrade.log ========================================================= REPORT ========================================================= A report has been generated at /var/log/leapp/leapp-report.json A report has been generated at /var/log/leapp/leapp-report.txt ========================================================= END OF REPORT ========================================================= Answerfile has been generated at /var/log/leapp/answerfile- 1
- 2
- 3
- 4
- 5
- 6
- 7
- 8
- 9
- 10
- 11
- 12
- 13
- 14
- 15
- 16
- 17
- 18
- 19
- 20
- 21
- 22
- 23
- 24
- 25
- 26
- 27
出现以上错误需要执行下列命令进行修复
sudo rmmod pata_acpi echo PermitRootLogin yes | sudo tee -a /etc/ssh/sshd_config sudo leapp answer --section remove_pam_pkcs11_module_check.confirm=True- 1
- 2
- 3
开始迁移
一切问题解决后准备就绪,执行下列命令开始升级迁移
leapp upgrade- 1
重启系统
安装需要耐心等等,速度取决于您的网速,安装完成所有的包后出现以下提示重启系统。
A reboot is required to continue. Please reboot your system. Debug output written to /var/log/leapp/leapp-upgrade.log ========================================================= REPORT ========================================================= A report has been generated at /var/log/leapp/leapp-report.json A report has been generated at /var/log/leapp/leapp-report.txt ========================================================= END OF REPORT ========================================================= Answerfile has been generated at /var/log/leapp/answerfile- 1
- 2
- 3
- 4
- 5
- 6
- 7
- 8
- 9
- 10
- 11
- 12
- 13
- 14
- 15
- 16
- 重启系统继续升级
reboot- 1
系统重启后进入引导,选择
ELevate-Upgrade-Initramfs项继续升级
迁移完成
升级迁移完成后我们可以正式登录系统了

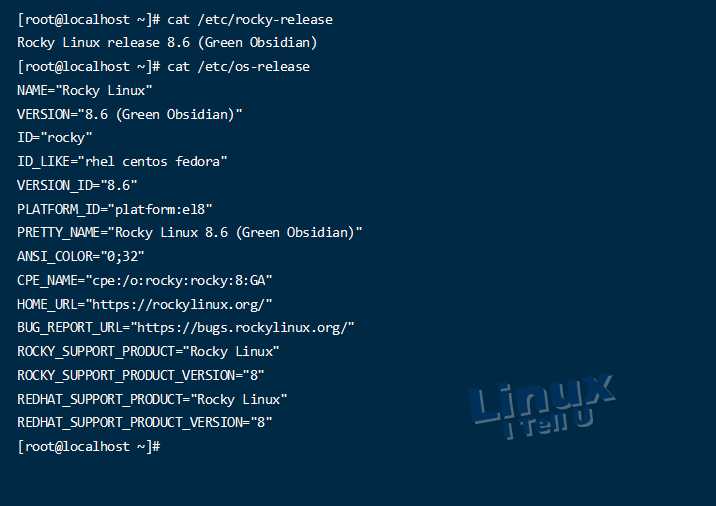
查看系统版本
之前选择了迁移
Rocky Linux我们可以使用以下命令查看版本信息。cat /etc/rocky-release cat /etc/os-release- 1
- 2
至此迁移升级完成,我们检查一下是否还有残留的 Centos 的包
rpm -qa | grep centos rpm -qf | grep el7- 1
- 2
-
相关阅读:
C++函数模板学习笔记
Git Flow,Git团队协作最佳实践
面向对象和面向过程的区别
pandas read_excel 参数及使用
1.5 - 逻辑运算
芯片调试记录,芯片频率,添加摄像头,CAN,SPI
双线路捆绑
JAXB:用XmlElement注解复杂类型的Java属性,来产生多层嵌套的xml元素
Java之Map集合的详细解析
vue面试相关知识
- 原文地址:https://blog.csdn.net/no1xium/article/details/127646938