-
MyBatis查询数据库
写在前面
我们前面学习了Spring那些框架,所以服务器端的逻辑处理已经学习的差不多了,而我们一个项目除了业务逻辑,还有就是最重要的就是前端传来的数据我们要通过数据库进行存储!而我们数据库和java代码进行连接的就是JDBC数据库接口!不过这样连接数据库的方式比较繁琐!而今天我们就学习MyBatis框架,简化数据库连接开发!
MyBatis定义
MyBatis是一款优秀的持久层框架,支持自定义SQL,存储过程以及高级映射! MyBatis几乎去除了所有JDBC代码及其参数的设置和获取结果集的工作!MyBatis可以通过简单的xml或注解来配置和映射原始类型,接口和java对象为数据库记录!
也就是说MyBatis是更简单完成程序和数据库交互的工具,更简单读取和操作数据库工具!MyBatis作用
作为我们后端程序,我们程序由最重要的两部分组成!
- 后端程序
- 数据库

我们来回顾一下我们传统的java程序连接数据库代码操作!
- 创建数据库连接池
DataSource - 通过
DataSource数据库连接池获取数据库连接Connection - 编写要执行的
SQL含有占位符等 - 通过
Connection和SQL获取数据库命令操作对象Statement - 替换占位符: 指定要替换的数据库字段类型,占位符索引以及要替换的值
- 使用
Statement执行SQL语句 - 查询操作:返回结果集
ResultSet,更新操作:返回更新的数据 - 处理结果集
- 释放资源
import com.mysql.jdbc.jdbc2.optional.MysqlDataSource; import javax.sql.DataSource; import java.sql.Connection; import java.sql.ResultSet; import java.sql.SQLException; import java.sql.Statement; public class TestJDBC { //volatile 保证内存可见性 static volatile DataSource dataSource; static String URL,User,Password; public TestJDBC(String URL,String User,String Password){ this.URL = URL; this.User = User; this.Password = Password; } public static Connection getConnection() throws SQLException { //单例模式! if (dataSource == null) { //为空才会进来,不然直接返回连接即可 //这里同一时刻可能有很多线程进入这里等待! //所以当一个线程进去后要再判断一下是否已经有线程创建了对象 synchronized (TestJDBC.class) { //拿到锁后,要判断是否已经之前的线程创建了对象! if (dataSource == null) { dataSource = new MysqlDataSource(); ((MysqlDataSource) dataSource).setURL(URL); ((MysqlDataSource) dataSource).setUser(User); ((MysqlDataSource) dataSource).setPassword(Password); } } } return dataSource.getConnection(); } public static void close(Connection connection, Statement statement, ResultSet resultSet) throws SQLException { //注意顺序! if(resultSet!=null){ resultSet.close(); } if(statement!=null){ statement.close(); } if(connection!=null){ connection.close(); } } }- 1
- 2
- 3
- 4
- 5
- 6
- 7
- 8
- 9
- 10
- 11
- 12
- 13
- 14
- 15
- 16
- 17
- 18
- 19
- 20
- 21
- 22
- 23
- 24
- 25
- 26
- 27
- 28
- 29
- 30
- 31
- 32
- 33
- 34
- 35
- 36
- 37
- 38
- 39
- 40
- 41
- 42
- 43
- 44
- 45
- 46
- 47
import java.sql.*; public class Main{ public static void main(String[] args) throws SQLException { //获取到数据库连接对象! String URL = "jdbc:mysql://127.0.0.1:3306/java_2022?characterEncoding=utf8&useSSL=false"; String User = "root"; String Password ="123456"; TestJDBC testJDBC = new TestJDBC(URL,User,Password); Connection connection = TestJDBC.getConnection(); //编写SQL String sql = "select * from student where class_id=?"; //获取Statement对象 PreparedStatement statement = connection.prepareStatement(sql); //输入占位符数据,查询 statement.setString(1,"101"); //获取结果集 ResultSet resultSet = statement.executeQuery(); //查询class_id为 101的学生结果! while(resultSet.next()){ String name = resultSet.getString(1); String class_id = resultSet.getString(2); System.out.println("name:"+name+" class_id:"+class_id); } } }- 1
- 2
- 3
- 4
- 5
- 6
- 7
- 8
- 9
- 10
- 11
- 12
- 13
- 14
- 15
- 16
- 17
- 18
- 19
- 20
- 21
- 22
- 23
- 24
- 25
- 26


显然这种方式十分繁琐!有很多重复的步骤!
我们学习MyBatis数据库操作将会大大简化!MyBatis学习重点
- 配置MyBatis开发环境
- 使用MyBatis模式和语法操作数据库
第一个MyBatis查询
创建数据库
我们的MyBatis是服务于数据库的,如果我们的数据库都没有,那还算个屁的MyBatis项目!
-- 创建数据库 create database if not exists mycnblog; -- 选中数据库 use mycnblog; -- 创建用户信息表 create table if not exists userinfo(id int(11) primary KEY, usename varchar(100) unique, password varchar(1024), photo varchar(1024), createtime datetime default CURRENT_TIMESTAMP, updatetime datetime default CURRENT_TIMESTAMP, state int(11) default 1 );- 1
- 2
- 3
- 4
- 5
- 6
- 7
- 8
- 9
- 10
- 11
- 12
- 13
- 14
- 15
引入MyBatis框架依赖
首先我们需要创建以SpringBoot项目,然后引入MyBatis框架依赖
如果你已经创建好了项目,而又要进行添加框架依赖,你可以在IDEA中,下载
Edit Starters插件,然后进行添加!

我们这里需要添加2个框架依赖支持,一个是
Mybatis框架依赖支持,一个是MySQL数据库的依赖!配置连接字符串和Mybatis
- 数据库连接字符串设置(数据库的地址,用户名,密码信息等!)
- Mybatis的xml文件配置
配置连接字符串
我们在
application.ymlSpringBoot配置文件中进行配置即可# 配置连接数据库的地址用户名密码,数据库类型! spring: datasource: url: jdbc:mysql://127.0.0.1:3306/java_2022?characterEncoding=utf8&useSSL=false username: root password: 123456 driver-class-name: com.mysql.cj.jdbc.Driver- 1
- 2
- 3
- 4
- 5
- 6
- 7
配置MyBatis中的xml路径
# 配置MyBatis中的xml路径,所有MyBatis的xml文件都在这个配置下! mybatis: mapper-locations: classpath:mybatis/**Mapper.xml- 1
- 2
- 3

也是我们后面关于MyBatis的xml文件都会放在 mybatis中!
添加业务代码
如果一个用户要获取数据库中的数据大致的业务逻辑如下!

添加实体类
假如我们需要进行登入功能,那我们肯定要先有一个用户实体
这里的用户实体要和数据库中的表对应!
package com.example.demo.demo; import lombok.Data; import java.sql.Timestamp; @Data //setter,get方法! public class User { int id; String username; String password; String photo; Timestamp cretetime; Timestamp updatetime; int state; }- 1
- 2
- 3
- 4
- 5
- 6
- 7
- 8
- 9
- 10
- 11
- 12
- 13
- 14
- 15
- 16
添加UserMapper.xml
数据持久层的实现,Mybatis的固定xml格式:
DOCTYPE mapper PUBLIC "-//mybatis.org//DTD Mapper 3.0//EN" "http://mybatis.org/dtd/mybatis-3-mapper.dtd"> <mapper namespace="com.example.demo.mapper.UserMapper"> mapper>- 1
- 2
- 3
- 4
- 5
- 6
UserMapper.xml查询所有用户SQL:
DOCTYPE mapper PUBLIC "-//mybatis.org//DTD Mapper 3.0//EN" "http://mybatis.org/dtd/mybatis-3-mapper.dtd"> <mapper namespace="com.example.demo.mapper.UserMapper"> <select id="getAll" resultType="com.example.demo.model.User"> select * from userinfo select> mapper>- 1
- 2
- 3
- 4
- 5
- 6
- 7
- 8
- 9
- 10
- 11
namespace属性,表示命名空间,值为mapper接口的全限定名,包括全包名.类名。
查询标签:是用来执行数据库的查询操作的
id:是和 Interface(接口)中定义的方法名称一样的,表示对接口的具体实现方法。
resultType:查询返回的数据类型,也就是我们刚定义的实体类型添加Service层代码
package com.example.demo.service; import com.example.demo.mapper.UserMapper; import com.example.demo.model.User; import org.springframework.stereotype.Service; import javax.annotation.Resource; import java.util.List; @Service public class UserService { @Resource //注入usermapper private UserMapper userMapper; public List<User> getAll(){ return userMapper.getAll(); } }- 1
- 2
- 3
- 4
- 5
- 6
- 7
- 8
- 9
- 10
- 11
- 12
- 13
- 14
- 15
- 16
- 17
添加Controlle层代码
package com.example.demo.controller; import com.example.demo.model.User; import com.example.demo.service.UserService; import org.springframework.stereotype.Controller; import org.springframework.web.bind.annotation.RequestMapping; import org.springframework.web.bind.annotation.ResponseBody; import javax.annotation.Resource; import java.util.List; @Controller @ResponseBody @RequestMapping("/user") public class UserController { @Resource private UserService userService; @RequestMapping("/getAll") public List<User> getAll(){ return userService.getAll(); } }- 1
- 2
- 3
- 4
- 5
- 6
- 7
- 8
- 9
- 10
- 11
- 12
- 13
- 14
- 15
- 16
- 17
- 18
- 19
- 20
- 21
- 22
运行代码,然后进行验证结果!

我们查询到2条数据和数据库中的数据一样!

增删改查操作
我们学完第一个MyBatis查询,已经知道了如何通过MyBatis进行更简单的查询操作!其他增删改操作也类似!
不同的操作对应的xml文件有不同的标签:
标签: 查询语句
增加操作
mapper接口
//添加用户信息 public Integer addUser(User user);- 1
- 2
xml实现
<insert id="addUser"> insert into userinfo(username,password,photo,state) values(#{username},#{password},#{photo},1) insert>- 1
- 2
- 3
- 4
- 5
注意:
这里的#{}里面的属性名要和你User下的属性名一一对应!
这里有点类似之前JDBC那一套的占位符的感觉
这里的返回值可以不写,因为返回是Integer类型默认可以省略!
Service层代码public Integer addUser(User user){ return userMapper.addUser(user); }- 1
- 2
- 3
Controller层代码
@RequestMapping("/add") public User addUser(User user){ return user; }- 1
- 2
- 3
- 4
运行验证:

我们查询数据库信息,可以看到有确实插入了这条数据

删除操作
UserMapper接口
//删除用户信息 public Integer deleteByName(String username);- 1
- 2
xml实现
<delete id="deleteByName"> delete from userinfo where username=#{username} delete>- 1
- 2
- 3
- 4
Service层代码
public Integer deleteByName(String username){ return userMapper.deleteByName(username); }- 1
- 2
- 3
Controller层代码
- 1
运行验证
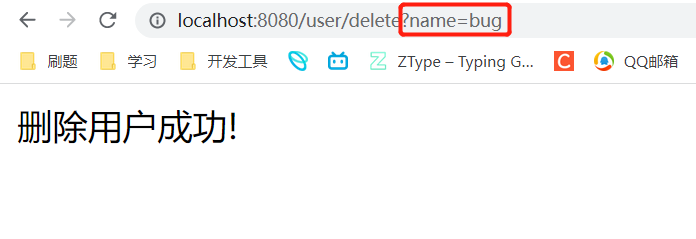
我们查看日志

查询数据库信息!
修改操作
UserMapper接口
//通过用户id修改用户密码! public Integer updateByName(Integer id,String password);- 1
- 2
xml实现
<update id="updateByName"> update userinfo set password=#{password} where id=#{id} update>- 1
- 2
- 3
- 4
Service层代码
public Integer updateById(Integer id,String password){ return userMapper.updateById(id,password); }- 1
- 2
- 3
Controller层代码
@RequestMapping("/update") public String updateById(@RequestParam Integer id,@RequestParam String password){ if(userService.updateById(id,password)==1){ return "修改密码成功!"; } return "修改密码失败!"; }- 1
- 2
- 3
- 4
- 5
- 6
- 7
验证结果:


查询操作
刚刚的只是简单的查询操作!
而我们的查询操作往往是要多个表一起,是十分复杂的!参数 #{} 和 ${}区别
#{}: 预编译处理${}:字符直接替换
预编译处理指的是MyBatis在处理#{}时,会将SQL中的#{} 替换成?号,使用
PreparedStatement来赋值
直接替换:就是在Mybatis处理${}替换成变量的值!预编译处理和字符串替换的区别故事(头等舱和经济舱乘机分离的故事)
预处理就好使头等舱乘客先登机,然后关闭头等舱,后面才是经济舱乘客登机,这样经济舱就去不了头等舱,而直接替换就是头等舱和经济舱一起登机,云龙混杂,很可能经济舱用户来到头等舱!
参数直接替换,它的问题是可能会带来越权查询和操作数据等问题,比如面会讲的 SQL 注入问题
${}优点
如果我们传入某个sql时,通过直接替换即可!而预编译就会解析成字符串,会自动加上引号,就不行了!select * from userinfo order by id ${sort}- 1
使用
${sort}可以实现排序查询,而使用#{sort}就不能实现排序查询了,因为当使用#{sort}查询时,如果传递的值为String则会加单引号,就会导致sql错误。SQL注入问题
<select id="isLogin" resultType="com.example.demo.model.User"> select * from userinfo where username='${name}' and password='${pwd}' </select>- 1
- 2
- 3
@RequestMapping("/isLogin") public User isLogin(@RequestParam String name,@RequestParam String password){ return userService.isLogin(name,password); }- 1
- 2
- 3
- 4
当我们密码传入为
'or 1=1 and id = '2时!
我们居然查询成功了!


因为这里是直接替换,我们将SQL替换一下就会发现问题所在!
替换后的SQL语句变成了如下:select * from where username = 'admin' and password = ''or 1=1 and id = '2'- 1
这样就阴差阳错的查询到了
id=2的用户信息!查询尽量用#{}
Like 查询
like使用#{}报错<select id="findUserByName3" resultType="com.example.demo.model.User"> select * from userinfo where username like '%#{username}%' </select>- 1
- 2
- 3
预编译后SQL变成如下:
select * from userinfo where username like '%'usernane'%';
这个又不能直接使用${}的!所以考虑MySQL下的内置函数concat()处理!select id="findUserByName3" resultType="com.example.demo.model.User"> select * from userinfo where username like concat('%',#{username},'%'); </select>- 1
- 2
- 3
多表查询
我们知道当我们进行增删改操作的时候,结果是返回受影响的行数,所以可以不设置返回值!
而进行查询操作一定要设置返回的类型,否则会报错!因为我们查询的结果一般都是含有多列是一组对象集合!返回类型reslutType
在通常情况下,我们返回类型通过
ResultType设置即可!<select id="getAll" resultType="com.example.demo.model.User"> select * from userinfo select>- 1
- 2
- 3
优点使用方便直接定义到某个实体类即可!
返回类型resultMap
使用场景:
- 字段名称和程序中的属性名称不同,可使用resultMap进行映射!
- 一对一或一对多关系可以使用resultMap映射并且查询数据
字段名和属性名不同

我们通过resultType进行查询操作时
因为我们程序中的字段和数据库中的字段信息不匹配所以数据库中的password无法映射到对象pwd属性!

通过resultMap实行映射
我们先给程序中的类和数据库中表建立映射关系!通过xml配置文件进行配置即可<resultMap id="baseMap" type="com.example.demo.model.User"> <id column="id" property="id"></id> <id column="username" property="username"></id> <id column="password" property="pwd"></id> </resultMap> <select id="getAll" resultMap="com.example.demo.mapper.UserMapper.baseMap"> select * from userinfo </select>- 1
- 2
- 3
- 4
- 5
- 6
- 7
- 8
resultMap中的id:是映射关系标识,等下进行查询如果要使用这个映射关系就需要用到这个标识!type:我们需要映射的类!column中的id:这里是数据库中的字段名!property:类中的属性名! 通过这样一一映射,就整张表映射起来了,名称一样可以不进行映射!- 然后我们在查询的
resultMap返回刚刚的映射标识所在的位置即可!

注意这里baseMap的位置是我们要实现的接口位置,然后加上标识!
然后验证结果

一对一映射
假如我们需要通过用户信息查询该用户的文章信息!
这里就要进行2张表的联系!
这是这些表的信息!如果我们要通过用户信息表查询到文章表!
直接查询是获取不到结果的!例如下面的文章类
这里有一个属性是User类! 如果我们直接单表查询文章表,肯定查询不到User类型的值!所以我们要通过resultMap进行映射处理!package com.example.demo.model; import lombok.Data; import java.time.LocalDateTime; @Data public class ArticleInfo { int id; String title; String content; LocalDateTime createtime; LocalDateTime updatetime; int uid; int rcount; int state; User user; }- 1
- 2
- 3
- 4
- 5
- 6
- 7
- 8
- 9
- 10
- 11
- 12
- 13
- 14
- 15
- 16
- 17
将
ArticleInfo和表进行映射!<resultMap id="BaseMap" type="com.example.demo.model.ArticleInfo"> <id property="id" column="id">id> <result property="title" column="title">result> <result property="content" column="content">result> <result property="createtime" column="createtime">result> <result property="updatetime" column="updatetime">result> <result property="uid" column="uid">result> <result property="rcount" column="rcount">result> <result property="state" column="state">result> <association property="user" resultMap="com.example.demo.mapper.UserMapper.baseMap" columnPrefix="u_"> association> resultMap> <select id="getAll" resultMap="BaseMap"> select a.*,u.username u_username from articleinfo a left join userinfo u on a.uid=u.id select>- 1
- 2
- 3
- 4
- 5
- 6
- 7
- 8
- 9
- 10
- 11
- 12
- 13
- 14
- 15
- 16
- 17
- 18
这里唯一的不同就是:
user和表的映射!
property:是当前表的属性值
resultMap:需要映射到的映射标识,因为我们已经映射了User表!
columnPrefix:为User查询的信息添加前缀,为了区分当前的ArticleInfo有同名的字段,绑定一对一对象时,是通过columnPrefix+assocation.resultMap.column来映射结果集字符的,这里assocation.resultMap.column是指columnPrefix不能省略!进行查询验证结果!

一对多映射
一对多映射也是需要使用
<resultMap id="Base" type="com.example.demo.model.User"> <id property="id" column="id">id> <id property="username" column="usename">id> <id property="pwd" column="password">id> <id property="photo" column="photo">id> <collection property="users" resultMap="com.example.demo.mapper.UserMapper.BaseMap" columnPrefix="a_"> collection> resultMap> <select id="getUserById" resultMap="Base"> select u.*,a.title a_title from userinfo u left join articleinfo a on u.id = a.uid where u.id = #{id} select>- 1
- 2
- 3
- 4
- 5
- 6
- 7
- 8
- 9
- 10
- 11
- 12
- 13
- 14
- 15
验证结果:

单元测试
我们发现我们测个数据库的接口很少麻烦,需要通过写多层代码,然后还有通过postman工具,进行操作验证结果!
此时我们介绍一个更简单的测试数据库接口的方法,单元测试- 可以非常简单直观快速的测试某一功能是否正确
- 使用单元测试可以帮我们在打包的时候发现一些问题!因为在打包之前所有单元测试都必须通过,否则打包失败!
- 使用单元测试,在测试功能的时候可以不污染数据库,也就是可以不对数据库任何修改的情况下进行测试
添加单元测试的依赖

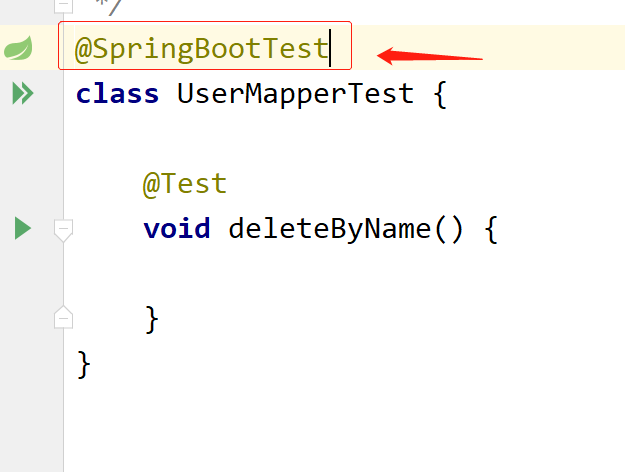
一般SpringBoot项目都会内置这个依赖!生成单元测试的类


对应的Test位置就生成了一个测试类!

配置单元测试的类添加@SpringBootTest注解,添加单源测试的业务代码
这里的代码编写和我们正常的代码一样就是先配置属性,调用这个接口方法!

运行结果如下:
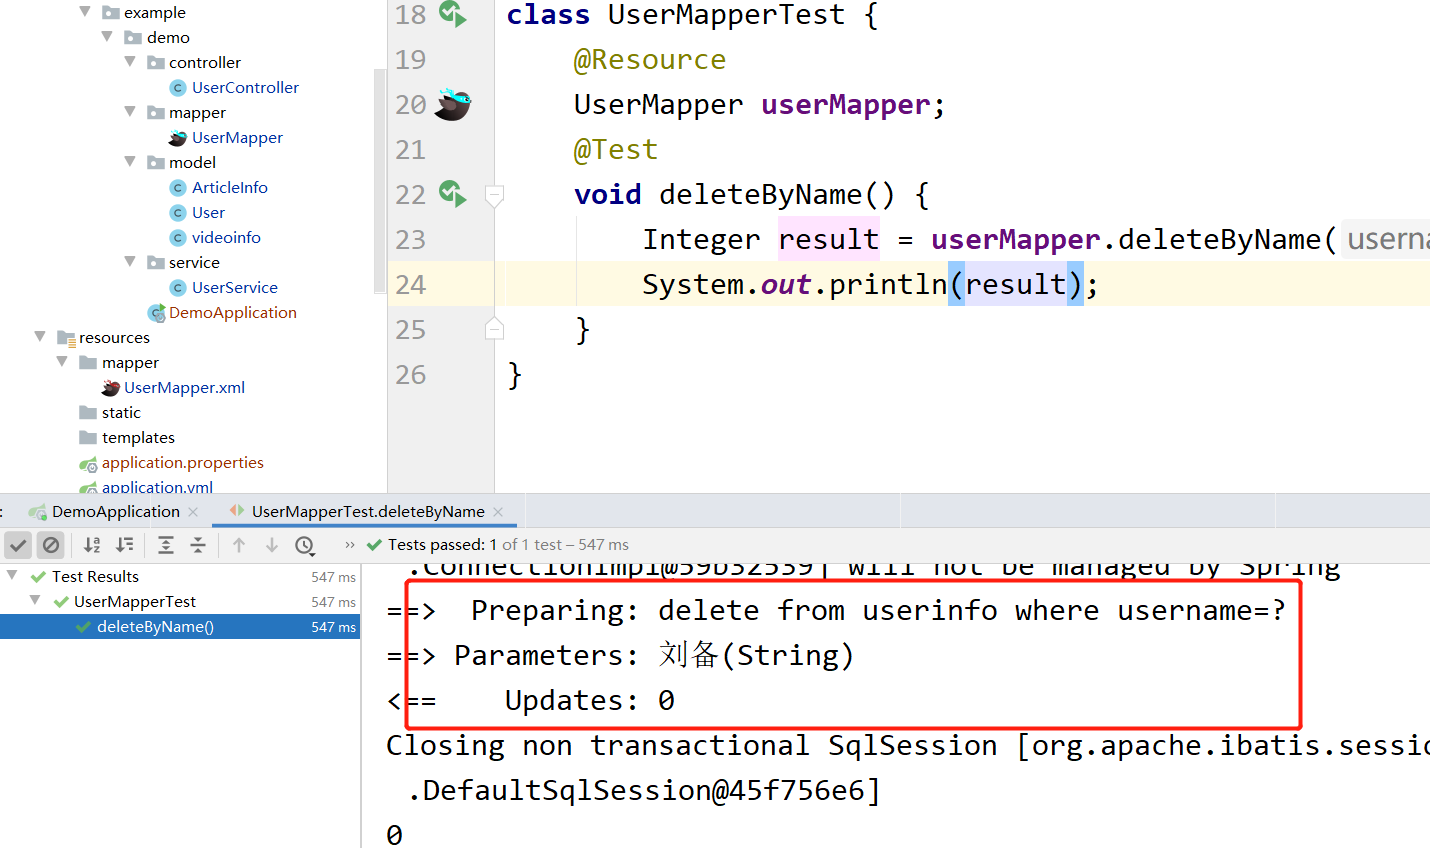
可以很直观的看到结果!简单断言说明
刚刚不是说不污染数据库,还有啥没测试过,就会报错嘛,咱也没看到报错呀!
我们需要用到断言进行辅助

添加@Transactional注解实现回滚!

我们虽然进行成功了这条测试!但是我们的数据库中的信息没有改变,这就是@Transaction注解的作用类似于事务回滚达到不污染数据库!

动态SQL使用
动态SQL是MyBatis的强大之处,能够完成不同条件的SQL拼接!
这个
if标签的使用场景,就是在一些注册界面中,有些字段是必填的,而有些字段信息是非必填的,而这样的情况我们要将注册信息保存的数据库中不可能写多个SQL接口吧,这样的排列组合这么多,这不得类似,所以就有了if标签实现动态SQL<insert id="addArticle"> insert into articleinfo (<if test="id != null"> id, if> title, <if test="content != null"> content, if> uid )values( <if test="id != null"> #{id}, if> #{title}, <if test="content != null"> #{content}, if> #{uid} ) insert>- 1
- 2
- 3
- 4
- 5
- 6
- 7
- 8
- 9
- 10
- 11
- 12
- 13
- 14
- 15
- 16
- 17
- 18
- 19
- 20
- 21
- 22
- 23
测试
@Test void addArticle() { ArticleInfo article = new ArticleInfo(); article.setTitle("C++学习"); article.setUid(1); article.setContent("STL"); Integer result = userMapper.addArticle(article); Assertions.assertEquals(1,result); }- 1
- 2
- 3
- 4
- 5
- 6
- 7
- 8
- 9

这样就实现了多态SQL!在i
f标签中一般都是一个选填项,如果有多个字段选填一般选择
结合prefix: 表示整个语句块,以prefix值作为前缀suffix:表示整个语句块,以suffix作为后缀prefixOverrides:表示整个语句块要去除的前缀suffixOverrides:表示整个语句块要去除的后缀
<!--添加文章!--> <insert id="addArticle"> insert into articleinfo <!--我们可以将括号放在trim 的prefix suffix中,然后通过prefixOverrides 去掉前后无效空格--> <trim prefix="(" suffix=")" prefixOverrides="," suffixOverrides=","> <if test="id != null"> ,id, </if> <if test="title !=null"> title, </if> <if test="content != null"> content, </if> <if test="uid != null"> uid, </if> </trim> values <trim prefix="(" suffix=")" prefixOverrides="," suffixOverrides=","> <if test="id != null"> ,#{id}, </if> <if test="title != null"> #{title}, </if> <if test="content != null"> #{content}, </if> <if test="uid != null"> #{uid}, </if> </trim> </insert>- 1
- 2
- 3
- 4
- 5
- 6
- 7
- 8
- 9
- 10
- 11
- 12
- 13
- 14
- 15
- 16
- 17
- 18
- 19
- 20
- 21
- 22
- 23
- 24
- 25
- 26
- 27
- 28
- 29
- 30
- 31
- 32
- 33
- 34

当我们进行用户查询时,如果输入了条件限制,就需要添加where标签,如果没有限制那就查询整张表的内容,所以这里的
where可以通过<select id="getAll" resultMap="com.example.demo.mapper.UserMapper.baseMap"> select * from userinfo <where> <if test="username!=null"> username = #{username} </if> </where> </select>- 1
- 2
- 3
- 4
- 5
- 6
- 7
- 8

这里可以通过prefix="where",prefixOverrides="and"代替!<update id="updateAritcle"> update articleinfo <set> <if test="title!= null"> title = #{title}, </if> <if test="content!= null"> content= #{content} </if> <where> <if test="id!=null"> id = #{id} </if> <if test="uid!=null"> and uid = #{uid} </if> </where> </set> </update>- 1
- 2
- 3
- 4
- 5
- 6
- 7
- 8
- 9
- 10
- 11
- 12
- 13
- 14
- 15
- 16
- 17
- 18
- 19

这里的set标签也可以用对集合进行遍历,使用该标签!
collection:判定方法参数中的集合,如List,Set,Map或者数组item:遍历时的每一个对象open:语句块开始的字符串close:语句块结束的字符串separator:每次遍历时的间隔字符串
例如通过多个文章id删除文章!
delete id="deleteByIds"> delete from articleinfo where id in <foreach collection="list" item="id" open="(" close=")" separator=","> #{id} foreach> delete>- 1
- 2
- 3
- 4
- 5
- 6
删除5到10

@Test void deleteByIds() { List<Integer> table = new LinkedList<>(); for (int i = 5; i <=10; i++) { table.add(i); } userMapper.deleteByIds(table); }- 1
- 2
- 3
- 4
- 5
- 6
- 7
- 8


-
相关阅读:
Apache Shiro反序列化(CVE-2016-4437)漏洞复现
CAPL如何实现27服务解锁
【Java 基础篇】Java线程同步:Lock接口详解
Linux环境下搭建本地git服务和客户端(超级详细)
千峰商城-springboot项目搭建-81-订单提交及支付-qrcode生成二维码
echarts折线图流动特效的实现(非平滑曲线)
Python自动化办公(二) —— 查看文件夹中的PDF文件数量
深度学习基于python+TensorFlow+Django的花朵识别系统
决策树(分类决策树)
解决docker安装mysql的乱码问题
- 原文地址:https://blog.csdn.net/weixin_52345071/article/details/126795325
