-
Serverless实战——2分钟,教你用Serverless每天给女朋友自动发土味情话
原文链接:https://developer.aliyun.com/article/981268
演示视频:https://developer.aliyun.com/live/249772
一、Serverless简介
Serverless,中文意思是“无服务器”,所谓的无服务器并非是说不需要依靠服务器等资源,而是说开发者再也不用过多考虑服务器的问题,可以更专注在产品代码上,同时计算资源也开始作为服务出现,而不是作为服务器的概念出现。
1.Serverless架构
主要包含两部分:Baas和Faas,通常位于云端,使用时不需要关注最底层的服务器。
Baas(后端即服务:Backend as a Service)包括对象存储、云数据库、API网关、消息推送等。
Faas(函数即服务:Functions as a Service)对计算能力进行了抽象,可以在无需管理服务器的情况下响应事件。2.Serverless三大应用场景
场景一:事件触发场景,即有事件触发时才会执行。
场景二:流量突发场景,遇到突发大流量情况时,Serverless架构下按需加载,弹性伸缩,节省资源,负载均衡。
场景三:大数据处理场景,用户只需要上传核心代码到函数计算,就可以快速完成整个工作。3.Serverless的优势
传统架构下,面对大流量场景,需要增加机器或者对机器升级,运维较为困难。面对高峰和低谷,无法做到按需使用,成本较高。
Serverless架构下,开发者只需专注代码开发,无需在各个云资源控制台手动开通服务和配置管理,并能够根据业务请求自动进行弹性伸缩;支持用户按需付费,成本较低;开发周期快,很大程度上提升了开发、部署的效率。
具体可以查看阿里云相关文档 https://developer.aliyun.com/group/serverless二、Python实现发送邮件
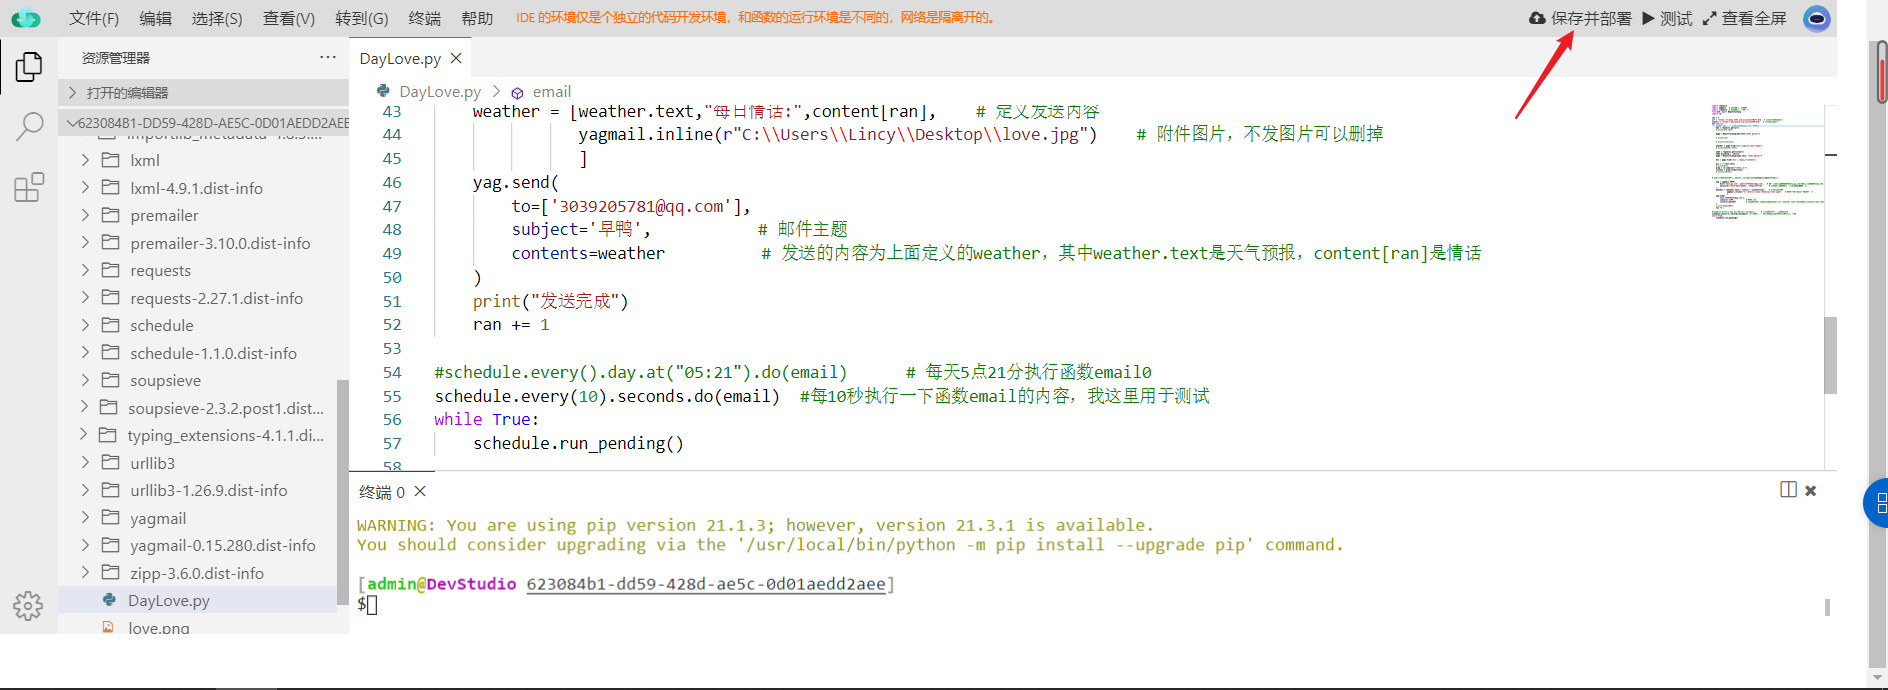
import requests import yagmail # 此模块用于发邮件 import schedule # 此模块用于计划任务 from bs4 import BeautifulSoup import re ran = 0 url = 'https://tianqi.2345.com/cixian1d/70177.htm' # 定义天气预报的url loveurl = 'https://www.guaze.com/juzi/23389.html' # 定义情话的url def email(): global ran # 将ran变量声明为全局变量 web = requests.get(url) # print(web.text) page = BeautifulSoup(web.text,"html.parser") # print(ran) # print(love[ran]) weather = page.find("div",class_="real-today") # print(weather.text) web2 = requests.get(loveurl) web2.encoding = 'gb2312' page = BeautifulSoup(web2.text, "html.parser") div = page.find('div', class_="content") div = str(div.text) # print(div) grep = re.compile(r"\d+、(.*)") content = grep.findall(div) # print(content) # email函数内的内容是爬取天气和情话的,具体的地址天气你可以更换url yag = yagmail.SMTP( host='smtp.qq.com', user='xxxxxxx@qq.com', # 如过用的是qq邮箱就写smtp.qq.com,如果是163就写smtp.163.com password='xhaztrwpjffpbdhh', smtp_ssl=True # 授权码在qq邮箱里开启smtp就会生成一个 ) weather = [weather.text,"每日情话:",content[ran], # 定义发送内容 yagmail.inline(r"/.love.jpg") # 附件图片,不发图片可以删掉 ] yag.send( to=['xxxxxxxxx@qq.com'], subject='早鸭', # 邮件主题 contents=weather # 发送的内容为上面定义的weather,其中weather.text是天气预报,content[ran]是情话 ) print("发送完成") ran += 1 schedule.every().day.at("05:21").do(email) # 每天5点20分执行函数email0 #schedule.every(10).seconds.do(email) #每10秒执行一下函数email的内容,我这里用于测试 while True: schedule.run_pending()- 1
- 2
- 3
- 4
- 5
- 6
- 7
- 8
- 9
- 10
- 11
- 12
- 13
- 14
- 15
- 16
- 17
- 18
- 19
- 20
- 21
- 22
- 23
- 24
- 25
- 26
- 27
- 28
- 29
- 30
- 31
- 32
- 33
- 34
- 35
- 36
- 37
- 38
- 39
- 40
- 41
- 42
- 43
- 44
- 45
- 46
- 47
- 48
- 49
- 50
- 51
- 52
- 53
- 54
- 55
- 56
- 57
三、部署到阿里云Serverless,实现自动发送
1.登录到阿里云首页
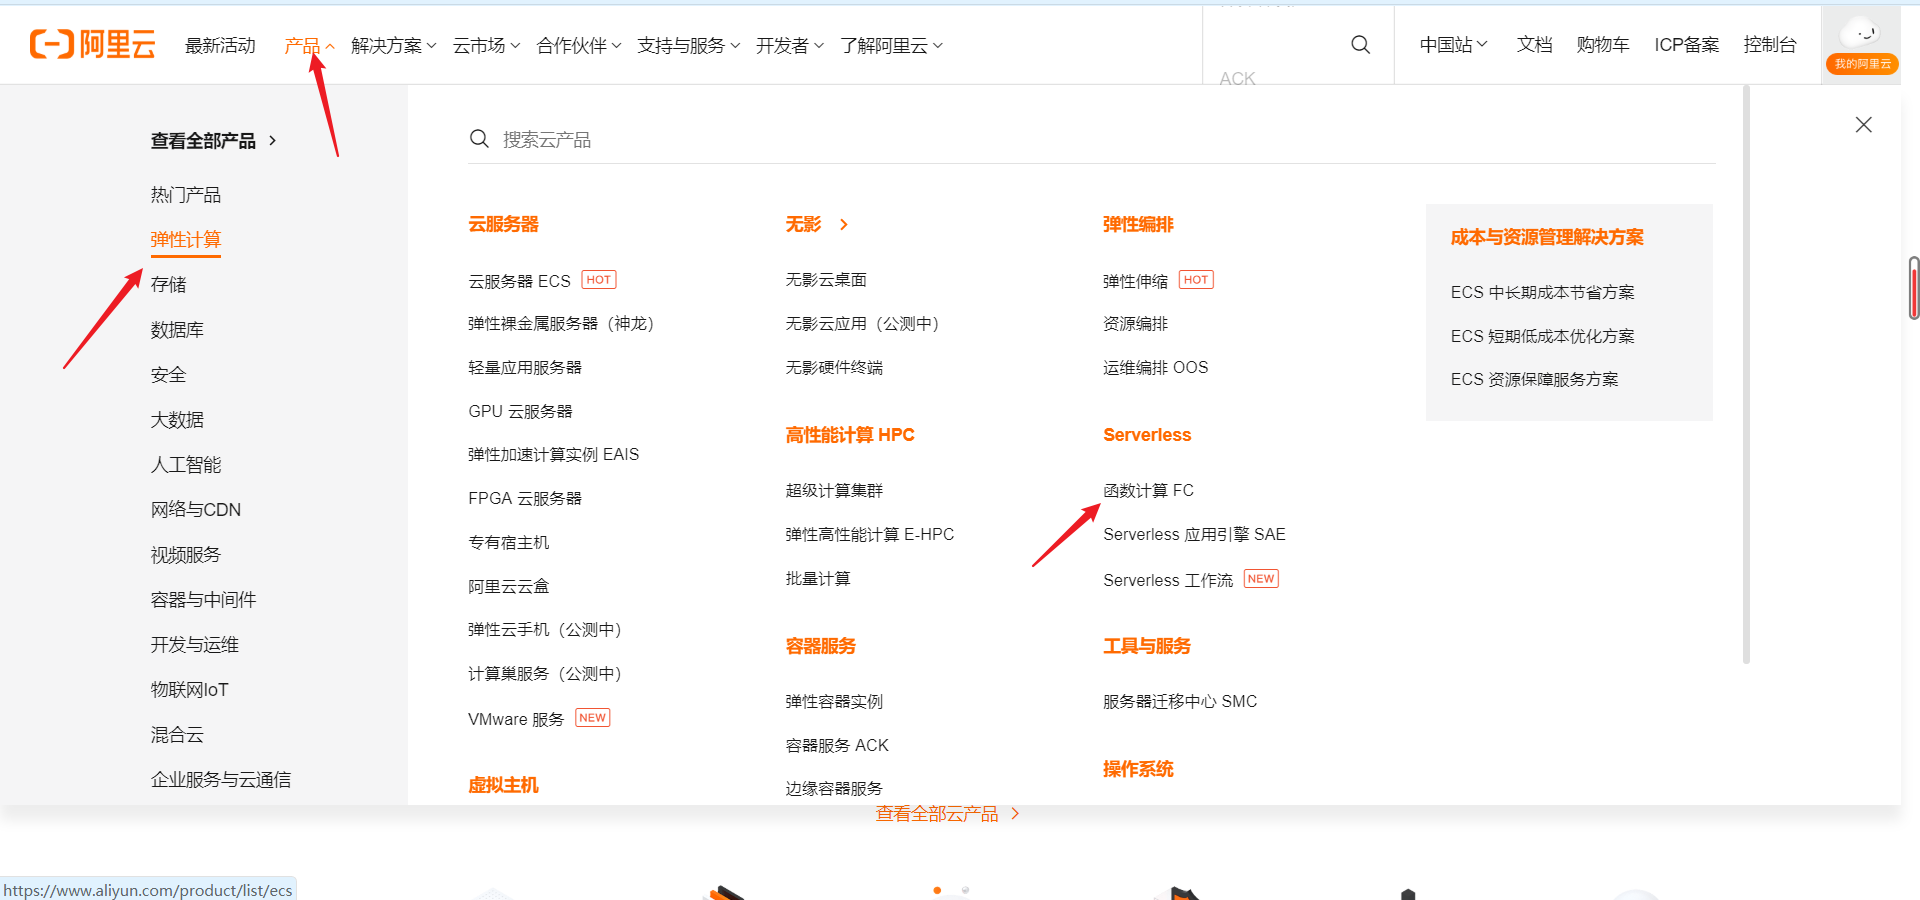
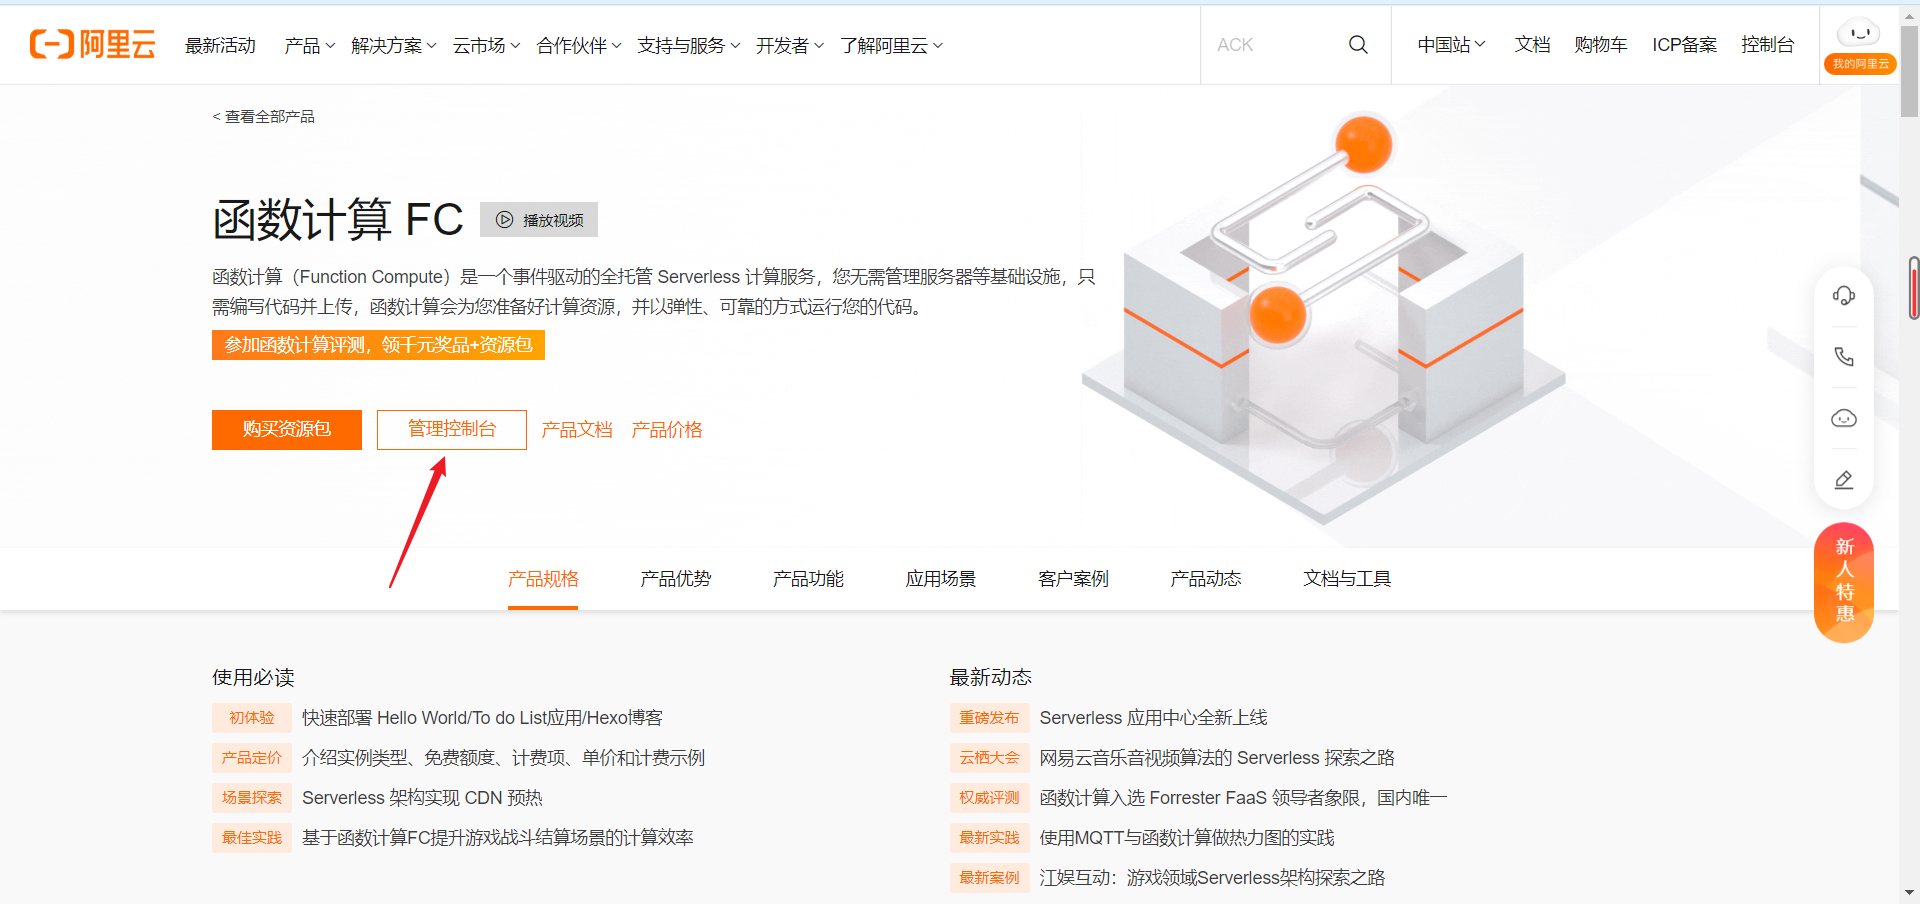
2.选择产品->弹性计算->Serverless->函数计算FC
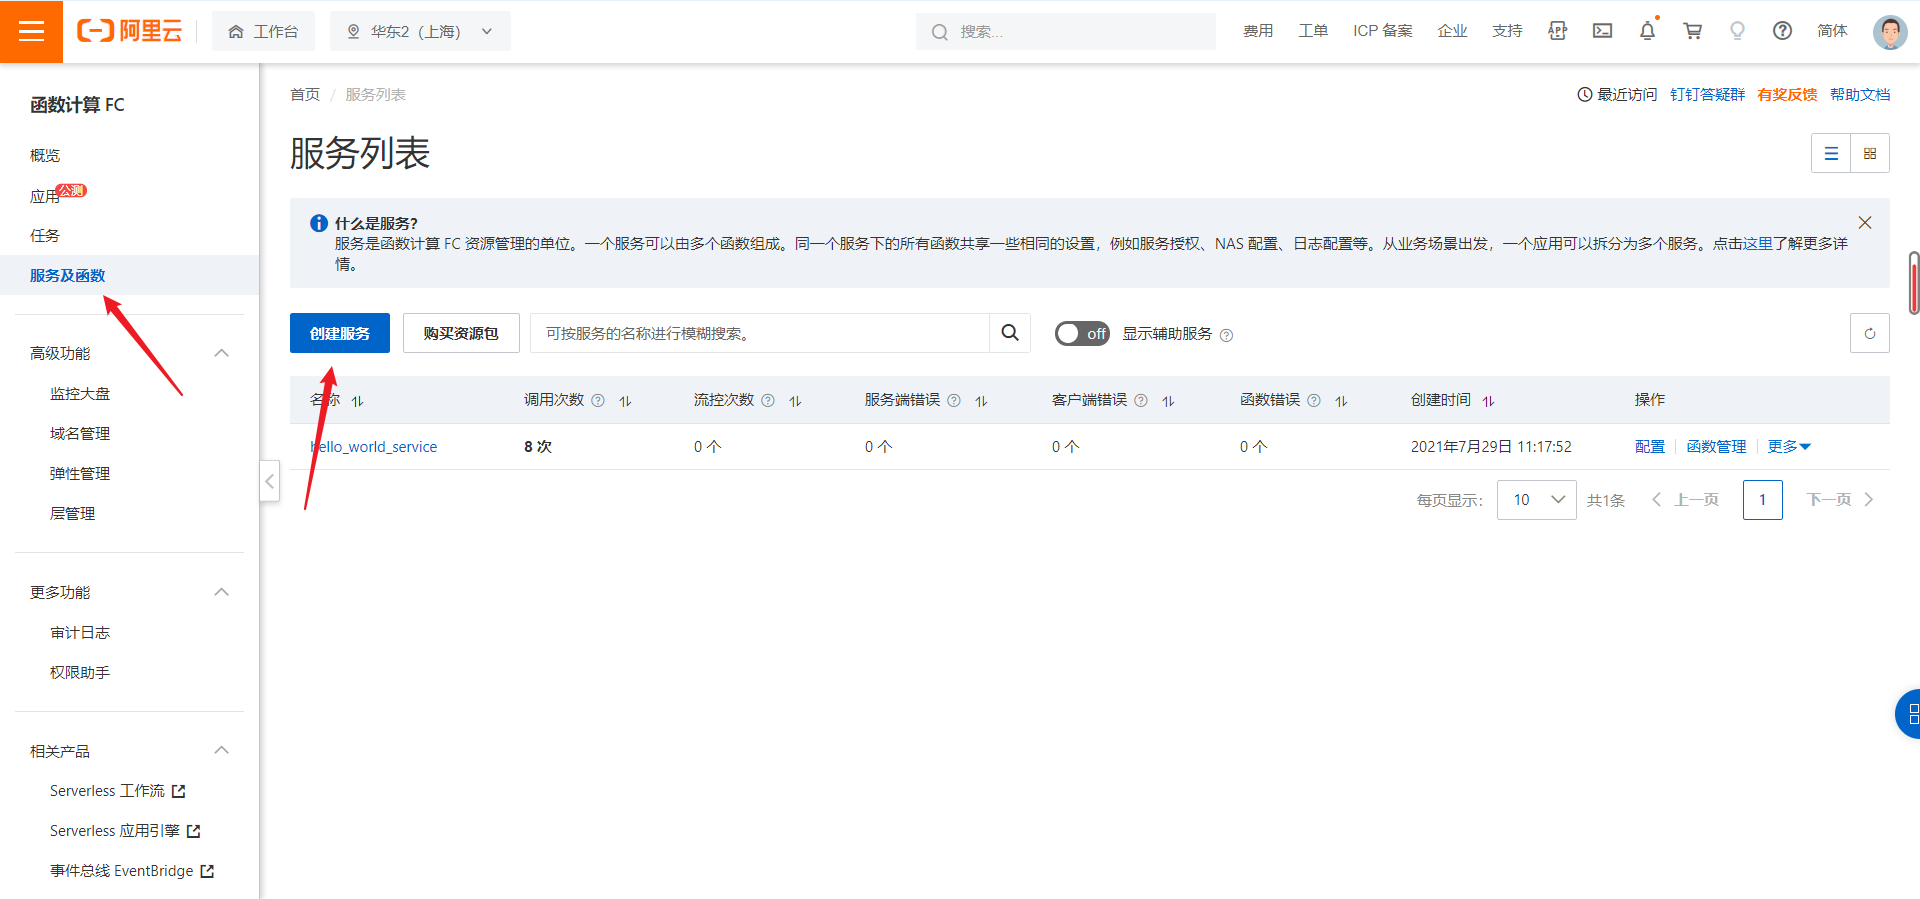
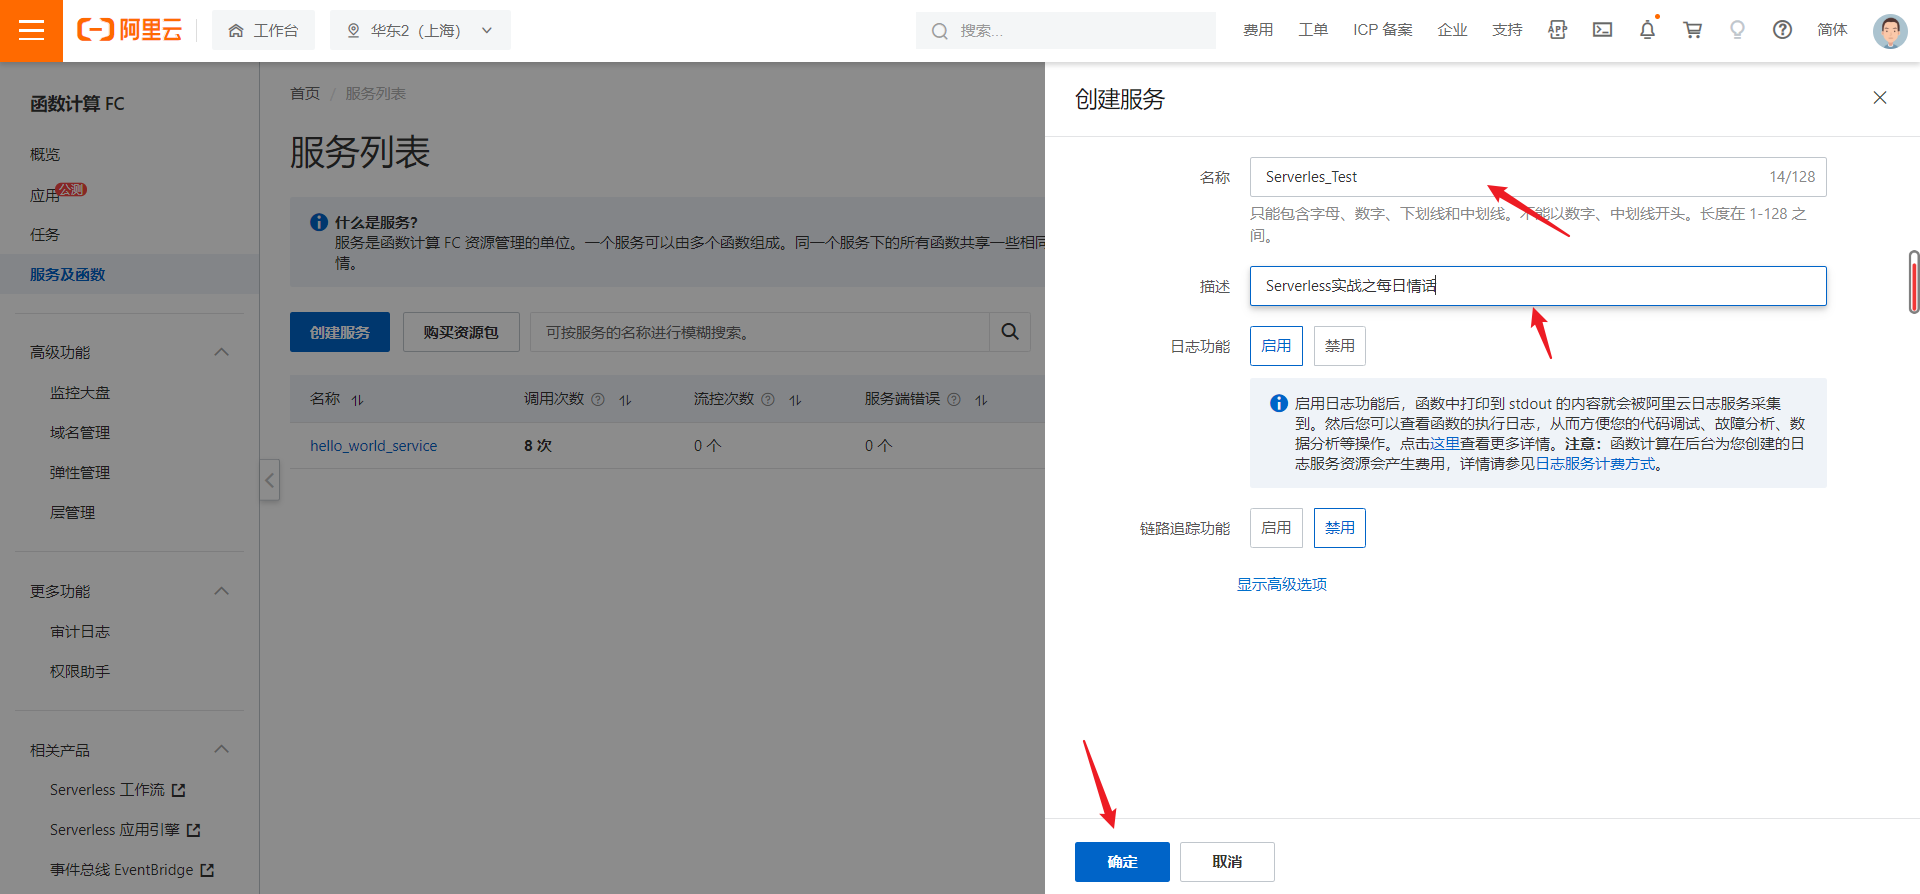
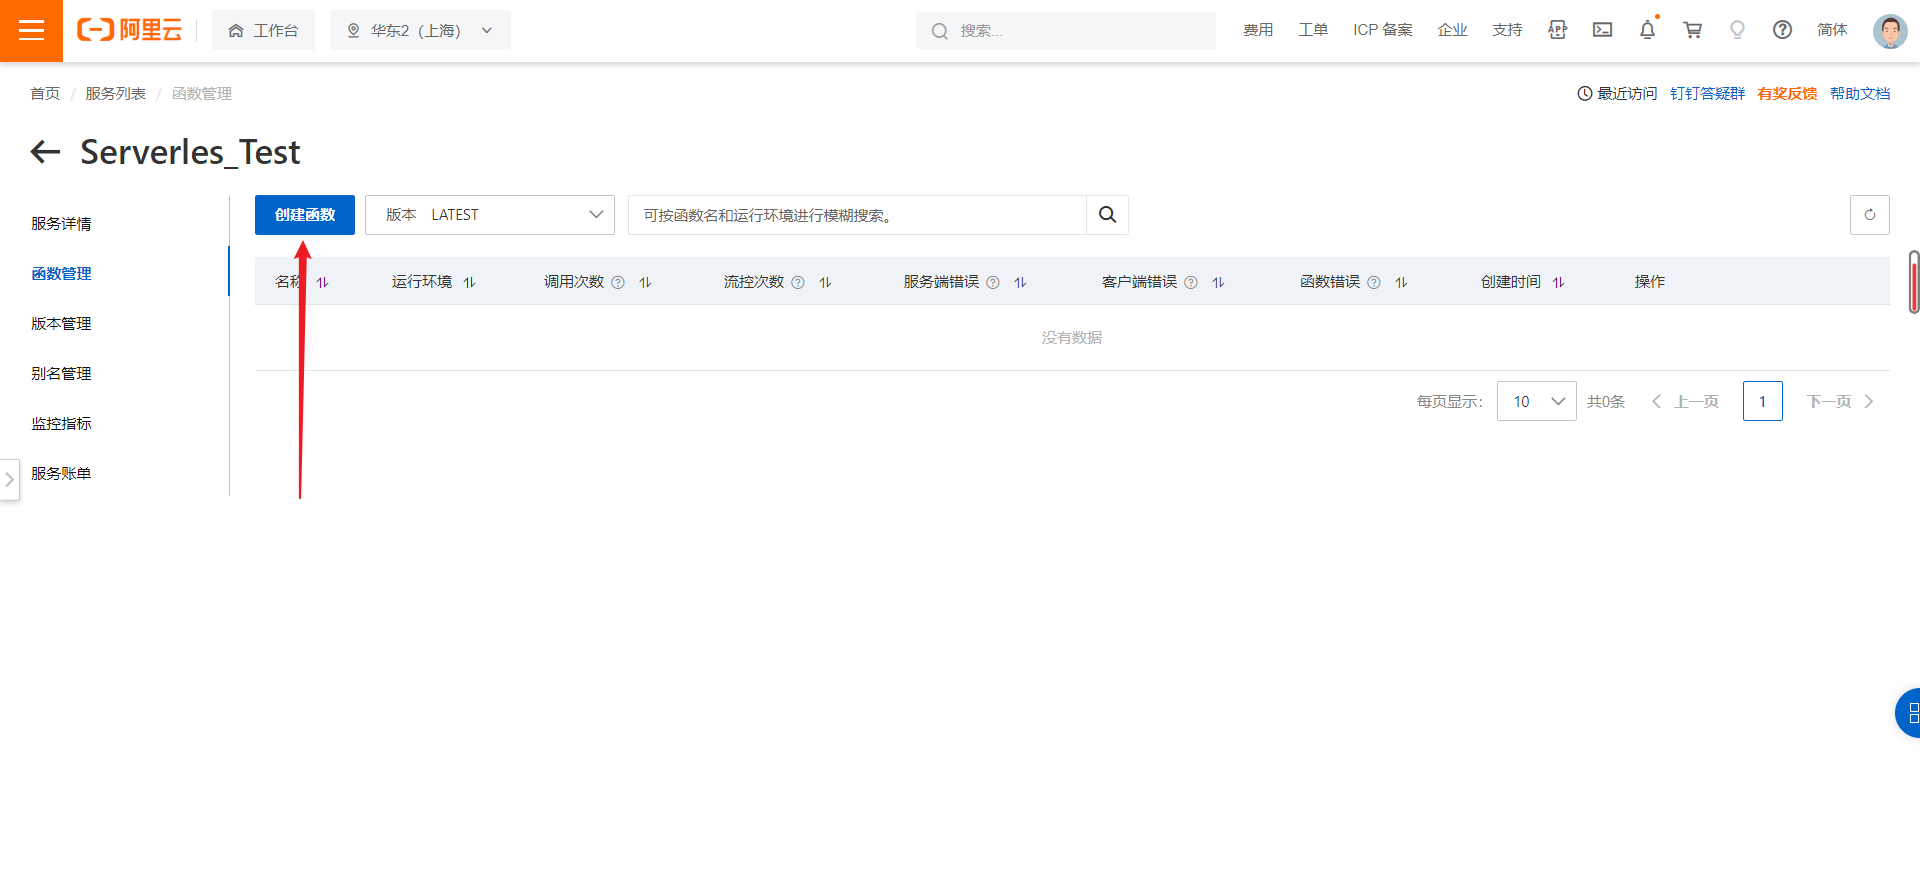
3.进入控制台->服务及函数->创建函数
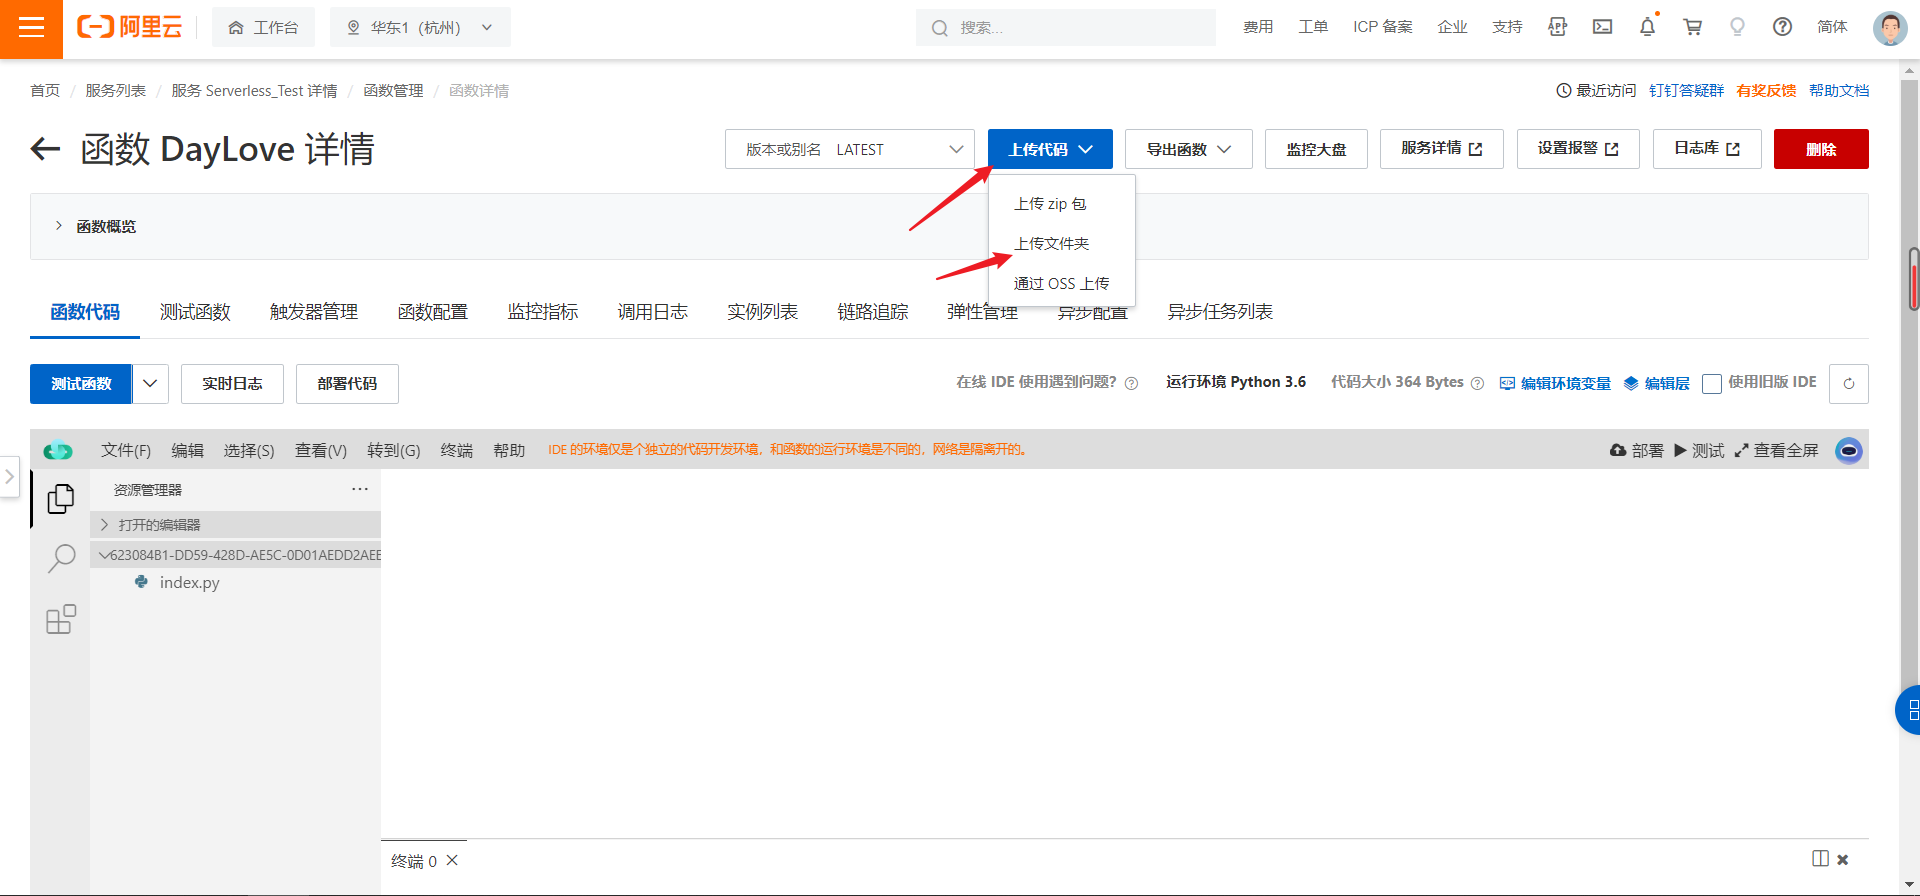
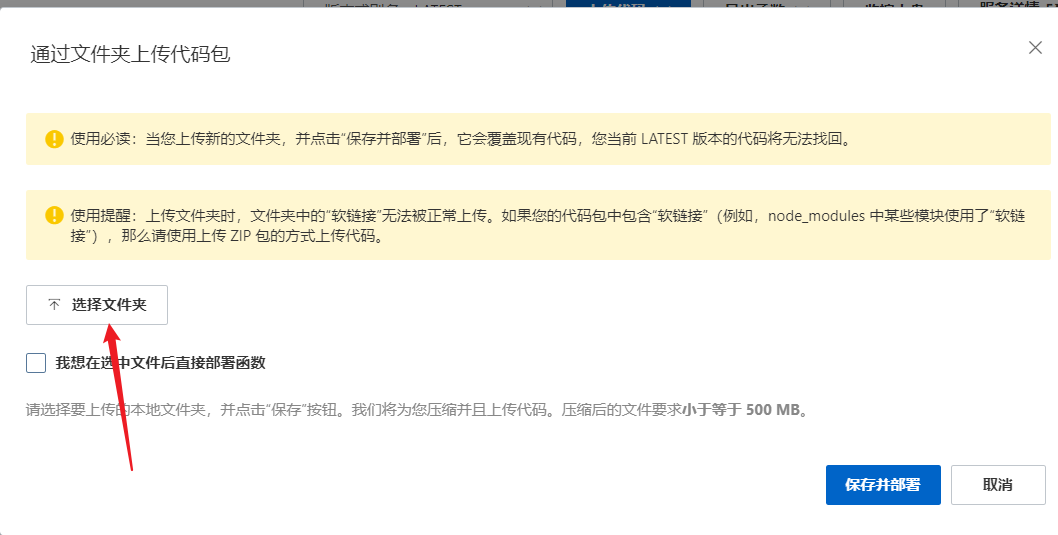
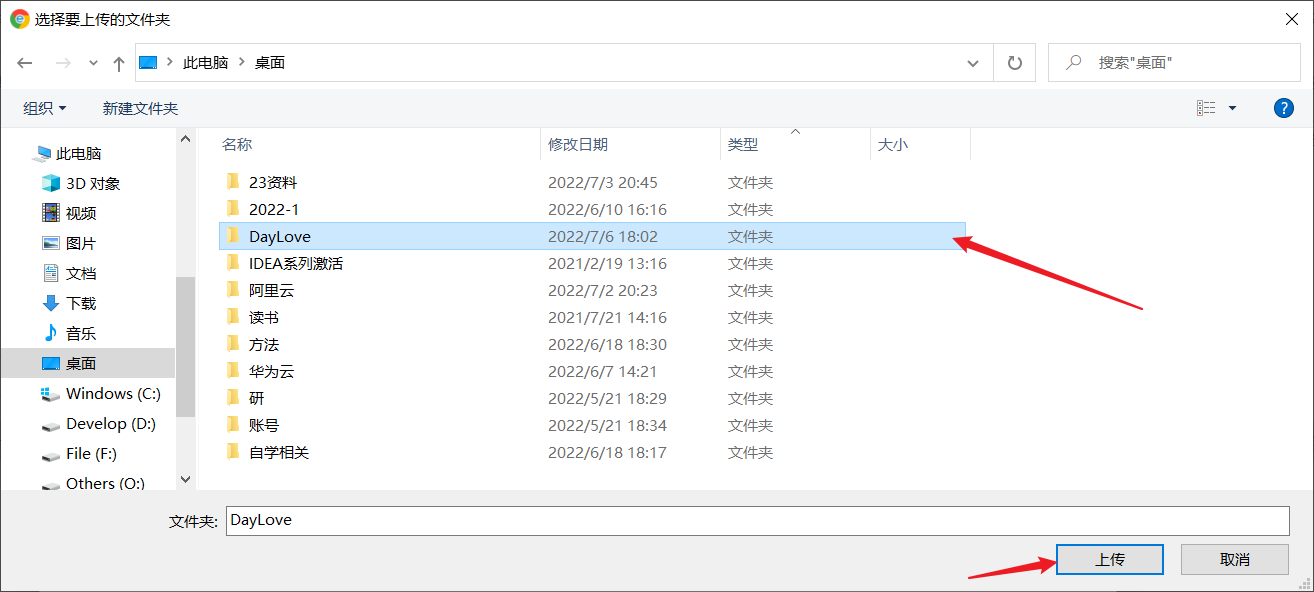
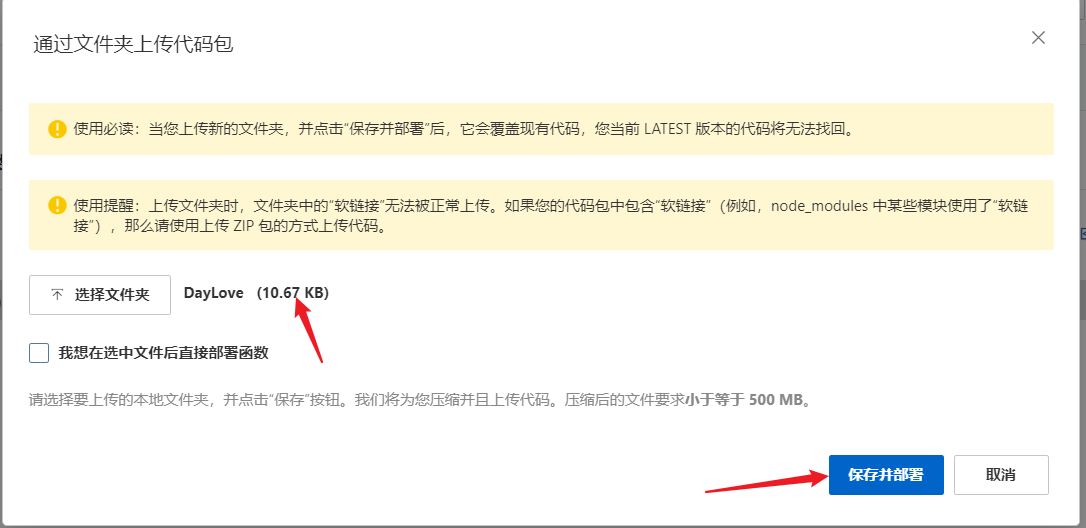
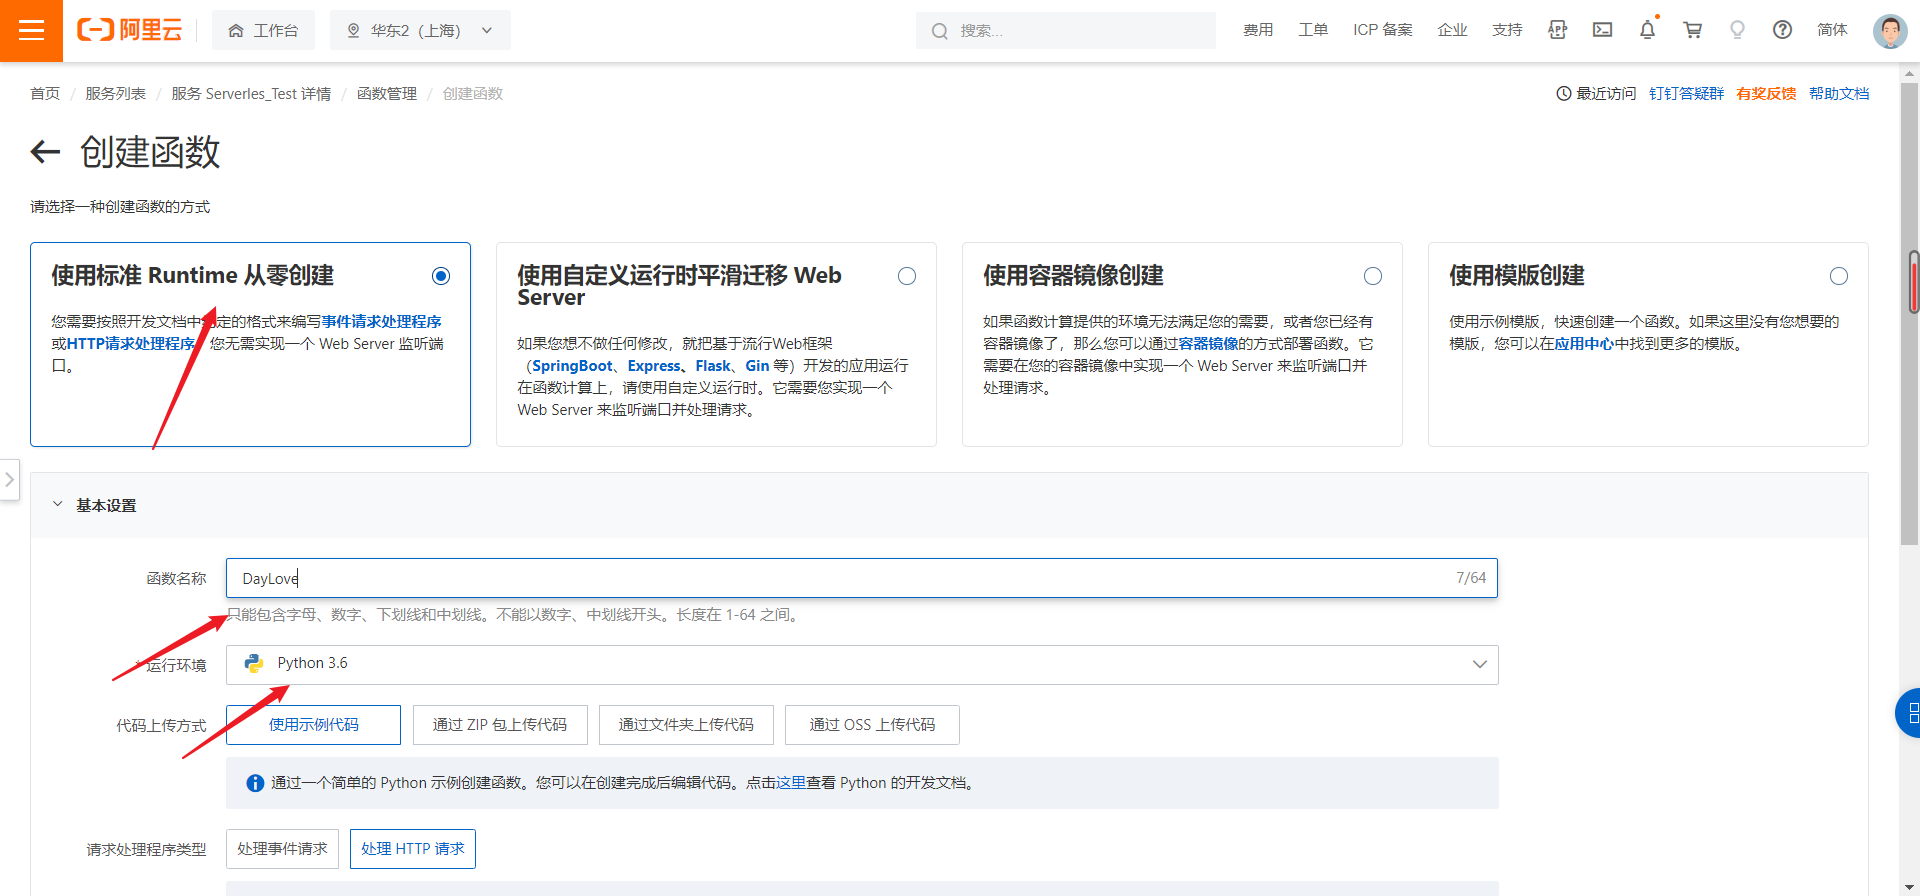4.上传代码->上传文件夹->选择文件夹->保存并部署
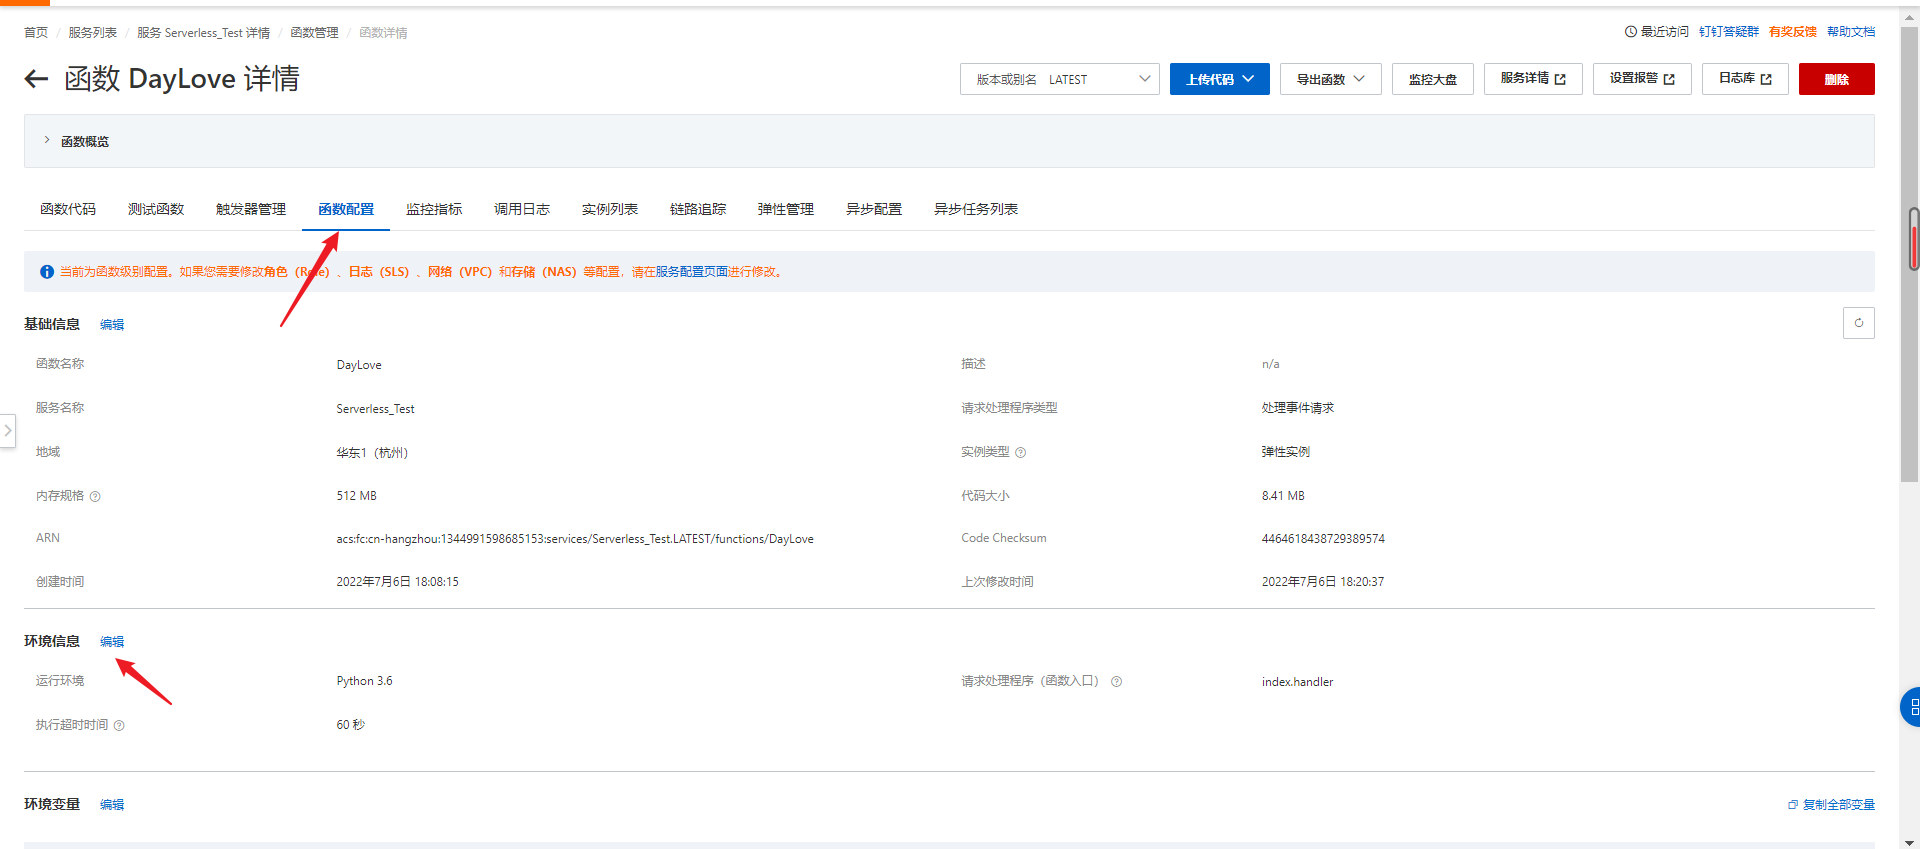
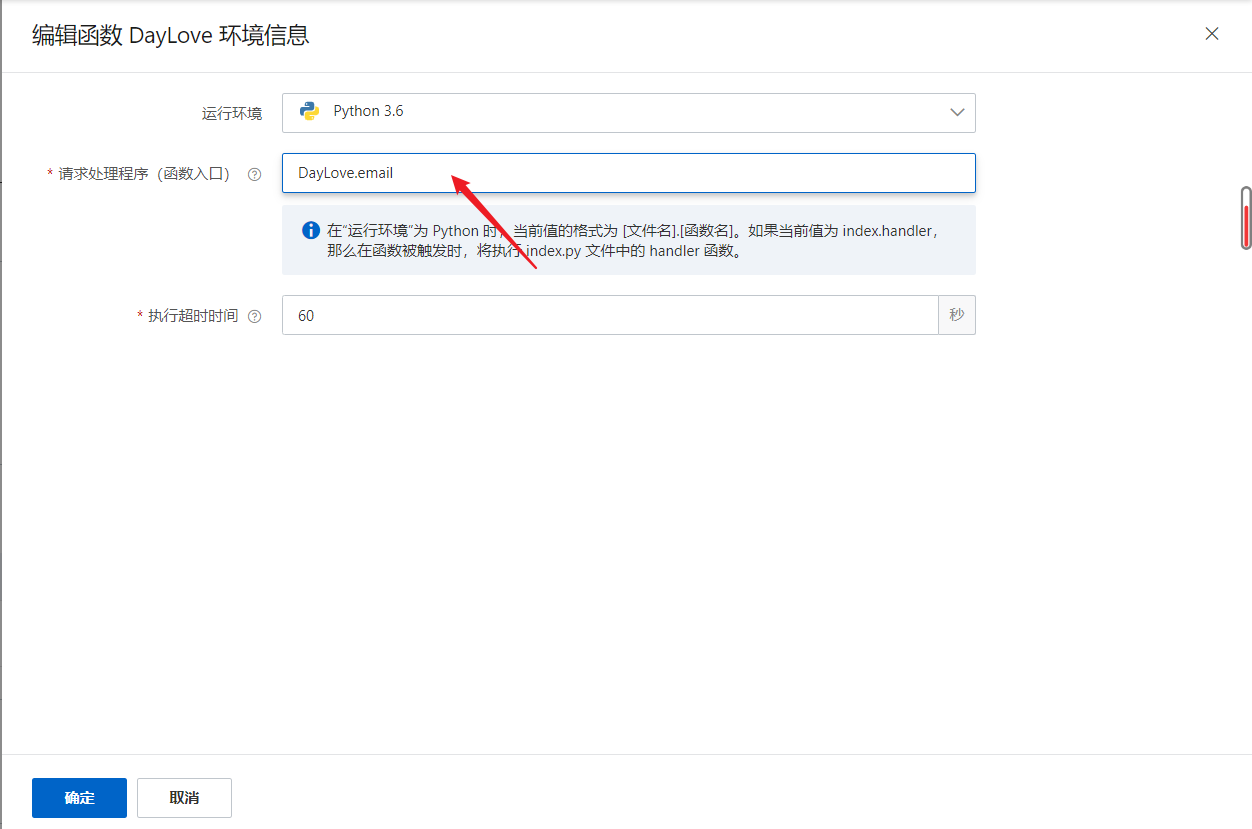
5.函数配置->编辑环境信息->修改函数入口
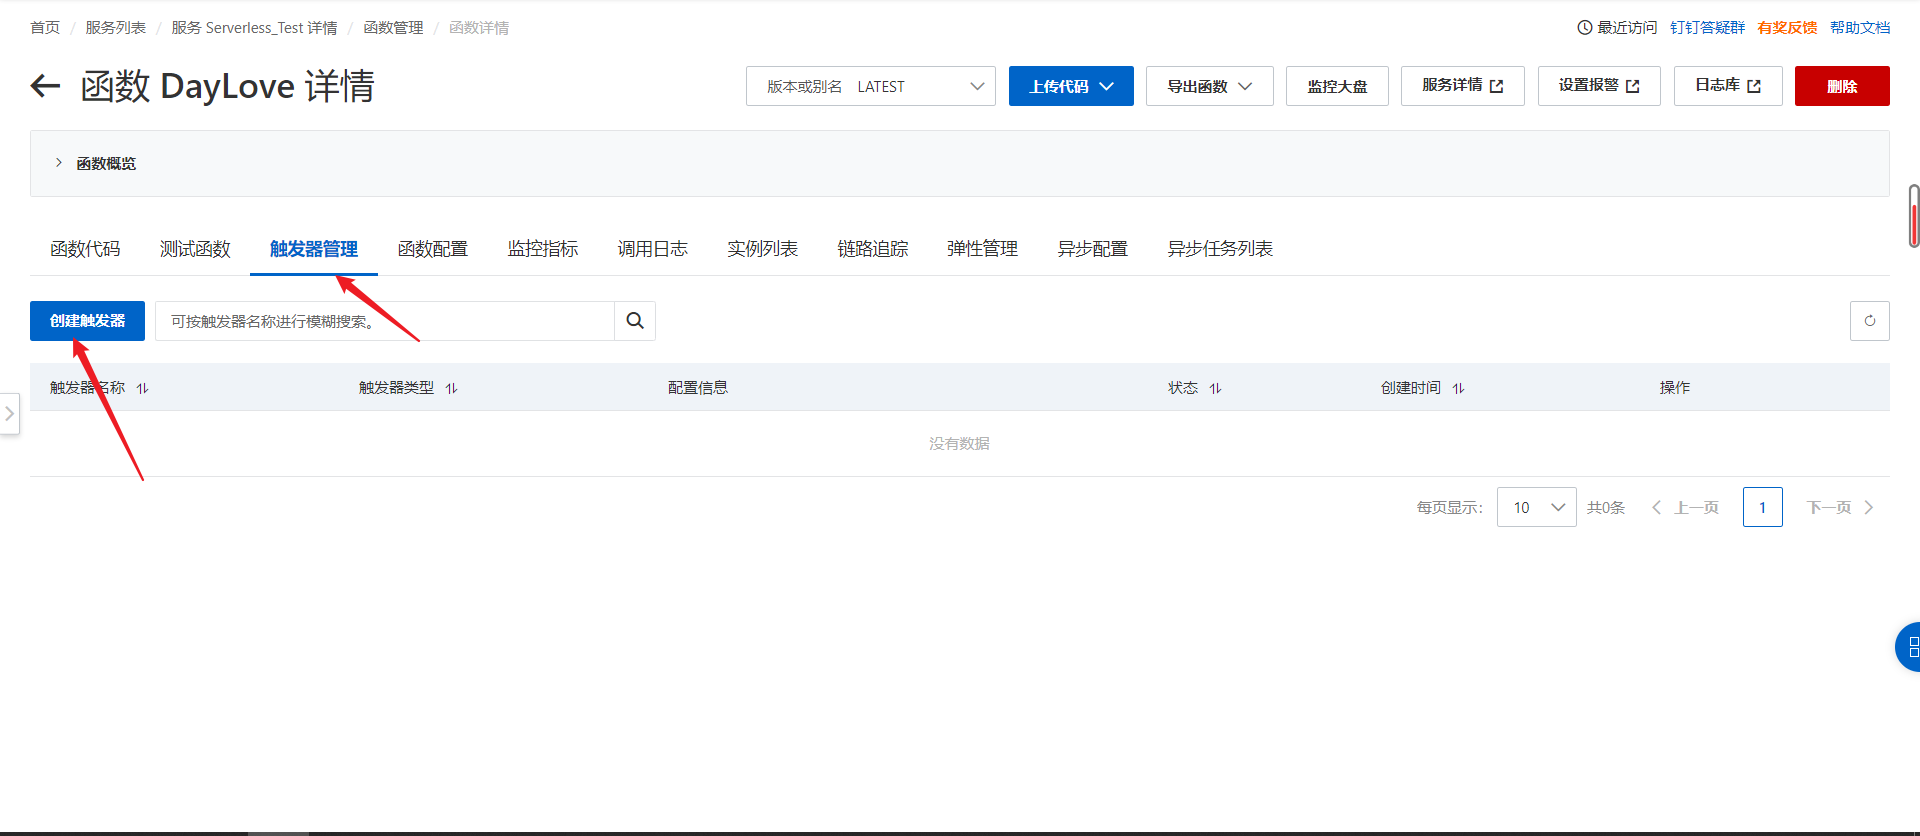
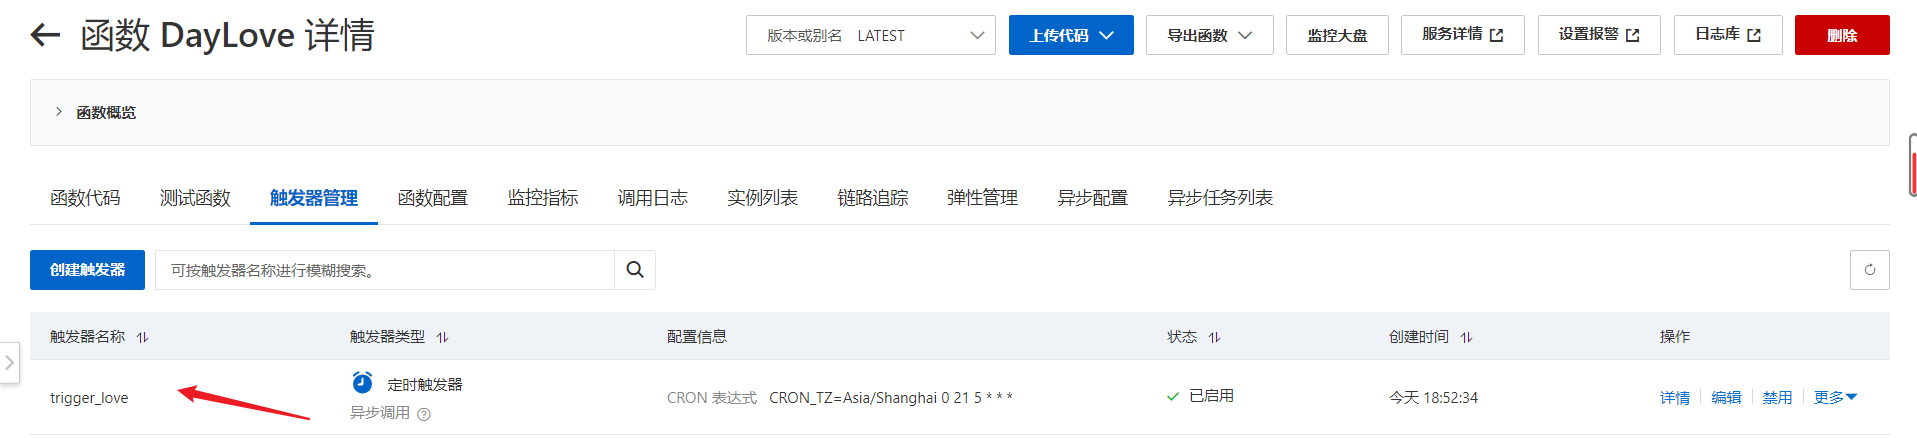
6.添加触发器,实现每日定时发送
触发器管理->创建触发器->定时触发器->填写名称和指定时间
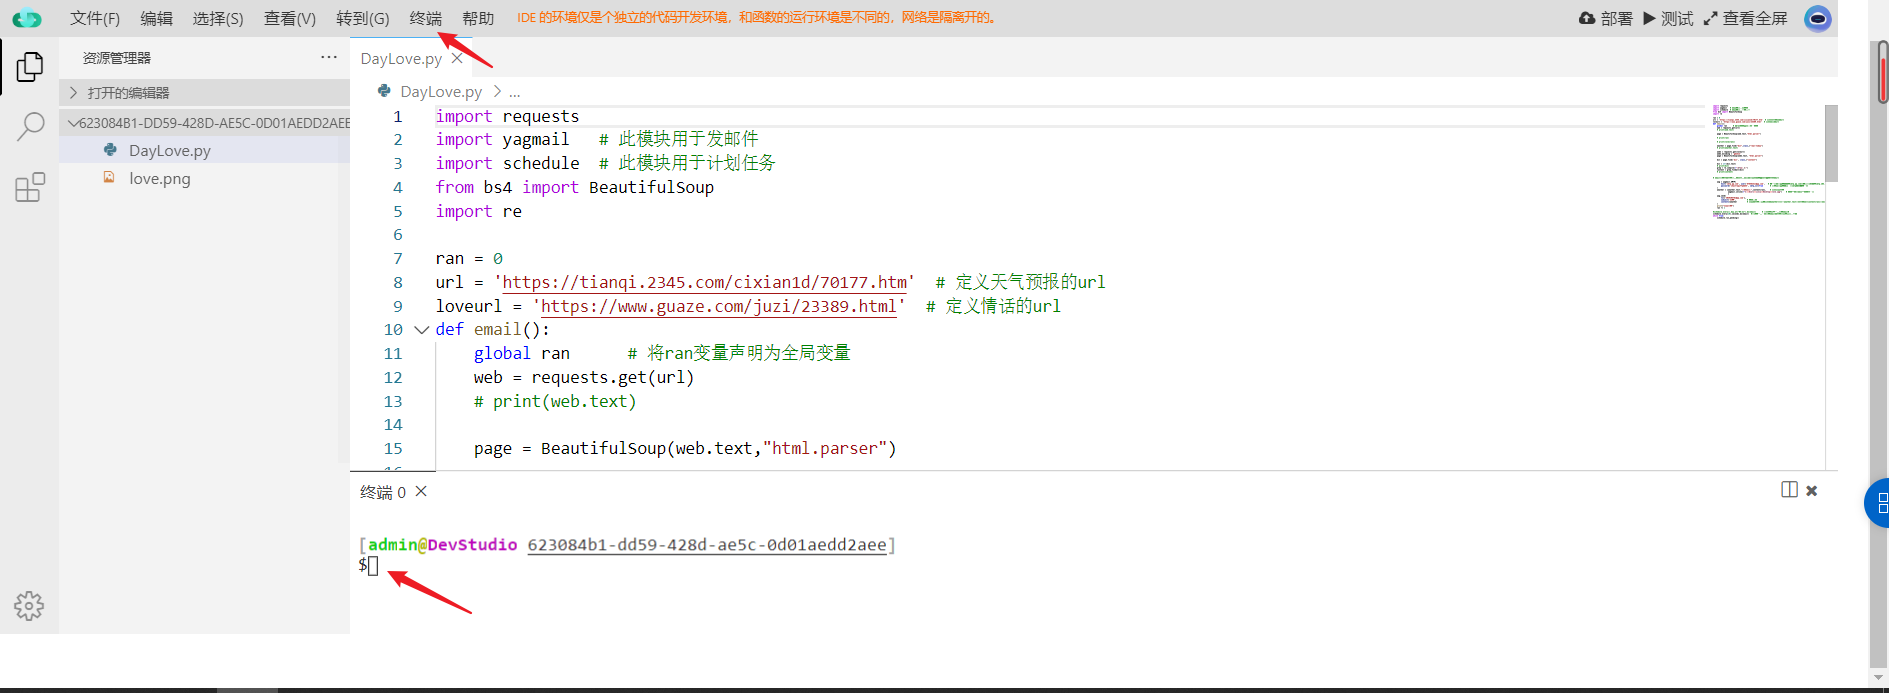
7.导入依赖并部署
先在终端执行以下三条命令,导入项目所需要的依赖
pip3 install yagmail -t . pip3 install schedule -t . pip3 install bs4 -t .- 1
- 2
- 3
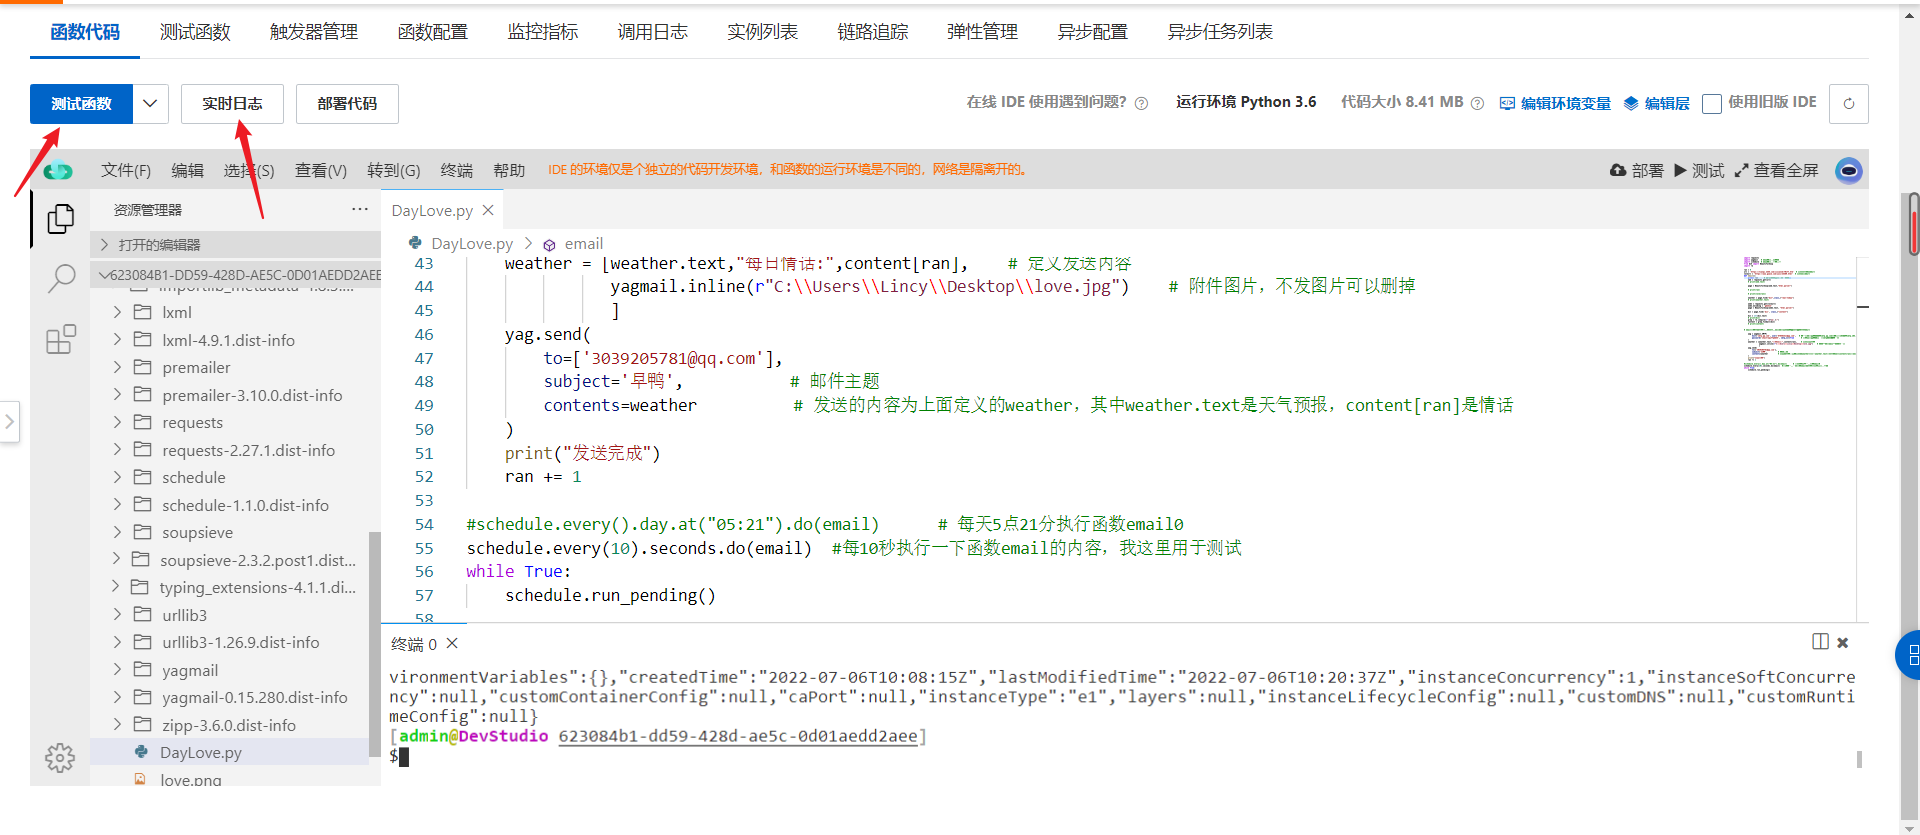
点击右上角保存并部署
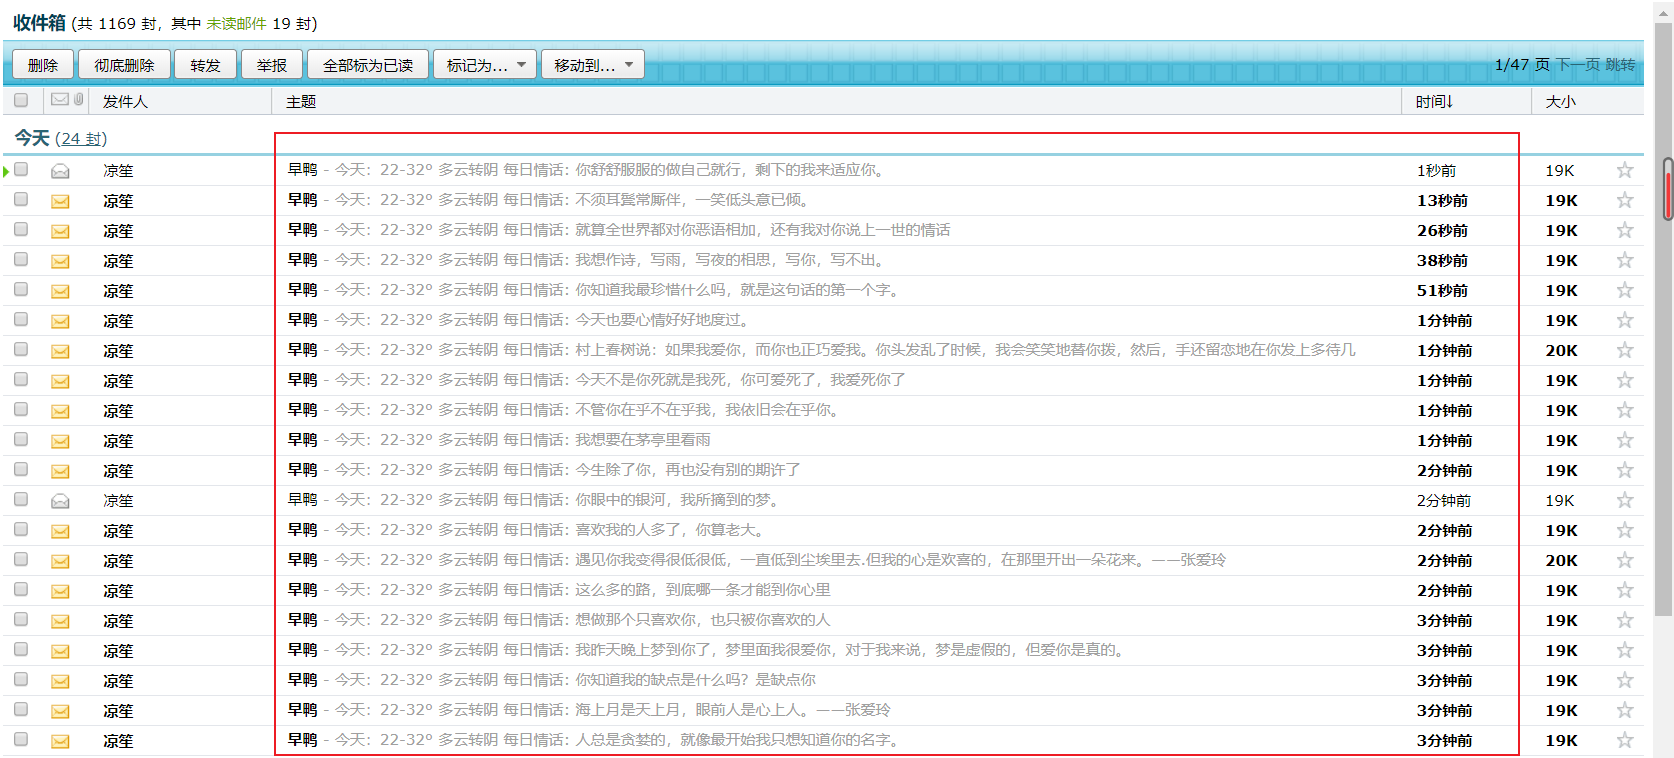
四、效果展示
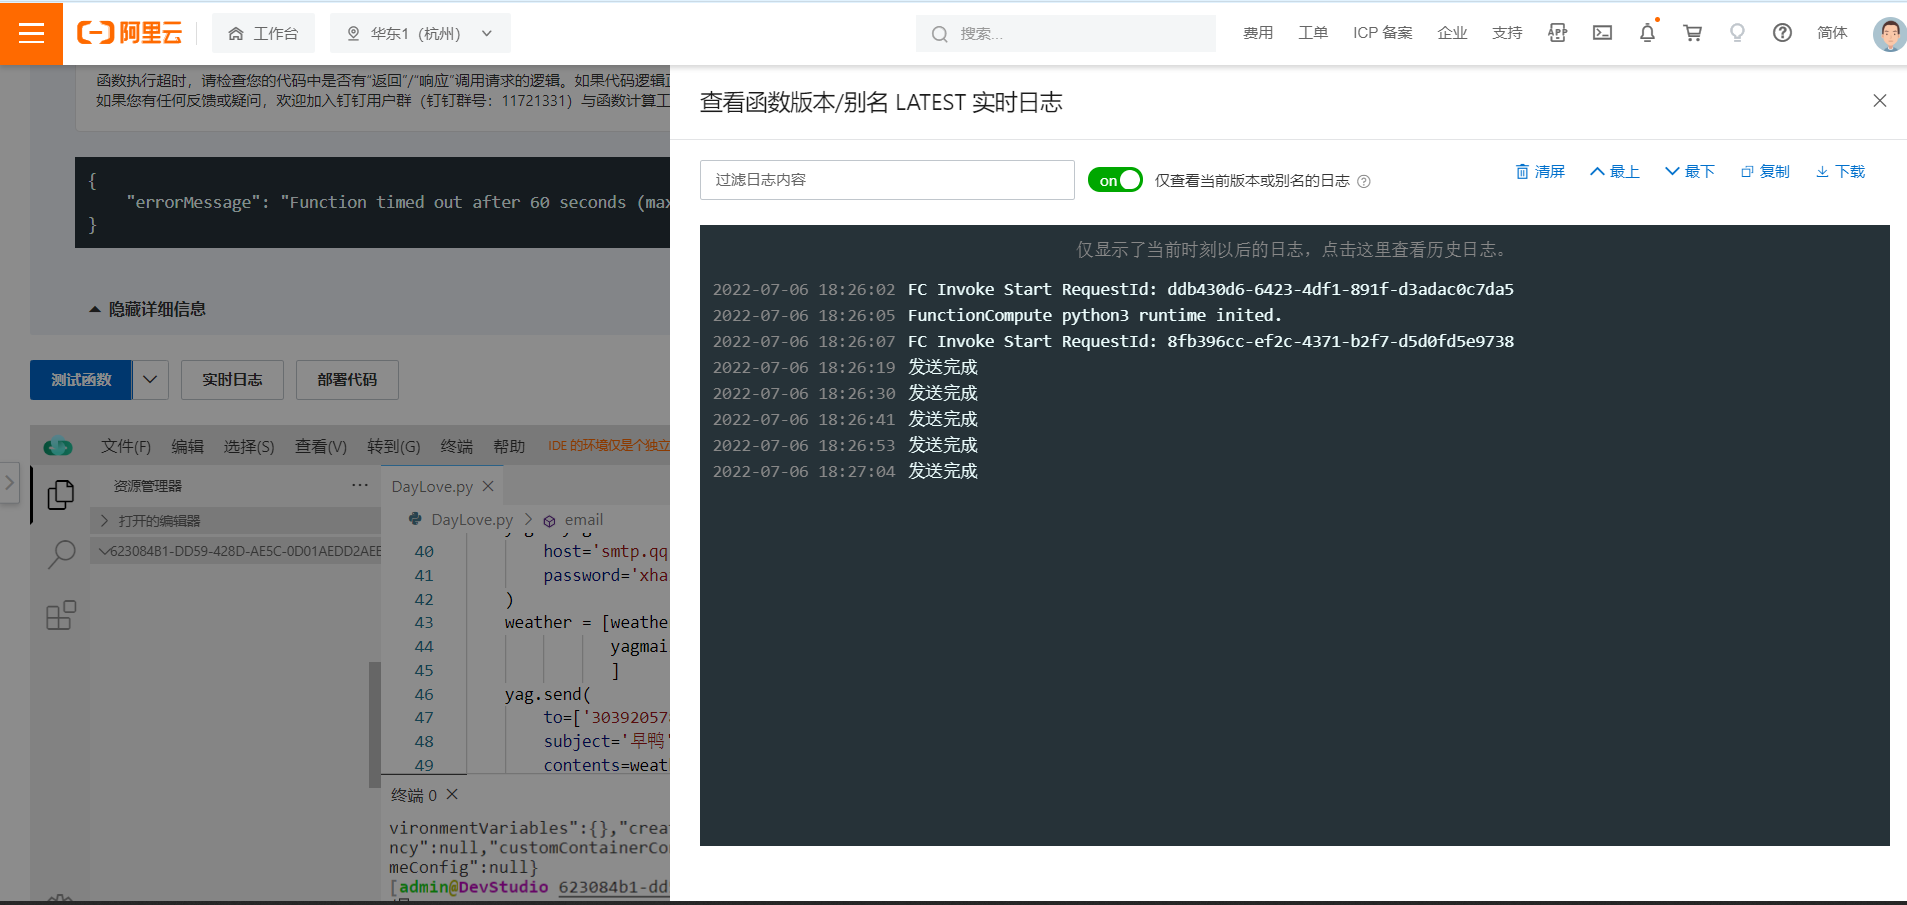
点击左上角测试函数,然后通过实时日志查看运行结果。
五、总结
这次实战是对Serverless的一次深刻的理解,收获技术的同时也提升了自己的学习能力。由于目前正在准备考研,就好久没有更新关于自学技术的文章,这回借着阿里云官方评测活动也去学一学火热的 Serverless 无服务架构的技术和思想,在这里分享这个当下流行的技术,然后结合着一些个人浅显的探索,希望能和大佬们共同学习成长!😄😄
-
相关阅读:
Hive、SparkSQL是如何决定写文件的数量的?
我的世界Minecraft Java开服教程(Windows)开服器开服包下载开服网站服务器开服核心开服端开服软件mac版Java启动器资源包
《最新出炉》系列初窥篇-Python+Playwright自动化测试-34-处理https 安全问题或者非信任站点-下篇
一个 SAP 开发工程师在 SAP 德国总部出差的见闻系列 2:Walldorf 附近的小旅馆
ucontext 上下文
软件测试笔试题含答案
Go中IO包简单使用
springboot+vue实现Minio文件存储
【原创工具】ADBGUI - GUI版ADB操作工具
机器学习:Softmax介绍及代码实现
- 原文地址:https://blog.csdn.net/weixin_42477427/article/details/126061801
