-
基于Apache部署虚拟主机网站
学习本章完成目标
1.httpd服务程序的基本部署。
2.个人用户主页功能和口令加密认证方式的实现。
3.基于ip地址,主机名(域名),端口号部署虚拟主机网站功能。Apache释义
我们大多数人都是通过访问网站而开始接触互联网的。我们平时访问的网站服务就是Web网络服务,一般是指允许用户通过浏览器访问到互联网中各种资源的服务。如图10-1所示,Web网络服务是一种被动访问的服务程序,即只有接收到互联网中其他主机发出的请求后才会响应,最终用于提供服务程序的Web服务器会通过HTTP(超文本传输协议)或HTTPS(安全超文本传输协议)把请求的内容传送给用户。
目前能够提供Web网络服务的程序有IIS、Nginx和Apache等。其中,IIS(Internet Information Services,互联网信息服务)是Windows系统中默认的Web服务程序,这是一款图形化的网站管理工具,不仅可以提供Web网站服务,还可以提供FTP、NMTP、SMTP等服务。但是,IIS只能在Windows系统中使用。2004年10月4日,为俄罗斯知名门户站点而开发的Web服务程序Nginx横空出世。Nginx程序作为一款轻量级的网站服务软件,因其稳定性和丰富的功能而快速占领服务器市场,但Nginx最被认可的还当是系统资源消耗低且并发能力强,因此得到了国内诸如新浪、网易、腾讯等门户站的青睐。

Apache程序是目前拥有很高市场占有率的Web服务程序之一,其跨平台和安全性广泛被认可且拥有快速、可靠、简单的API扩展。Apache服务程序可以运行在Linux系统、UNIX系统甚至是Windows系统中,支持基于IP、域名及端口号的虚拟主机功能,支持多种认证方式,集成有代理服务器模块、安全Socket层(SSL),能够实时监视服务状态与定制日志消息,并有着各类丰富的模块支持。
Apache程序作为老牌的Web服务程序,一方面在Web服务器软件市场具有相当高的占有率,另一方面Apache也是RHEL 7系统中默认的Web服务程序,而且还是RHCSA和RHCE认证考试的必考内容,因此无论从实际应用角度还是从应对红帽认证考试的角度,我们都有必要好好学习Apache服务程序的部署,并深入挖掘其可用的丰富功能。Apache配置
关闭防火墙和selinux
[root@localhost ~]# systemctl stop firewalld [root@localhost ~]# vim /etc/selinux/config # This file controls the state of SELinux on the system. # SELINUX= can take one of these three values: # enforcing - SELinux security policy is enforced. # permissive - SELinux prints warnings instead of enforcing. # disabled - No SELinux policy is loaded. SELINUX=disabled #改为disabled # SELINUXTYPE= can take one of three two values: # targeted - Targeted processes are protected, # minimum - Modification of targeted policy. Only selected processes are protected. # mls - Multi Level Security protection. SELINUXTYPE=targeted- 1
- 2
- 3
- 4
- 5
- 6
- 7
- 8
- 9
- 10
- 11
- 12
- 13
第1步:把光盘设备中的系统镜像挂载到/mnt目录。
[root@localhost ~]# mount /dev/cdrom /mnt mount: /dev/sr0 is write-protected, mounting read-only- 1
- 2
第2步:使用Vim文本编辑器创建Yum仓库的配置文件
[root@localhost ~]# vim /etc/yum.repos.d/xx.repo [root@localhost ~]# cat /etc/yum.repos.d/xx.repo [xx] name=xx baseurl=file:///mnt gpgcheck=0 enabled=1- 1
- 2
- 3
- 4
- 5
- 6
- 7
第3步:动手安装Apache服务程序。注意,使用yum命令进行安装时,跟在命令后面的Apache服务的软件包名称为httpd。如果直接执行yum install apache命令,则系统会报错。
[root@localhost ~]# yum -y install httpd Loaded plugins: aliases, changelog, fastestmirror, langpacks, ovl, : product-id, search-disabled-repos, subscription-manager, : tmprepo, verify, versionlock This system is not registered with an entitlement server. You can use subscription-manager to register. Loading mirror speeds from cached hostfile xx | 4.1 kB 00:00 Resolving Dependencies --> Running transaction check ---> Package httpd.x86_64 0:2.4.6-67.el7 will be installed --> Finished Dependency Resolution Dependencies Resolved ========================================================================== Package Arch Version Repository Size ========================================================================== Installing: httpd x86_64 2.4.6-67.el7 xx 1.2 M Transaction Summary ========================================================================== Install 1 Package Total download size: 1.2 M Installed size: 3.7 M Downloading packages: Running transaction check Running transaction test Transaction test succeeded Running transaction Installing : httpd-2.4.6-67.el7.x86_64 1/1 Verifying : httpd-2.4.6-67.el7.x86_64 1/1 Installed: httpd.x86_64 0:2.4.6-67.el7 Complete!- 1
- 2
- 3
- 4
- 5
- 6
- 7
- 8
- 9
- 10
- 11
- 12
- 13
- 14
- 15
- 16
- 17
- 18
- 19
- 20
- 21
- 22
- 23
- 24
- 25
- 26
- 27
- 28
- 29
- 30
- 31
- 32
- 33
- 34
- 35
- 36
- 37
- 38
- 39
第4步:启用httpd服务程序并将其加入到开机启动项中,使其能够随系统开机而运行,从而持续为用户提供Web服务
[root@localhost ~]# systemctl restart httpd [root@localhost ~]# systemctl enable httpd #加入开机自启 Created symlink from /etc/systemd/system/multi-user.target.wants/httpd.service to /usr/lib/systemd/system/httpd.service.- 1
- 2
- 3
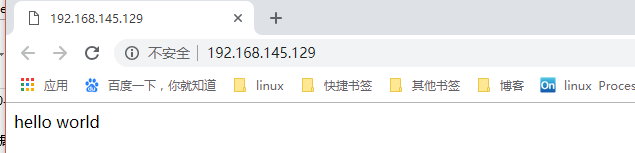
在浏览器的地址栏中输入ip地址并按回车键,就可以看到用于提供Web服务的httpd服务程序的默认页面了

配置服务文件参数
httpd服务程序的主要配置文件及存放位置
|配置文件的名称 |存放位置|
|----|—|—|
服务目录| /etc/httpd
主配置文件| /etc/httpd/conf/httpd.conf
网站数据目录| /var/www/html
访问日志 |/var/log/httpd/access_log
错误日志| /var/log/httpd/error_log
在httpd服务程序的主配置文件中,存在三种类型的信息:注释行信息、全局配置、区域配置

主配置文件常用参数及用途描述
参数 |用途|
|—|—|-
ServerRoot |服务目录
ServerAdmin |管理员邮箱
User| 运行服务的用户
Group |运行服务的用户组
ServerName |网站服务器的域名
DocumentRoot |网站数据目录
Directory| 网站数据目录的权限
Listen |监听的IP地址与端口号
DirectoryIndex| 默认的索引页页面
ErrorLog |错误日志文件
CustomLog |访问日志文件
Timeout |网页超时时间,默认为300秒更改默认页内容
从主配置文件中可以看出网站的默认页存放位置为/var/www/html/目录中,替换掉httpd服务程序的默认页面,该操作会立即生效
[root@localhost ~]# echo "hello world" > /var/www/html/index.html- 1
更改默认页存放位置
改变保存网站数据的目录,将保存网站的目录修改为/home/test
[root@localhost ~]# mkdir /home/test [root@localhost ~]# echo "The new web directory" > /home/test/index.html- 1
- 2
修改主配置文件
[root@localhost ~]# vim /etc/httpd/conf/httpd.conf 118 # 119 DocumentRoot "/home/test" #改为/home/test 120 121 # 122 # Relax access to content within /var/www. 123 # 124 <Directory "/home/test"> #改为/home/test 125 AllowOverride None 126 # Allow open access: 127 Require all granted 128 </Directory>- 1
- 2
- 3
- 4
- 5
- 6
- 7
- 8
- 9
- 10
- 11
- 12
重启服务
[root@localhost ~]# systemctl restart httpd.service- 1

个人用户主页功能
如果想在系统中为每位用户建立一个独立的网站,通常的方法是基于虚拟网站主机功能来部署多个网站。但这个工作会让管理员苦不堪言(尤其是用户数量很庞大时),而且在用户自行管理网站时,还会碰到各种权限限制,需要为此做很多额外的工作。其实,httpd服务程序提供的个人用户主页功能完全可以以胜任这个工作。该功能可以让系统内所有的用户在自己的家目录中管理个人的网站,而且访问起来也非常容易。
第1步:在httpd服务程序中,默认没有开启个人用户主页功能。
手动开启,修改配置文件[root@localhost ~]# vim /etc/httpd/conf.d/userdir.conf 15 # permissions). 16 # 17 # UserDir disabled # 前面加#号,注释 18 19 # 20 # To enable requests to /~user/ to serve the user's public_html 21 # directory, remove the "UserDir disabled" line above, and uncomme nt 22 # the following line instead: 23 # 24 UserDir public_html # 前面去#号 25 </IfModule> 26- 1
- 2
- 3
- 4
- 5
- 6
- 7
- 8
- 9
- 10
- 11
- 12
- 13
- 14
第2步:在用户家目录中建立用于保存网站数据的目录及首页面文件。另外,还需要把家目录的权限修改为755,保证其他人也有权限读取里面的内容。
[root@localhost ~]# useradd haha [root@localhost ~]# su - haha [haha@localhost ~]$ mkdir public_html [haha@localhost ~]$ echo "this is haha website" > public_html/index.html [haha@localhost ~]$ chmod -Rf 755 /home/haha [haha@localhost ~]$ exit logout- 1
- 2
- 3
- 4
- 5
- 6
- 7
第3步:重启服务
[root@localhost ~]# systemctl restart httpd- 1
- 2
基于口令登录网站
第1步:先使用htpasswd命令生成密码数据库。-c参数表示第一次生成;后面再分别添加密码数据库的存放文件,以及验证要用到的用户名称
[root@localhost dxk]# htpasswd -c /etc/httpd/passwd haha New password: #此处输入用于网页验证的密码 Re-type new password: #再输入一遍进行确认 Adding password for user haha- 1
- 2
- 3
- 4
- 5
第2步:修改配置文件
[root@localhost ~]# vim /etc/httpd/conf.d/userdir.conf (尾行) #原配置文件 31 <Directory "/home/*/public_html"> 32 AllowOverride FileInfo AuthConfig Limit Indexes 33 Options MultiViews Indexes SymLinksIfOwnerMatch IncludesNoExec 34 Require method GET POST OPTIONS 35 </Directory> #修改为 # for a site where these directories are restricted to read-only. # <Directory "/home/*/public_html"> AllowOverride all authuserfile "/etc/httpd/passwd" #刚刚生成出来的密码验证文件保存路径 authname "My privately website" #当用户尝试访问个人用户网站时的提示信息 authtype basic Require user haha #用户进行账户密码登录时需要验证的用户名称 </Directory>- 1
- 2
- 3
- 4
- 5
- 6
- 7
- 8
- 9
- 10
- 11
- 12
- 13
- 14
- 15
- 16
- 17
- 18
第3步:重启服务
[root@localhost ~]# systemctl restart httpd- 1
此后,当用户再想访问某个用户的个人网站时,就必须要输入账户和密码才能正常访问了

虚拟主机功能
利用虚拟主机功能,可以把一台处于运行状态的物理服务器分割成多个“虚拟的服务器”。。但是,该技术无法实现目前云主机技术的硬件资源隔离,让这些虚拟的服务器共同使用物理服务器的硬件资源,供应商只能限制硬盘的使用空间大小。出于各种考虑的因素(主要是价格低廉),目前依然有很多企业或个人站长在使用虚拟主机的形式来部署网站。
Apache的虚拟主机功能是服务器基于用户请求的不同IP地址、主机域名或端口号,实现提供多个网站同时为外部提供访问服务的技术,用户请求的资源不同,最终获取到的网页内容也各不相同。基于ip地址
如果一台服务器有多个IP地址,而且每个IP地址与服务器上部署的每个网站一一对应,这样当用户请求访问不同的IP地址时,会访问到不同网站的页面资源。而且,每个网站都有一个独立的IP地址,对搜索引擎优化也大有裨益。因此以这种方式提供虚拟网站主机功能不仅最常见,也受到了网站站长的欢迎(尤其是草根站长)。
Apache的虚拟主机功能是服务器基于用户请求的不同IP地址、主机域名或端口号,实现提供多个网站同时为外部提供访问服务的技术,用户请求的资源不同,最终获取到的网页内容也各不相同。
1.添加ip[root@localhost ~]# ip addr add 192.168.145.10/24 dev ens33 [root@localhost ~]# ip addr add 192.168.145.20/24 dev ens33 [root@localhost ~]# ip addr add 192.168.145.30/24 dev ens33 RTNETLINK answers: File exists [root@localhost ~]# ip a 1: lo: <LOOPBACK,UP,LOWER_UP> mtu 65536 qdisc noqueue state UNKNOWN qlen 1 link/loopback 00:00:00:00:00:00 brd 00:00:00:00:00:00 inet 127.0.0.1/8 scope host lo valid_lft forever preferred_lft forever inet6 ::1/128 scope host valid_lft forever preferred_lft forever 2: ens33: <BROADCAST,MULTICAST,UP,LOWER_UP> mtu 1500 qdisc pfifo_fast state UP qlen 1000 link/ether 00:0c:29:da:a6:35 brd ff:ff:ff:ff:ff:ff inet 192.168.145.129/24 brd 192.168.145.255 scope global dynamic ens33 valid_lft 1757sec preferred_lft 1757sec inet 192.168.145.30/24 scope global secondary ens33 valid_lft forever preferred_lft forever inet 192.168.145.10/24 scope global secondary ens33 valid_lft forever preferred_lft forever inet 192.168.145.20/24 scope global secondary ens33 valid_lft forever preferred_lft forever inet6 fe80::af06:33cc:d831:4b74/64 scope link valid_lft forever preferred_lft forever- 1
- 2
- 3
- 4
- 5
- 6
- 7
- 8
- 9
- 10
- 11
- 12
- 13
- 14
- 15
- 16
- 17
- 18
- 19
- 20
- 21
- 22
- 23
- 24
测试联通性
[root@localhost ~]# ping 192.168.145.20 PING 192.168.145.20 (192.168.145.20) 56(84) bytes of data. 64 bytes from 192.168.145.20: icmp_seq=1 ttl=64 time=0.022 ms ^C --- 192.168.145.20 ping statistics --- 1 packets transmitted, 1 received, 0% packet loss, time 0ms rtt min/avg/max/mdev = 0.022/0.022/0.022/0.000 ms [root@localhost ~]# ping 192.168.145.30 PING 192.168.145.30 (192.168.145.30) 56(84) bytes of data. 64 bytes from 192.168.145.30: icmp_seq=1 ttl=64 time=0.016 ms ^C --- 192.168.145.30 ping statistics --- 1 packets transmitted, 1 received, 0% packet loss, time 0ms rtt min/avg/max/mdev = 0.016/0.016/0.016/0.000 ms- 1
- 2
- 3
- 4
- 5
- 6
- 7
- 8
- 9
- 10
- 11
- 12
- 13
- 14
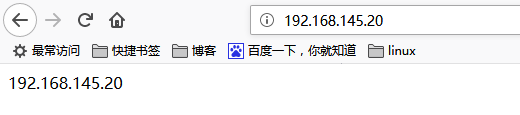
第2步:分别在/home/test中创建用于保存不同网站数据的3个目录,并向其中分别写入网站的首页文件。每个首页文件中应有明确区分不同网站内容的信息,方便我们稍后能更直观地检查效果。
[root@localhost ~]# mkdir /home/test/1 [root@localhost ~]# mkdir /home/test/2 [root@localhost ~]# mkdir /home/test/3 [root@localhost ~]# echo "192.168.145.10" > /home/test/1/index.html [root@localhost ~]# echo "192.168.145.20" > /home/test/2/index.html [root@localhost ~]# echo "192.168.145.30" > /home/test/3/index.html- 1
- 2
- 3
- 4
- 5
- 6
- 7
第3步:修改配置文件,追加写入三个基于IP地址的虚拟主机网站参数,然后保存并退出。
[root@localhost ~]# vim /etc/httpd/conf/httpd.conf 最末行增加(113) ....... <VirtualHost 192.168.145.10> DocumentRoot /home/test/1 ServerName www.one.com <Directory /home/test/1> AllowOverride None Require all granted </Directory> </VirtualHost> <VirtualHost 192.168.145.20> DocumentRoot /home/test/2 ServerName www.two.com <Directory /home/test/2> AllowOverride None Require all granted </Directory> </VirtualHost> <VirtualHost 192.168.145.30> DocumentRoot /home/test/3 ServerName www.three.com <Directory /home/test/3> AllowOverride None Require all granted </Directory> </VirtualHost>- 1
- 2
- 3
- 4
- 5
- 6
- 7
- 8
- 9
- 10
- 11
- 12
- 13
- 14
- 15
- 16
- 17
- 18
- 19
- 20
- 21
- 22
- 23
- 24
- 25
- 26
- 27
- 28
- 29
第4步:重启服务
[root@localhost ~]# systemctl restart httpd.service- 1


相同ip不同域名
当服务器无法为每个网站都分配一个独立IP地址的时候,可以尝试让Apache自动识别用户请求的域名,从而根据不同的域名请求来传输不同的内容。在这种情况下的配置更加简单,只需要保证位于生产环境中的服务器上有一个可用的IP地址就可以了
第1步:手工定义IP地址与域名之间对应关系的配置文件,保存并退出后会立即生效。可以通过分别ping这些域名来验证域名是否已经成功解析为IP地址。我们用的windows浏览器访问的域名,应修改windows的hosts文件


第1步,修改配置文件[root@localhost ~]# vim /etc/httpd/conf/httpd.conf ..... (在上次基础上改就可以了) <VirtualHost 192.168.145.10> DocumentRoot /home/test/1 ServerName test1.haha.com <Directory /home/test/1> AllowOverride None Require all granted </Directory> </VirtualHost> <VirtualHost 192.168.145.10> DocumentRoot /home/test/2 ServerName test2.haha.com <Directory /home/test/2> AllowOverride None Require all granted </Directory> </VirtualHost> <VirtualHost 192.168.145.10> DocumentRoot /home/test/3 ServerName test3.haha.com <Directory /home/test/3> AllowOverride None Require all granted </Directory> </VirtualHost>- 1
- 2
- 3
- 4
- 5
- 6
- 7
- 8
- 9
- 10
- 11
- 12
- 13
- 14
- 15
- 16
- 17
- 18
- 19
- 20
- 21
- 22
- 23
- 24
- 25
- 26
- 27
- 28
第3步:重启服务
[root@localhost ~]# systemctl restart httpd- 1
第四步,验证


相同ip不同端口
修改配置文件
39 # prevent Apache from glomming onto all bound IP addresses. 40 # 41 #Listen 12.34.56.78:80 42 Listen 80 43 Listen 800 #添加端口 44 Listen 8080 #添加端口 45 46 # 47 # Dynamic Shared Object (DSO) Support 116 <VirtualHost 192.168.145.10:80> #加端口 117 DocumentRoot /home/test/1 118 ServerName test1.haha.com 119 <Directory /home/test/1> 120 AllowOverride None 121 Require all granted 122 </Directory> 123 </VirtualHost> 124 <VirtualHost 192.168.145.10:800> #加端口 125 DocumentRoot /home/test/2 126 ServerName test2.haha.com 127 <Directory /home/test/2> 128 AllowOverride None 129 Require all granted 130 </Directory> 131 </VirtualHost> 132 <VirtualHost 192.168.145.10:8080> #加端口 133 DocumentRoot /home/test/3 134 ServerName test3.haha.com 135 <Directory /home/test/3> 136 AllowOverride None 137 Require all granted 138 </Directory> 139 </VirtualHost> 140 #- 1
- 2
- 3
- 4
- 5
- 6
- 7
- 8
- 9
- 10
- 11
- 12
- 13
- 14
- 15
- 16
- 17
- 18
- 19
- 20
- 21
- 22
- 23
- 24
- 25
- 26
- 27
- 28
- 29
- 30
- 31
- 32
- 33
- 34
- 35
- 36
- 37
- 38
重启服务
[root@localhost ~]# systemctl restart httpd- 1
查看端口
[root@localhost ~]# ss -antl State Recv-Q Send-Q Local Address:Port Peer Address:Port LISTEN 0 128 *:22 *:* LISTEN 0 100 127.0.0.1:25 *:* LISTEN 0 128 :::8080 :::* LISTEN 0 128 :::80 :::* LISTEN 0 128 :::22 :::* LISTEN 0 100 ::1:25 :::* LISTEN 0 128 :::800 :::*- 1
- 2
- 3
- 4
- 5
- 6
- 7
- 8
- 9
验证(默认80)


-
相关阅读:
利用 Python PyPDF2库轻松提取PDF文本(及其他高级操作)
现代_复习_第4章:线性方程组
C/C++自动 21 级(含卓越 211)《软件技术基础》期末大作业
性能测试-性能瓶颈定位思路(14)
【RKNN】YOLO V5中pytorch2onnx,pytorch和onnx模型输出不一致,精度降低
分布式ID系统设计(1)
etcd http API
【智能优化算法】基于觅食生境选择的改进粒子群算法(FHSPSO)附 Matlab代码
ant design ant design Pro 中的table横向与纵向合并问题
Web前端:所有新前端开发人员应该具备的顶级技能
- 原文地址:https://blog.csdn.net/qq_43094192/article/details/85708143
