-
Flink on yarn 实战和源码分析
版本:1.13.6
目录
Flink on yarn 的3种模式的使用
Application Mode #
./bin/flink run-application -t yarn-application ./examples/streaming/TopSpeedWindowing.jar
Per-Job Mode #
./bin/flink run -t yarn-per-job --detached ./examples/streaming/TopSpeedWindowing.jar
Session Mode #
./bin/flink run -t yarn-session ./examples/streaming/TopSpeedWindowing.jar
注意:application 方式 使用的action为 run-application,而 per-job session mode 都是 run -t。 为什么不统一呢,官方没注意到?
yarn session 模式源码分析
以样例TopSpeedWindowing.jar为例,命令行提交命令为:
./bin/flink run -t yarn-session ./examples/streaming/TopSpeedWindowing.jar
根据bin/flink脚本中的入口类 org.apache.flink.client.cli.CliFrontend
1、找到bin/flink 提交脚本中看到启动类即程序的入口是: org.apache.flink.client.cli.CliFrontend
2、查看其中的main方法,执行的逻辑简单总结如下:
-
获取flink的conf目录的路径
-
根据conf路径,加载配置
-
封装命令行接口:按顺序Generic、Yarn、Default
- /** Submits the job based on the arguments. */
- public static void main(final String[] args) {
- EnvironmentInformation.logEnvironmentInfo(LOG, "Command Line Client", args);
- // 1. find the configuration directory
- final String configurationDirectory = getConfigurationDirectoryFromEnv();
- // 2. load the global configuration
- final Configuration configuration =
- GlobalConfiguration.loadConfiguration(configurationDirectory);
- // 3. load the custom command lines
- final List
customCommandLines = - loadCustomCommandLines(configuration, configurationDirectory);
- int retCode = 31;
- try {
- final CliFrontend cli = new CliFrontend(configuration, customCommandLines);
- SecurityUtils.install(new SecurityConfiguration(cli.configuration));
- retCode = SecurityUtils.getInstalledContext().runSecured(() -> cli.parseAndRun(args));
- } catch (Throwable t) {
- final Throwable strippedThrowable =
- ExceptionUtils.stripException(t, UndeclaredThrowableException.class);
- LOG.error("Fatal error while running command line interface.", strippedThrowable);
- strippedThrowable.printStackTrace();
- } finally {
- System.exit(retCode);
- }
- }
parseAndRun 方法中 根据命令行的第一个参数匹配action ,此模式参数为run ,所以 case ACTION_RUN:
- /**
- * Parses the command line arguments and starts the requested action.
- *
- * @param args command line arguments of the client.
- * @return The return code of the program
- */
- public int parseAndRun(String[] args) {
- // check for action
- if (args.length < 1) {
- CliFrontendParser.printHelp(customCommandLines);
- System.out.println("Please specify an action.");
- return 1;
- }
- // get action
- String action = args[0];
- // remove action from parameters
- final String[] params = Arrays.copyOfRange(args, 1, args.length);
- try {
- // do action
- switch (action) {
- case ACTION_RUN:
- run(params);
- return 0;
- case ACTION_RUN_APPLICATION:
- runApplication(params);
- return 0;
- case ACTION_LIST:
- list(params);
- return 0;
- case ACTION_INFO:
- info(params);
- return 0;
- case ACTION_CANCEL:
- cancel(params);
- return 0;
- case ACTION_STOP:
- stop(params);
- return 0;
- case ACTION_SAVEPOINT:
- savepoint(params);
- return 0;
- case "-h":
- case "--help":
- CliFrontendParser.printHelp(customCommandLines);
- return 0;
- case "-v":
- case "--version":
- String version = EnvironmentInformation.getVersion();
- String commitID = EnvironmentInformation.getRevisionInformation().commitId;
- System.out.print("Version: " + version);
- System.out.println(
- commitID.equals(EnvironmentInformation.UNKNOWN)
- ? ""
- : ", Commit ID: " + commitID);
- return 0;
- default:
- System.out.printf("\"%s\" is not a valid action.\n", action);
- System.out.println();
- System.out.println(
- "Valid actions are \"run\", \"run-application\", \"list\", \"info\", \"savepoint\", \"stop\", or \"cancel\".");
- System.out.println();
- System.out.println(
- "Specify the version option (-v or --version) to print Flink version.");
- System.out.println();
- System.out.println(
- "Specify the help option (-h or --help) to get help on the command.");
- return 1;
- }
- } catch (CliArgsException ce) {
- return handleArgException(ce);
- } catch (ProgramParametrizationException ppe) {
- return handleParametrizationException(ppe);
- } catch (ProgramMissingJobException pmje) {
- return handleMissingJobException();
- } catch (Exception e) {
- return handleError(e);
- }
- }
- /**
- * Executions the run action.
- *
- * @param args Command line arguments for the run action.
- */
- protected void run(String[] args) throws Exception {
- LOG.info("Running 'run' command.");
- //获取run的动作,默认的配置项
- final Options commandOptions = CliFrontendParser.getRunCommandOptions();
- //根据用户指定的配置项,进行解析 例如-t -p -c等
- final CommandLine commandLine = getCommandLine(commandOptions, args, true);
- // evaluate help flag,只要参数中包含help 打印后结束
- if (commandLine.hasOption(HELP_OPTION.getOpt())) {
- CliFrontendParser.printHelpForRun(customCommandLines);
- return;
- }
- final CustomCommandLine activeCommandLine =
- validateAndGetActiveCommandLine(checkNotNull(commandLine));
- final ProgramOptions programOptions = ProgramOptions.create(commandLine);
- //获取 用户的jar包和其他依赖
- final List
jobJars = getJobJarAndDependencies(programOptions); - //获取有效配置:HA的id、Target(session、per-job)、JobManager内存、TaskManager内存、每个TM的slot数
- final Configuration effectiveConfiguration =
- getEffectiveConfiguration(activeCommandLine, commandLine, programOptions, jobJars);
- LOG.debug("Effective executor configuration: {}", effectiveConfiguration);
- // PackagedProgram 类很关键,
- try (PackagedProgram program = getPackagedProgram(programOptions, effectiveConfiguration)) {
- // 执行程序
- executeProgram(effectiveConfiguration, program);
- }
- }
yarn per-job模式源码分析
以样例TopSpeedWindowing.jar为例,命令行提交命令为:
./bin/flink run -t yarn-per-job --detached ./examples/streaming/TopSpeedWindowing.jar
application模式源码分析
Flink 1.11 版本引入了 Application 模式。
应用模式是唯一一个main方法不在客户端上执行的。其他两种模式都要在本地管理依赖资源,运行main方法然后生成JobGraph并提交到集群,不仅增加了网络传输的压力,还消耗了客户端大量的CPU资源。为了解决这个问题,应用模式先把用户jar包等资源提交到资源平台,然后创建Flink集群 并 自动在服务器上运行应用main方法。在main方法中可以通过execute或executeAysnc提交任务并记录提交作业id,作业执行完毕后,集群自动关闭。因此这种模式可以跟Per Job一样做到单任务的资源隔离,同时也可以解决客户端的计算瓶颈问题。
另外,应用模式支持提交多个作业,作业的顺序依赖于启动顺序。如果使用的是execute()会阻塞按顺序执行;如果使用的是executeAysnc,各个任务可能会乱序执行。
bin目录下 flink脚本内容,可以看到 入口类为 org.apache.flink.client.cli.CliFrontend

- #!/usr/bin/env bash
- ################################################################################
- # Licensed to the Apache Software Foundation (ASF) under one
- # or more contributor license agreements. See the NOTICE file
- # distributed with this work for additional information
- # regarding copyright ownership. The ASF licenses this file
- # to you under the Apache License, Version 2.0 (the
- # "License"); you may not use this file except in compliance
- # with the License. You may obtain a copy of the License at
- #
- # http://www.apache.org/licenses/LICENSE-2.0
- #
- # Unless required by applicable law or agreed to in writing, software
- # distributed under the License is distributed on an "AS IS" BASIS,
- # WITHOUT WARRANTIES OR CONDITIONS OF ANY KIND, either express or implied.
- # See the License for the specific language governing permissions and
- # limitations under the License.
- ################################################################################
- target="$0"
- # For the case, the executable has been directly symlinked, figure out
- # the correct bin path by following its symlink up to an upper bound.
- # Note: we can't use the readlink utility here if we want to be POSIX
- # compatible.
- iteration=0
- while [ -L "$target" ]; do
- if [ "$iteration" -gt 100 ]; then
- echo "Cannot resolve path: You have a cyclic symlink in $target."
- break
- fi
- ls=`ls -ld -- "$target"`
- target=`expr "$ls" : '.* -> \(.*\)$'`
- iteration=$((iteration + 1))
- done
- # Convert relative path to absolute path
- bin=`dirname "$target"`
- # get flink config
- . "$bin"/config.sh
- if [ "$FLINK_IDENT_STRING" = "" ]; then
- FLINK_IDENT_STRING="$USER"
- fi
- CC_CLASSPATH=`constructFlinkClassPath`
- log=$FLINK_LOG_DIR/flink-$FLINK_IDENT_STRING-client-$HOSTNAME.log
- log_setting=(-Dlog.file="$log" -Dlog4j.configuration=file:"$FLINK_CONF_DIR"/log4j-cli.properties -Dlog4j.configurationFile=file:"$FLINK_CONF_DIR"/log4j-cli.properties -Dlogback.configurationFile=file:"$FLINK_CONF_DIR"/logback.xml)
- # Add Client-specific JVM options
- FLINK_ENV_JAVA_OPTS="${FLINK_ENV_JAVA_OPTS} ${FLINK_ENV_JAVA_OPTS_CLI}"
- # Add HADOOP_CLASSPATH to allow the usage of Hadoop file systems
- exec "${JAVA_RUN}" $JVM_ARGS $FLINK_ENV_JAVA_OPTS "${log_setting[@]}" -classpath "`manglePathList "$CC_CLASSPATH:$INTERNAL_HADOOP_CLASSPATHS"`" org.apache.flink.client.cli.CliFrontend "$@"
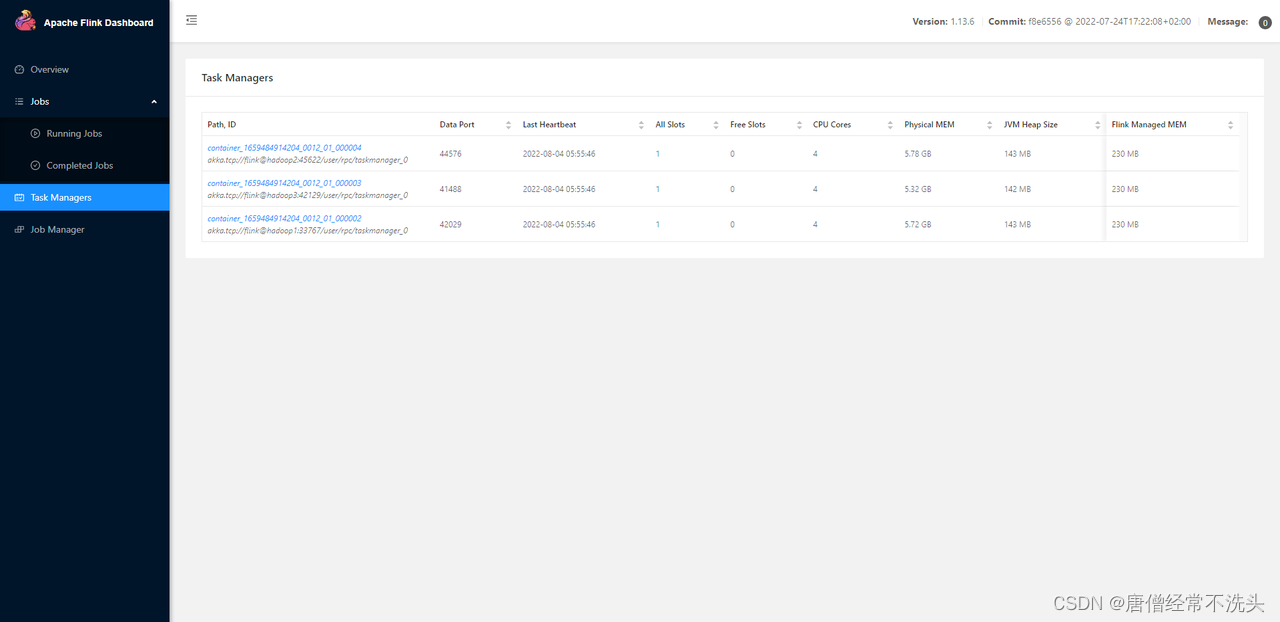
使用application方式提交样例作业

hadoop1 jps

hadoop2 jps

hadoop3 jps

jobmanager

taskmanager -p 3 1slot/taskmanager 所以 需要启动3个container

-
-
相关阅读:
【springboot】你了解@Autowired 和 @Resource吗?@Autowired 和 @Resource深入分析
Android 摇一摇功能实现,重力加速度大于15
[动态规划] (十四) 简单多状态 LeetCode LCR 091.粉刷房子
【毕业设计】机器学习的员工离职模型研究-python
Vue2详解
【leetcode】排序数组中两个数字之和
《第一行代码Andorid》阅读笔记-第一章
爬虫基础入门
基本概念 I 和 Q:I/Q 数据的基础知识
无良软件测试培训机构,退退退
- 原文地址:https://blog.csdn.net/yelangshisan/article/details/133265734
