-
数据库开发项目 flask + html 01
目的 开放平台(网站)
前端开发 HTML CSS JavaScript
Web框架: 接受请求并处理
MySQL数据库: 存储数据快速上手: 基于 Flask Web框架 快速搭建网站。
进阶: 基于 Django框架1. 快速开发网站
安装框架
pip3 install flask
app = Flask(__name__) # 创建 网址 /show/info 和 函数index的对应关系 # 以后 用户浏览器访问 /show/info 网站自动执行 和 函数index 的对应关系 @app.route("/show/info") def index(): return "China Union" if __name__ == '__main__': app.run()- 1
- 2
- 3
- 4
- 5
- 6
- 7
- 8
- 9
- 10
- 11
- 12
访问网站
http://127.0.0.1:5000/show/info
浏览器修改
标签 + 数据@app.route("/show/info") def index(): return "China
" \ "Union" if __name__ == '__main__': app.run()- 1
- 2
- 3
- 4
- 5
- 6
- 7
<h1></h1> 加粗 <span style = 'color:red;'>Union</span> 字体变红- 1
- 2
Flask框架支持 将文件 直接打开,并将文件返回
@app.route("/show/info") def index(): # return "China
" \ # "Union" # FLask 内部会自动打开这个文件,并读取内容,将内容给用户返回。 # 默认去 当前目录的templates文件夹中找。 return render_template("index.html") if __name__ == '__main__': app.run()- 1
- 2
- 3
- 4
- 5
- 6
- 7
- 8
- 9
- 10
- 11
- 12
创建 templates 文件
并在里面创建 index.html文件
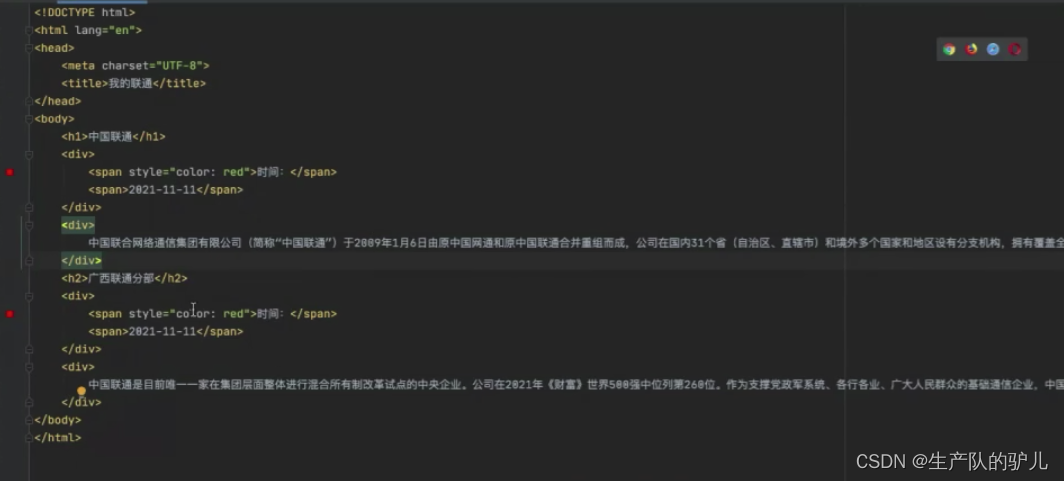
在这里插入图片描述2. 浏览器可以识别的标签
2.1 编码
<meta charset="UTF-8">- 1
表示 用户接收到文件之后,使用 utf-8进行解码

2.2 title
<title>My Union</title>- 1

2.3 标题
<body> <h1>一级标题</h1> <h2>二级标题</h2> <h3>三级标题</h3> <h4>四级标题</h4> <h5>五级标题</h5> </body>- 1
- 2
- 3
- 4
- 5
- 6
- 7

2.4 div和span
div 分行 一人占一行(块级标签)
span 不分行(行内标签)<body> <div>ShanDong Blue fly</div> <div> where is the best Excavator</div> </body> </html>- 1
- 2
- 3
- 4
- 5

<body> <span>ShanDong Blue fly</span> <span> where is the best Excavator</span> </body> </html>- 1
- 2
- 3
- 4
- 5

注意: 这两个标签 比较素。但是可以通过 和 CSS样式结合 变化。
小节:

2.4.5 超链接
跳转到其他网站
def index(): return render_template("index.html") if __name__ == '__main__': app.run()- 1
- 2
- 3
- 4
- 5
只修改html文件就好了
<!DOCTYPE html> <html lang="en"> <head> <meta charset="UTF-8"> <title>My Union</title> </head> <body> <a href="https://www.google.com/">click</a> </body> </html>- 1
- 2
- 3
- 4
- 5
- 6
- 7
- 8
- 9
- 10
- 11
- 12
跳转到自己网站可以简写


显示图片
<!DOCTYPE html> <html lang="en"> <head> <meta charset="UTF-8"> <title>My Union2</title> </head> <body> <!-- <img src = "图片地址"/>--> <!-- 引用别人的图片--> <img src="https://pic1.zhimg.com/v2-59adb0fd7757a7c5722d7a4fef576fbc_b.jpg" /> <!-- 显示自己的图片--> <!-- <img src = "自己图片的地址" />--> <img src="/static/wbq.jpg"> </body> </html>- 1
- 2
- 3
- 4
- 5
- 6
- 7
- 8
- 9
- 10
- 11
- 12
- 13
- 14
- 15
指定 长度 和 宽度
px是指 像素<img style = "height: 100px;width: 100px" src="https://pic1.zhimg.com/v2-59adb0fd7757a7c5722d7a4fef576fbc_b.jpg" />- 1

小结:
标签<h1> </h1> <div></div> <span></span> <a></a> <img />- 1
- 2
- 3
- 4
- 5
划分
块级标签 <h1></h1> <div></div> 行内标签 <span></span> <a></a> <img />- 1
- 2
- 3
- 4
- 5
- 6
- 7
- 8
嵌套
<div> <span>xxx</span> </div>- 1
- 2
- 3
- 4
图片 超链接 组合
<!DOCTYPE html> <html lang="en"> <head> <meta charset="UTF-8"> <title>Title</title> </head> <body> <h1>good list</h1> <a href="https://www.amazon.com/Terre-Hermes-Men-Parfum-Spray/dp/B002Z7FSK8/?_encoding=UTF8&pd_rd_w=pVRJ3&content-id=amzn1.sym.a5eaa569-8a45-4530-84d2-2dcf8023272a&pf_rd_p=a5eaa569-8a45-4530-84d2-2dcf8023272a&pf_rd_r=7DGMPYTV0N4EY1NJ7W62&pd_rd_wg=r1RsG&pd_rd_r=9397a299-b451-4a14-8231-5226f22b4e2b&ref_=pd_gw_ci_mcx_mi"> <img src="/static/good1.jpg" style="width: 150px"> </a> <!--增加target="_blank",会新生成网页,而不是跳转--> <a href="https://www.amazon.com/Terre-Hermes-Men-Parfum-Spray/dp/B002Z7FSK8/?_encoding=UTF8&pd_rd_w=pVRJ3&content-id=amzn1.sym.a5eaa569-8a45-4530-84d2-2dcf8023272a&pf_rd_p=a5eaa569-8a45-4530-84d2-2dcf8023272a&pf_rd_r=7DGMPYTV0N4EY1NJ7W62&pd_rd_wg=r1RsG&pd_rd_r=9397a299-b451-4a14-8231-5226f22b4e2b&ref_=pd_gw_ci_mcx_mi" target="_blank" > <img src="/static/good2.jpg" style="width: 150px"> </a> </body> </html>- 1
- 2
- 3
- 4
- 5
- 6
- 7
- 8
- 9
- 10
- 11
- 12
- 13
- 14
- 15
- 16
- 17
- 18
- 19
- 20
- 21
- 22
- 23
@app.route("/goods/list") def good_list(): return render_template("good_list.html")- 1
- 2
- 3
列表标签
ul 是点
ol 是数字

<body> <ul> <li> china no1</li> <li> china no2</li> <li> china no3</li> </ul> </body> </html>- 1
- 2
- 3
- 4
- 5
- 6
- 7
- 8
- 9

<ul> <li> china no1</li> <li> china no2</li> <li> china no3</li> </ul> <ol> <li> china no1</li> <li> china no2</li> <li> china no3</li> </ol>- 1
- 2
- 3
- 4
- 5
- 6
- 7
- 8
- 9
- 10
- 11
- 12
- 13
表格标签
<h1>data table</h1> <!-- borader= 1 表示增加边框--> <table border="1"> <thead> <!-- 表头--> <tr> <th>ID</th> <th>Name</th> <th>age<th> </tr> </thead> <tr> <td>10</td> <td>stev</td> <td>19 </td> </tr> <tr> <td>11</td> <td>wu</td> <td>19 </td> </tr> <tr> <td>12</td> <td>cor</td> <td>19 </td> </tr> <tr> <td>13</td> <td>xin</td> <td>19 </td> </tr> <tr> <td>14</td> <td>x</td> <td>19 </td> </tr> <tbody> </tbody> </table>- 1
- 2
- 3
- 4
- 5
- 6
- 7
- 8
- 9
- 10
- 11
- 12
- 13
- 14
- 15
- 16

case练习
新建立html
<!DOCTYPE html> <html lang="en"> <head> <meta charset="UTF-8"> <title>Title</title> </head> <body> <h1>user list</h1> <table border = "1"> <thead> <tr> <th>ID</th> <th>PHOTO</th> <th>NAME</th> <th>EMAIL</th> <th>OPERATION</th> </tr> </thead> <tbody> <tr> <td>1</td> <td> <img src = "/static/good1.jpg" alt="" style="height: 50px"> </td> <td> wucc</td> <td>lxx@xx.com</td> <td> <a href="https://www.nia.gov.cn/n741430/n741491/index.html" target="_blank">click to see more information </a> </td> </tr> </tbody> </table> </body> </html>- 1
- 2
- 3
- 4
- 5
- 6
- 7
- 8
- 9
- 10
- 11
- 12
- 13
- 14
- 15
- 16
- 17
- 18
- 19
- 20
- 21
- 22
- 23
- 24
- 25
- 26
- 27
- 28
- 29
- 30
- 31
- 32
- 33
- 34
- 35
添加url
@app.route("/users/list") def user_list(): return render_template("user_list.html")- 1
- 2
- 3
- 4
输入框
<h1>input context</h1> <input type="text">- 1
- 2
密码框

上传文件<input type="file">- 1

单选 和 多选<!--单选框--> <!-- 如果name一样,则这两个单选框是 互斥的,即 只能选择1个--> <input type="radio" name = "n1"> male <input type="radio" name = "n1"> female <!--复选框--> <input type="checkbox"> mutiple options1 <input type="checkbox"> mutiple options2- 1
- 2
- 3
- 4
- 5
- 6
- 7
- 8
- 9

按钮 和 提交

下拉框 Drop-down box
<h1>drop-off box</h1> <select multiple> <option> beijing </option> <option> shenzhen </option> <option> sanjose </option> <option> seattle </option> <option> boston </option> </select>- 1
- 2
- 3
- 4
- 5
- 6
- 7
- 8
多行文本
<h1>mutiple text</h1> <textarea></textarea>- 1
- 2

用户注册案例
User registration case
<!DOCTYPE html> <html lang="en"> <head> <meta charset="UTF-8"> <title>Title</title> </head> <body> <h1>user register</h1> <div> user: <input type="text" /> </div> <div> password: <input type="password" /> </div> <div> sex: <input type="radio" /> male <input type="radio"> female </div> <div> hobbits: <input type="checkbox"> basketball <input type="checkbox"> football <input type="checkbox"> tableball </div> <div> city: <select> <option>sanjose</option> <option>seattle</option> <option>boston</option> <option>newyork</option> </select> </div> <div> comment: <textarea></textarea> </div> <div> <input type="button" value = "button"> <input type="submit" value = "submit"> </div> </body> </html>- 1
- 2
- 3
- 4
- 5
- 6
- 7
- 8
- 9
- 10
- 11
- 12
- 13
- 14
- 15
- 16
- 17
- 18
- 19
- 20
- 21
- 22
- 23
- 24
- 25
- 26
- 27
- 28
- 29
- 30
- 31
- 32
- 33
- 34
- 35
- 36
- 37
- 38
- 39
- 40
- 41
- 42
- 43
- 44
- 45
@app.route("/register") def register(): return render_template("register.html")- 1
- 2
- 3
- 4
回顾
网络 进行 数据交互
浏览器 向 网站 发出请求
网站接收请求 返还数据 给浏览器
标签
h
div
span
a
img
ul
li
table
input
textarea
select网络请求的本质
在浏览器的URL写入地址
点击回车 访问浏览器会发送数据过去
本质上 发送的是字符串
GET /explore httpl.1\r \nhost:…\rlnuser-agent \rln…\rlnlrln
或者
浏览器会发送数据过去,本质上发送的是字符串:
“POST /explore httpl.1\r\nhost:。。。 \r\nuser-agent\rln。。 \rin\r\n“浏览器在向后端发送请求时
GET请求:{URL方法,表单提交}
相当于透明袋子
现象: GET请求,跳转, 向后台传入数据时, 数据会拼接在URL上。https://www.sogou.com/web?query-安卓&age=19sname=xx- 1
注意:GET请求数据会在URL中体现。
POST请求:「只能表单请求」
相当于黑色袋子(看不到)
现象: 提交数据不在URL中体现,而是在请求体中。提交数据 form标签
form 提交 要和 submmit结合
在这里插入代码片- 1
页面上的数据想要提交后台:
数据 必须被 <form> 标签包裹。 form标签内 method 定义为 get 提交地址 action = “地址” 在form标签里面必须有 submmit- 1
- 2
- 3
- 4
- 5
案例代码
# This is a sample Python script. from crypt import methods # Press ⌃R to execute it or replace it with your code. # Press Double ⇧ to search everywhere for classes, files, tool windows, actions, and settings. from flask import Flask, render_template, request app = Flask(__name__) @app.route('/register', methods =['GET']) def register(): return render_template("register.html") # @app.route('/do/reg', methods = ['GET']) # def do_register(): # # receiver user by get # print(register.args) # return "register successful!" @app.route('/post/reg', methods = ['POST']) def post_register(): # print(request.form) user = request.form.get("user") pwd = request.form.get("pwd") gender = request.form.get("gender") hobby_list = request.form.getlist("hobby") city = request.form.get("city") skill_list = request.form.getlist("skill") more = request.form.get("more") print(user,pwd,gender,hobby_list,city,skill_list,more) # 将用户信息写入文件中 实现注册,写入mysql实现注册 return "register successful!2" if __name__ == '__main__': app.run()- 1
- 2
- 3
- 4
- 5
- 6
- 7
- 8
- 9
- 10
- 11
- 12
- 13
- 14
- 15
- 16
- 17
- 18
- 19
- 20
- 21
- 22
- 23
- 24
- 25
- 26
- 27
- 28
- 29
- 30
- 31
- 32
- 33
- 34
- 35
- 36
- 37
html页面
<!DOCTYPE html> <html lang="en"> <head> <meta charset="UTF-8"> <title>user registation</title> </head> <body> <h1>user registation</h1> <h1>user register</h1> <!--action表示提交的地址--> <form method="post" action="/post/reg"> <div> user: <input type="text" name="user" /> </div> <div> password: <input type="password" name="pwd" /> </div> <div> sex: <input type="radio" name="gender" value="1"> male <input type="radio" name="gender" value="2"> female </div> <div> hobby: <input type="checkbox" name="hobby" value="10"> basketball <input type="checkbox" name="hobby" value="20"> football <input type="checkbox" name="hobby" value="30"> table ball </div> <div> city: <select> <option value="sj">San Jose</option> <option value="s">Settle</option> <option value="b">Boston</option> </select> </div> Areas of expertise: <select name="skill" multiple> <option value="100">eat</option> <option value="101">sleep</option> <option value="102">play</option> </select> <div> <div> comment: <textarea name = "more"></textarea> </div> </div> <div> <input type="submit" value = "submit"> </div> </form> </body> </html>- 1
- 2
- 3
- 4
- 5
- 6
- 7
- 8
- 9
- 10
- 11
- 12
- 13
- 14
- 15
- 16
- 17
- 18
- 19
- 20
- 21
- 22
- 23
- 24
- 25
- 26
- 27
- 28
- 29
- 30
- 31
- 32
- 33
- 34
- 35
- 36
- 37
- 38
- 39
- 40
- 41
- 42
- 43
- 44
- 45
- 46
- 47
- 48
- 49
- 50
- 51
- 52
- 53
- 54
- 55
- 56
- 57
- 58
改进
通过设置method不同
改进# This is a sample Python script. from crypt import methods # Press ⌃R to execute it or replace it with your code. # Press Double ⇧ to search everywhere for classes, files, tool windows, actions, and settings. from flask import Flask, render_template, request app = Flask(__name__) @app.route('/register', methods =['GET', 'POST']) def register(): if request.method == "GET": return render_template("register.html") else: user = request.form.get("user") pwd = request.form.get("pwd") gender = request.form.get("gender") hobby_list = request.form.getlist("hobby") city = request.form.get("city") skill_list = request.form.getlist("skill") more = request.form.get("more") print(user,pwd,gender,hobby_list,city,skill_list,more) # 将用户信息写入文件中 实现注册,写入mysql实现注册 return "register successful!" if __name__ == '__main__': app.run()- 1
- 2
- 3
- 4
- 5
- 6
- 7
- 8
- 9
- 10
- 11
- 12
- 13
- 14
- 15
- 16
- 17
- 18
- 19
- 20
- 21
- 22
- 23
- 24
- 25
- 26
- 27
- 28
- 29
前端页面改这里

-
相关阅读:
AspNetCore&云效Flow持续集成
51单片机全自动洗衣机proteus仿真设计
Maven中央仓库
Android | WMS 解析(一)
MySQL 8.0 新特性之 Clone Plugin
MySQL的介绍
开发工程师必备————【Day37】Django补充(九)
程序分享--排序算法--冒泡排序
【前端小tip】深拷贝不能处理函数的解决方法,文末包含所有深拷贝常见问题的解决方法
STP选举
- 原文地址:https://blog.csdn.net/weixin_46969441/article/details/128063628
