-
初识 Spring 框架
一、Spring 介绍
Spring 是由 Rod Johnson 组织和开发的一个分层的 Java SE/EE 一站式轻量级开源框架。它最为核心的理念是 loC(控制反转)和 AOP(面向切面编程),其中,loC 是 Spring 的基础,它支撑着 Spring 对 JavaBean 的管理功能,AOP 是 Spring 的重要特性,AOP 是通过预编译方式和运行期间动态代理实现程序功能,也就是说可以在不修改源代码的情况下,给程序统一添加功能。
Spring 在表现层、业务逻辑层和持久层的作用:
① 在表现层它提供了 Spring MVC 框架,并且 Spring 还可以与 Struts 框架整合;
② 在业务逻辑层可以管理事务、记录日志等;
③ 在持久层可以整合 MyBatis、Hibernate、JdbcTemplate 等技术。Spring 框架的优点:
(1)Spring 是一种非侵入式框架,所谓非侵入式是指 Spring 框架的 API 不会再业务逻辑上出现,也就是说业务逻辑应该是纯净的,不能出现与业务逻辑无关的代码。由于业务逻辑中没有 Spring 的 API,所以业务逻辑代码也可以从 Spring 框架快速地移植到其他框架;
(2)Spring 就是一个大工厂,可以将所有对象的创建和依赖关系的维护工作都交给 Spring 容器管理,大大降低了组件之间的耦合性;
(3)Spring 提供了对 AOP 的支持,AOP 可以将一些通用的任务进行集中处理,如安全、事务和日志等,以减少通过传统 OOP 方法带来的代码冗余和繁杂;
(4)在 Spring 中,可以直接通过 Spring 配置文件管理数据库事务,省去了手动编程的繁琐,提高了开发效率;
(5)Spring 提供了对 Junit 的支持,开发人员可以通过 Junit 进行单元测试;
(6)Spring 提供了一个广阔的基础平台,其内部提供了对各种框架的直接支持,如 Struts、Hibernate、MyBatis、Ouartz 等,这些优秀框架可以与 Spring 无缝集成;
(7)Spring 对 Java EE 开发中的一些 API(如 JDBC、JavaMail 等)都进行了封装,大大降低了这些 API 的使用难度。二、Spring 下载安装
(1)Spring 官网地址,
https://spring.io/(2)Projects → Spring Framework

(3)打开 github

(4)往下翻,找到 Access to Binaries,点击下面的网址

(5)打开后继续往下滑,选择 Downloading a Distribution 下的网址

(6)点击 Artifacts,依次展开 release → org → springframework → spring


(7)选择最新版本,点击右侧链接

(8)点击第一个开始下载

在使用 Spring 开发时,除了要使用自带的 jar 包外,Spring 的核心容器还需要依赖 commons.logging 的 jar 包,但是由于我们创建的是 Maven 工程,这些架包 Maven 都可以帮我们自动完成,所以我们只需了解即可。
三、编写入门程序
1.项目文件构架

2.引入相关依赖
<dependencies> <dependency> <groupId>org.springframeworkgroupId> <artifactId>spring-beansartifactId> <version>5.3.9version> dependency> <dependency> <groupId>org.springframeworkgroupId> <artifactId>spring-contextartifactId> <version>5.3.9version> dependency> <dependency> <groupId>org.springframeworkgroupId> <artifactId>spring-coreartifactId> <version>5.3.9version> dependency> <dependency> <groupId>org.springframeworkgroupId> <artifactId>spring-expressionartifactId> <version>5.3.9version> dependency> <dependency> <groupId>commons-logginggroupId> <artifactId>commons-loggingartifactId> <version>1.2version> dependency> <dependency> <groupId>org.junit.jupitergroupId> <artifactId>junit-jupiterartifactId> <version>RELEASEversion> <scope>testscope> dependency> <dependency> <groupId>org.springframeworkgroupId> <artifactId>spring-testartifactId> <version>5.3.9version> <scope>testscope> dependency> dependencies>- 1
- 2
- 3
- 4
- 5
- 6
- 7
- 8
- 9
- 10
- 11
- 12
- 13
- 14
- 15
- 16
- 17
- 18
- 19
- 20
- 21
- 22
- 23
- 24
- 25
- 26
- 27
- 28
- 29
- 30
- 31
- 32
- 33
- 34
- 35
- 36
- 37
- 38
- 39
- 40
- 41
- 42
- 43
- 44
- 45
- 46
- 47
- 48
- 49
- 50
- 51
- 52

3.创建实体类
在 src/main/java/com.tyut 下创建实体类,HelloSpring.java。
//HelloSpring.java package com.tyut; public class HelloSpring { private String userName; private void setUserName(String userName) { this.userName = userName; } public void show() { System.out.println(userName+"你好,Spring"); } }- 1
- 2
- 3
- 4
- 5
- 6
- 7
- 8
- 9
- 10
- 11
- 12
4.Spring 配置文件
找到我们之前下载好的 Spring 文件夹,docs → reference → html → index.html → Core → 往下滑找到 Configuration Metadata,再往下滑一点可以看到一段代码,这就是我们所要的配置文件模板,直接复制。


<beans xmlns="http://www.springframework.org/schema/beans" xmlns:xsi="http://www.w3.org/2001/XMLSchema-instance" xsi:schemaLocation="http://www.springframework.org/schema/beans https://www.springframework.org/schema/beans/spring-beans.xsd"> <bean id="..." class="..."> bean> <bean id="..." class="..."> bean> beans>- 1
- 2
- 3
- 4
- 5
- 6
- 7
- 8
- 9
- 10
- 11
- 12
- 13
- 14
- 15
- 16
- 17
为了后续开发方便,我们不妨把它做成一个模板,以后直接使用就可以了。
模板具体步骤,File → Settings → Editor → File and Code Templates → 加号 → 填写名称和文件类型,然后把配置代码复制进去即可 → Apply

有了模板之后,我们的选项卡中就可以看到 applicationContext,在 resources 目录下创建配置文件,我这里名字依然叫 applicationContext!

5.编写测试类
//MyTest.java package com.tyut; import org.springframework.context.ApplicationContext; import org.springframework.context.support.ClassPathXmlApplicationContext; public class MyTest { public static void main(String[] args) { //1.获取spring容器 ApplicationContext ac = new ClassPathXmlApplicationContext("applicationContext.xml"); //2.从spring容器获取对象 HelloSpring helloSpring = (HelloSpring)ac.getBean("helloSpring"); //3.调用对象的方法 helloSpring.show(); } }- 1
- 2
- 3
- 4
- 5
- 6
- 7
- 8
- 9
- 10
- 11
- 12
- 13
- 14
- 15
- 16
- 17

四、控制反转与依赖注入
1.控制反转概念
控制反转(Ioc)是面向对象编程中的一个设计原则,用来降低程序代码之间的耦合度。
在传统面向对象编程中,获取对象的方式是用 new 关键字主动创建一个对象,也就是说应用程序掌握着对象的控制权。
Ioc 控制反转机制指的是对象由 Ioc 容器统一管理,当程序需要使用对象时,可以直接从 Ioc 容器中获取,这样对象的控制权就从应用程序转移到了 Ioc 容器。借助 Ioc 容器实现具有依赖关系对象之间的解耦,各个对象类封装之后,通过 Ioc 容器来关联这些对象类。2.依赖注入概念
依赖注入(DI),就是由 Ioc 容器在运行期间动态地将某种依赖资源注入对象之中,例如,将对象 B 赋值给对象 A 的成员变量。依赖注入的基本思想是,明确地定义组件接口,独立开发各个组件,然后根据组件的依赖关系组装运行。
依赖注入和控制反转的比较:
依赖注入和控制反转是从不同角度来描述了同一件事情。依赖注入是从应用程序的角度描述,即应用程序依赖 Ioc 容器创建并注入它所需要的外部资源;而控制反转是从 Ioc 容器的角度描述,即 Ioc 容器控制应用程序,由 Ioc 容器反向地向应用程序注入应用程序所需要的外部资源,这里的外部资源可以是外部实例对象,也可以是外部文件对象等。3.依赖注入的类型
依赖注入的作用就是在使用 Spring 框架创建对象时,动态的将其所依赖的对象注入到 Bean 组件中,依赖注入通常有两种实现方式,一种是构造方法注入,另一种是属性 setter 方法注入。这两种实现方式具体介绍如下:
① 构造方法注入
构造方法注入是指 Spring 容器调用构造方法注入被依赖的实例,构造方法可以是有参的或者是无参的。Spring 在读取配置信息后,会通过反射方式调用实例的构造方法,如果是有参构造方法,可以在构造方法中传入所需的参数值,最后创建类对象。
//User1.java package com.tyut; public class User1 { private int id; private String username; private String password; public User1(Integer id,String username,String password) { this.id = id; this.username = username; this.password = password; } @Override public String toString() { return "User1{" + "id=" + id + ", username='" + username + '\'' + ", password='" + password + '\'' + '}'; } }- 1
- 2
- 3
- 4
- 5
- 6
- 7
- 8
- 9
- 10
- 11
- 12
- 13
- 14
- 15
- 16
- 17
- 18
- 19
- 20
- 21
- 22
- 23
<beans xmlns="http://www.springframework.org/schema/beans" xmlns:xsi="http://www.w3.org/2001/XMLSchema-instance" xsi:schemaLocation="http://www.springframework.org/schema/beans https://www.springframework.org/schema/beans/spring-beans.xsd"> <bean id="user1" class="com.tyut.User1"> <constructor-arg name="id" value="1">constructor-arg> <constructor-arg name="username" value="张三">constructor-arg> <constructor-arg name="password" value="123">constructor-arg> bean> beans>- 1
- 2
- 3
- 4
- 5
- 6
- 7
- 8
- 9
- 10
- 11
- 12
- 13
//MyTest.java package com.tyut; import org.springframework.context.ApplicationContext; import org.springframework.context.support.ClassPathXmlApplicationContext; public class MyTest { public static void main(String[] args) { ApplicationContext ac = new ClassPathXmlApplicationContext("applicationContext.xml"); User1 user1 = (User1) ac.getBean("user1"); System.out.println(user1); } }- 1
- 2
- 3
- 4
- 5
- 6
- 7
- 8
- 9
- 10
- 11
- 12
- 13
- 14
- 15

一个 constructor-arg 元素表示构造方法的一个参数,且定义时不区分顺序,只需要通过 constructor-arg 元素的 name 属性指定参数即可。constructor-arg 元素还提供了 type 属性和 index 属性来确定参数,实际开发中,我们推荐使用 name 属性来确定参数。同时还有 value 属性和 ref 属性,value 属性用来给基本类型赋值,ref 属性用来给引用类型进行赋值。
当使用 type 属性确定参数时,如果两个参数的类型是一样的,那么定义时就要区分顺序了!② 属性 setter 方法注入
属性 setter 方法注入是 Spring 最主流的注入方法,这种注入方法简单、直观,它是在被注入的类中声明一个 setter 方法,通过 setter 方法的参数注入对应的值。
//User2.java package com.tyut; public class User2 { private int id; private String username; private String password; public void setId(int id) { this.id = id; } public void setUsername(String username) { this.username = username; } public void setPassword(String password) { this.password = password; } @Override public String toString() { return "User1{" + "id=" + id + ", username='" + username + '\'' + ", password='" + password + '\'' + '}'; } }- 1
- 2
- 3
- 4
- 5
- 6
- 7
- 8
- 9
- 10
- 11
- 12
- 13
- 14
- 15
- 16
- 17
- 18
- 19
- 20
- 21
- 22
- 23
- 24
- 25
- 26
- 27
- 28
- 29
- 30
<bean id="user2" class="com.tyut.User2"> <property name="id" value="2">property> <property name="username" value="李四">property> <property name="password" value="1234">property> bean>- 1
- 2
- 3
- 4
- 5
package com.tyut; import org.springframework.context.ApplicationContext; import org.springframework.context.support.ClassPathXmlApplicationContext; public class MyTest { public static void main(String[] args) { ApplicationContext ac = new ClassPathXmlApplicationContext("applicationContext.xml"); User2 user2 = (User2) ac.getBean("user2"); System.out.println(user2); } }- 1
- 2
- 3
- 4
- 5
- 6
- 7
- 8
- 9
- 10
- 11
- 12
- 13
- 14

注意配置文件中 name 的值并不是属性名,而是 set 方法去掉 set 关键字后的名字!4.依赖注入的应用
① 在 com.tyut 包下创建 dao 层包,在该包下创建 UserDao 接口类。


② 提供 UserDao 接口的实现类,dao 层下 impl.UserDaoImpl。


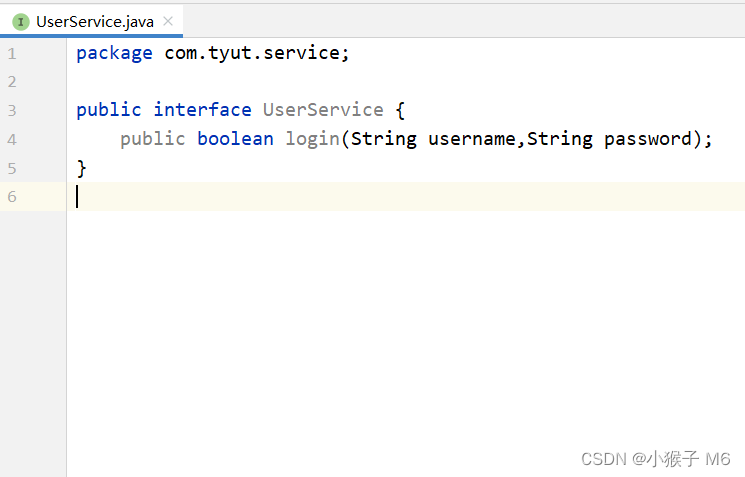
③ com.tyut下创建 service 包 下的 UserService 接口。
④ 提供 UserService 接口的实现类,service 层下 impl.UserServiceImpl。

如何自动生成 get 方法?
鼠标右键 Generate,Setter,Ctrl+A 全部选中,回车键!⑤ 再次来到配置文件中,有两个对象需要配置。
<beans xmlns="http://www.springframework.org/schema/beans" xmlns:xsi="http://www.w3.org/2001/XMLSchema-instance" xsi:schemaLocation="http://www.springframework.org/schema/beans https://www.springframework.org/schema/beans/spring-beans.xsd"> <bean id="userDao" class="com.tyut.dao.impl.UserDaoImpl">bean> <bean id="userService" class="com.tyut.service.impl.UserServiceImpl"> <property name="userDao" ref="userDao">property> bean> beans>- 1
- 2
- 3
- 4
- 5
- 6
- 7
- 8
- 9
- 10
- 11
- 12
- 13
- 14
- 15
⑥ 编写测试类
package com.tyut; import com.tyut.service.UserService; import org.springframework.context.ApplicationContext; import org.springframework.context.support.ClassPathXmlApplicationContext; public class MyTest { public static void main(String[] args) { ApplicationContext ac = new ClassPathXmlApplicationContext("applicationContext.xml"); UserService userService = (UserService) ac.getBean("userService"); boolean flag = userService.login("张三","123"); if (flag) { System.out.println("登录成功!"); } else { System.out.println("登录失败!"); } } }- 1
- 2
- 3
- 4
- 5
- 6
- 7
- 8
- 9
- 10
- 11
- 12
- 13
- 14
- 15
- 16
- 17
- 18
- 19

-
相关阅读:
如何查看自己电脑IP和端口
with语句和上下文管理器
时序预测 | MATLAB实现XGBoost极限梯度提升树时间序列预测
深入理解计算机系统(CSAPP)bomblab实验进阶之nuclearlab——详细题解
Yarn学习,Yarn安装,Yarn常用命令。这一篇即可(有需要再补充)
python 删除特定字符所在行
前端面试题:1.为什么有时连续多次setState只有一次生效?2.http的缓存机制 3.数组扁平化 4.babel和babel-polyfill
P1017 [NOIP2000 提高组] 进制转换
【联通】数据编排技术在联通的应用
Vuex详解(五种状态)
- 原文地址:https://blog.csdn.net/m0_52861684/article/details/128019646
